- Products

- Developers
- User stories
- Blog
- Pricing

Build an anonymous chat app using ASP.NET
Introduction
Anonymity gives the likelihood to wear a cover, to end up being anyone you need to be. Also, anonymous communication permits you to quit being bashful and act naturally. It is a chance to pull in individuals whom you won't have the confidence to get to know, all things considered.
Today, we will create a realtime public anonymous group chat app using C# ASP.NET and Pusher. This tutorial assumes the reader has basic knowledge of C# ASP.NET.
Setting up Pusher
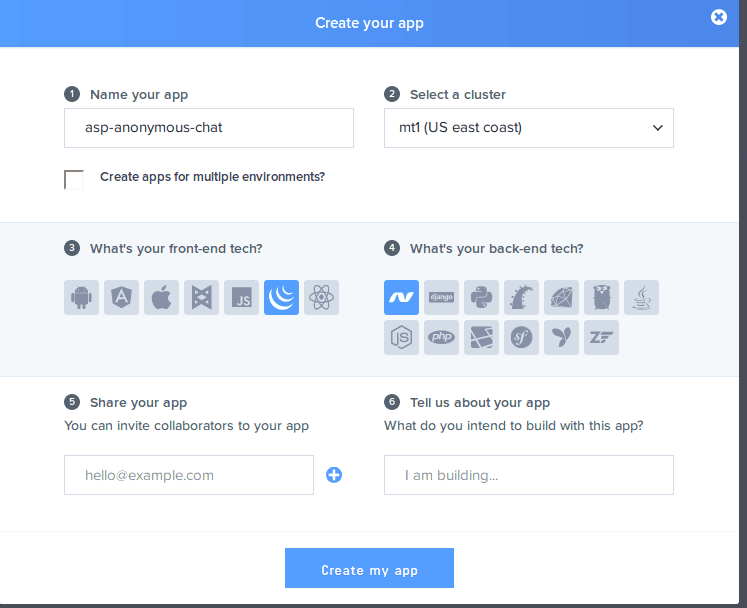
We need to sign up with Pusher and create a new app, and also copy our secret, application key and application id.
Setting up the ASP.NET project in Visual Studio
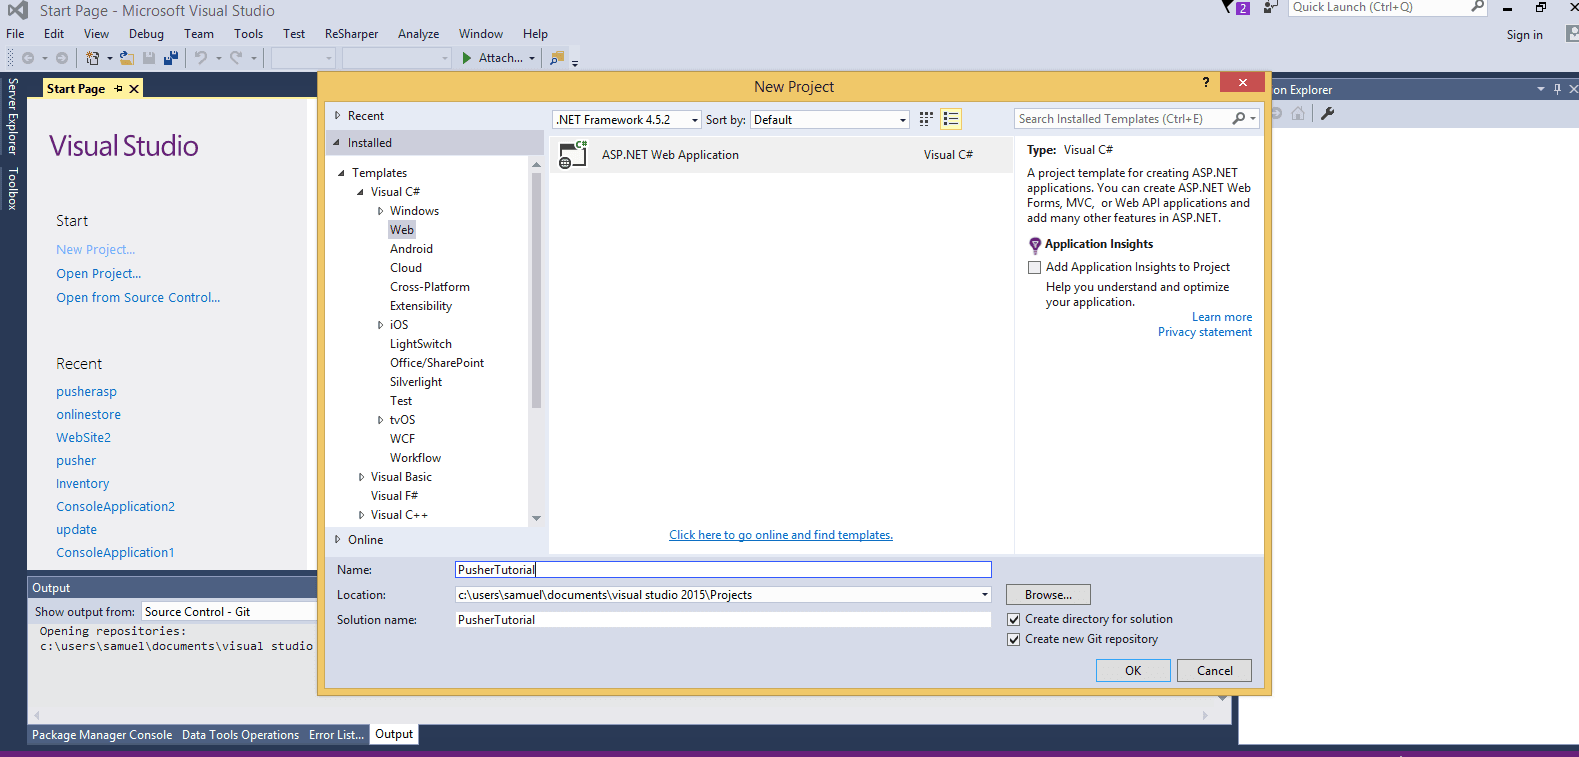
We need to create a new Asp.Net MVC application, so we open up Visual Studio, select new project from the sidebar, under templates, select Visual C#, next, select web, and finally in the middle section, select ASP.NET Web Application.
Now we are almost ready. The next step will be to install the official Pusher library for .Net using the NuGet Package. To do this, we go to tools on the top bar, click on NuGet Package Manager, on the dropdown we select Package Manager Console. After doing this, we will see the Package Manager Console at the bottom of our Visual Studio as shown below.

The next step is to install the library, by running the following command in the console.
Install-Package PusherServer
Once this is done, our environment has now been set up.
Crafting the chat application
Now that our environment is set up and ready, let us dive into writing some code.
By default, Visual Studio creates three controllers for us, however we will be using the HomeController for the logic of our chat application.
The first thing we want to do is to delete the default index.cshtml file under the Views/Home folder, and create a new view file named index.cshtml that does not have a master layout. In our new index.cshtml file, let us copy the following contents into it.
1@{ 2 Layout = null; 3 Response.ContentType = "text/HTML"; 4 } 5 <html> 6 <head> 7 <title> 8 Pusher Tutorial 9 </title> 10 </head> 11 <link rel="stylesheet" href="https://maxcdn.bootstrapcdn.com/bootstrap/3.3.7/css/bootstrap.min.css" /> 12 <script src="https://cdnjs.cloudflare.com/ajax/libs/jquery/3.1.1/jquery.min.js"></script> 13 <script src="//js.pusher.com/4.0/pusher.min.js"></script> 14 <style> 15 .chat { 16 list-style: none; 17 margin: 0; 18 padding: 0; 19 } 20 21 .chat li { 22 margin-bottom: 10px; 23 padding-bottom: 5px; 24 border-bottom: 1px dotted #B3A9A9; 25 } 26 27 .chat li.left .chat-body { 28 margin-left: 60px; 29 } 30 31 .chat li.right .chat-body { 32 margin-right: 60px; 33 } 34 35 .chat li .chat-body p { 36 margin: 0; 37 color: #777777; 38 } 39 40 .panel .slidedown .glyphicon, .chat .glyphicon { 41 margin-right: 5px; 42 } 43 44 .panel-body { 45 overflow-y: scroll; 46 height: 250px; 47 } 48 49 ::-webkit-scrollbar-track { 50 -webkit-box-shadow: inset 0 0 6px rgba(0,0,0,0.3); 51 background-color: #F5F5F5; 52 } 53 54 ::-webkit-scrollbar { 55 width: 12px; 56 background-color: #F5F5F5; 57 } 58 59 ::-webkit-scrollbar-thumb { 60 -webkit-box-shadow: inset 0 0 6px rgba(0,0,0,.3); 61 background-color: #555; 62 } 63 </style> 64 <body> 65 <div class="container"> 66 <div class="row"> 67 <div class="col-md-12"> 68 <div class="panel panel-primary"> 69 <div class="panel-heading"> 70 <span class="glyphicon glyphicon-comment"></span> Chat 71 </div> 72 <div class="panel-body"> 73 <ul class="chat" id="chat"></ul> 74 </div> 75 <div class="panel-footer"> 76 <div class="input-group"> 77 <input id="btn-input" class="form-control input-sm" placeholder="Type your message here..." type="text"> 78 <span class="input-group-btn"> 79 <button class="btn btn-warning btn-sm" id="btn-chat"> 80 Send 81 </button> 82 </span> 83 </div> 84 </div> 85 </div> 86 </div> 87 </div> 88 </div> 89 </body> 90 </html>
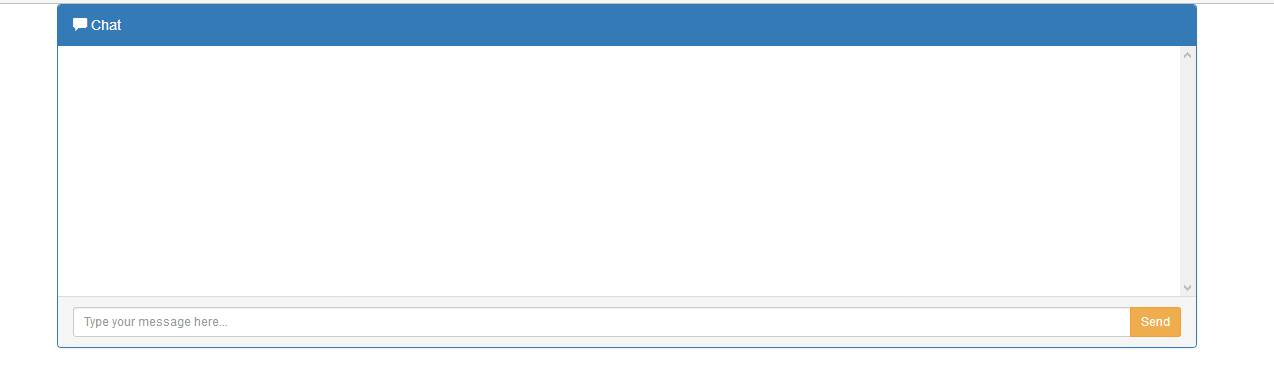
In the above piece of code, we have defined the layout to be null, and we have defined the content type as "text/HTML" so Asp.Net does not attempt to parse the page as XML. We required Bootstrap CSS, jQuery library, as well as the Pusher JavaScript library, before defining the HTML structure. If we save our file and run our project, we should see this.
Now we have to trigger an event when someone enters some text and clicks the send button. Let's open up our index.cshtml file again and add the following at the end of the page.
1<script> 2 $(document).ready(function(){ 3 $("#btn-chat").click(function(){ 4 var message = $('#btn-input').val(); 5 6 $.post({ 7 url: '@Url.Action("Pushermessage", "Home")', 8 dataType: 'text/HTML', 9 contentType: "application/json", 10 data: JSON.stringify({ 11 "message": message 12 }), 13 success: function (data) { 14 $("#btn-input").val(''); 15 } 16 }); 17 }) 18 }) 19 </script>
In the above code, we have attached a click event listener to the element with the ID of btn-chat which happens to be our button. Once the button is clicked, the code will take the value of the element with the id of btn-input which happens to be our text box, and send an AJAX call to our Pushermessage function in our HomeController. However, we are yet to create the Pushermessage function that responds to the AJAX call.
Let us move to our HomeController, and paste the following code after the index function.
1[HttpPost] 2 public async Task<ActionResult> Pushermessage(String message) 3 { 4 var options = new PusherOptions(); 5 options.Cluster = "XXX_CLUSTER"; 6 var pusher = new Pusher("XXX_APP_ID", "XXX_APP_KEY", "XXX_APP_SECRET", options); 7 ITriggerResult result = await pusher.TriggerAsync("asp_channel", "asp_event", new { message = message, name = "Anonymous" }); 8 9 return new HttpStatusCodeResult((int)HttpStatusCode.OK); 10 11 }
Don't forget to add the following references to the top of your file, before the class declaration
1using PusherServer; 2 using System.Net; 3 using System.Threading.Tasks;
In the last two block of codes, we have defined our Pushermessage function and we also decorated it with the [HttpPost] decorator, so Asp.Net knows it’s a function for POST requests. In this function, we instantiate Pusher, using our appId, appKey and appSecret respectively. We then went ahead to trigger a channel called asp_channel and an event called asp_event, sending in two values with it.
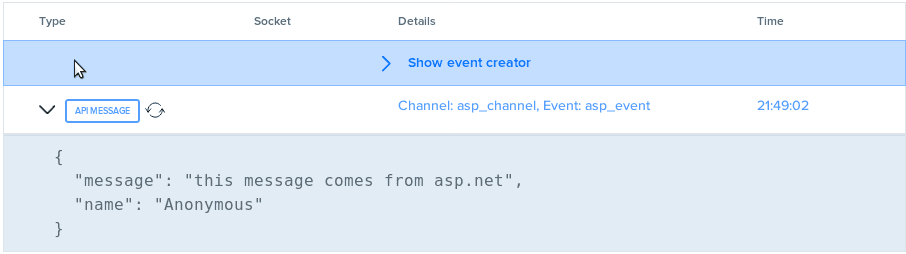
At this point, if we reload our app, type in a message and send, we should see the following when we visit our debug console on our Pusher dashboard:
At this point, we are done with emitting the message to data. Let us now move onto listening for the event on the client side and displaying the new message.
Let us open up our index.cshtml file, and add the following lines of code after our click event.
1var pusher = new Pusher('PUSHER_APP_KEY', {cluster: 'XXX_CLUSTER'}); 2 var my_channel = pusher.subscribe('asp_channel'); 3 my_channel.bind("asp_event", function (data) { 4 var new_message = '<li class="left clearfix"><span class="chat-img pull-left">'; 5 new_message +='<img src="http://placehold.it/50/55C1E7/fff&text='+data.name+'" alt="User Avatar" class="img-circle">'; 6 new_message += '</span>'; 7 new_message += '<div class="chat-body clearfix">'; 8 new_message += '<div class="header">'; 9 new_message += '<strong class="primary-font">'+data.name+'</strong> <small class="pull-right text-muted">'; 10 new_message += '</div>'; 11 new_message += '<p>'; 12 new_message += data.message; 13 new_message += '</p>'; 14 new_message += '</div>'; 15 new_message += '</li>'; 16 $("#chat").append(new_message); 17 });
In the above block of code, we declared a variable called pusher and we set it to an instance of a new Pusher object, passing in our appKey. Next, we declared a variable called my_channel, and we call the Pusher subscribe method to our channel, which in this case, is called asp_channel.
Next, we bind to the event, receive the data passed from it, wrap the data in some li tags, and then we append it to the ul element in our HTML structure with the ID of chat. Below is our functionality:
In this article, we have demonstrated how to create a public anonymous chat application using C# ASP.NET and Pusher. We have gone over the process of setting up the environment, using the NuGet Package Console to install packages as well as implementing the chat application.
Many other realtime applications can be built using Pusher and ASP.NET, it's left for you to decide which awesome realtime app you'll be building next.


© 2024 Pusher Ltd. All rights reserved.
Pusher Limited is a company registered in England and Wales (No. 07489873) whose registered office is at MessageBird UK Limited, 3 More London Riverside, 4th Floor, London, United Kingdom, SE1 2AQ.