- Products

- Developers
- User stories
- Blog
- Pricing

Build sentiment analysis in a chat app using Node modules and Pusher Functions
- Introduction
- Prerequisites
- Implementation steps
- Project walkthrough
- Step 2 - Login and authorization
- Backend logic for authorization
- Frontend logic for authorization
- Step 3 - Sending and receiving messages
- Step 4 - Running sentiment analysis in a Pusher Function
- Rendering flagged client-chat-event messages
- Adding the Pusher Function to analyze the events
- Deploying our sentiment analysis function
- Conclusion
Introduction
This tutorial will show you how to use an external Node module in a Pusher Function. We’ll use Pusher Channels to deliver chat messages, and Pusher Functions to perform sentiment analysis on every message. If a message contains a negative sentiment, it triggers a message to the admin channel for further review.
Prerequisites
All code written in this tutorial will be in JavaScript and we’ll be making use of the Pusher JavaScript SDK as well so prior JS knowledge will be helpful.
- Basic knowledge of what Pusher, channels, and events are.
- A new Pusher project.
- A basic chat frontend to view the live updates.
- Pusher CLI - You need this installed to create and manage the Function we’ll be creating.
- Pusher Functions enabled as a feature - The function will perform the sentiment analysis on every message emitted in a channel.
- Node and npm installed - Since we’ll be working in a JavaScript environment on the server.
- Express.js app framework installed - Since we’ll be using an Express server to serve the frontend and handle authorization.
Implementation steps
1. Sign in to Pusher or if you don’t have an account, sign up for one.
NOTE:
The Pusher sandbox plan is free and fully featured. It comes with 200,000 messages per day and 100 concurrent connections. This plan is more than sufficient for this tutorial.
2. Since we’re making use of a Channels feature, from the Pusher dashboard, create a new Channels app (this one is called sentiment-analysis-app-functions).
3. Navigate to App Settings and enable Client events to allow clients to send messages to each other.
4. With the app created, now set up the project code. Clone the starter template from Github as that comes with structure and styling to help you get started faster.
Project walkthrough
This template comes with:
- Scaffolding for both the frontend and server,
- Helper functions to render messages on the frontend.
Let’s take some time to go through the relevant project files:
src/frontend/index.html— Scaffolding for the chat UI as well as imports for the Pusher JavaScript library and links to CSS and JavaScript files.src/frontend/admin.html— Scaffolding for the admin UI where flagged messages are sent.src/frontend/index.js— Contains logic to subscribe to a channel,my-channel, render anymy-eventmessages triggered from the server and handle form submissions.src/frontend/admin.js— Contains logic to subscribe to a channel,admin-channeland render anyflagged-message-eventmessages initiated from the function.src/frontend/utils.js— Contains the Pusher web client, as well as some helper functions to render data on the screen, work with cookies (for authentication), and some dummy users.src/frontend/style.css— Styling to make the UI look pretty.src/server/index.js— Contains code for setting up the server to serve the frontend, and later to authenticate users in the chat channel.
IMPORTANT:
Make sure to create a .env file using the .env.example template and add the required API keys (you can get this from the “App Keys” section in your Pusher dashboard).
To test that the app works at this stage, do this in two steps:
- Open a terminal in the root of the project and run
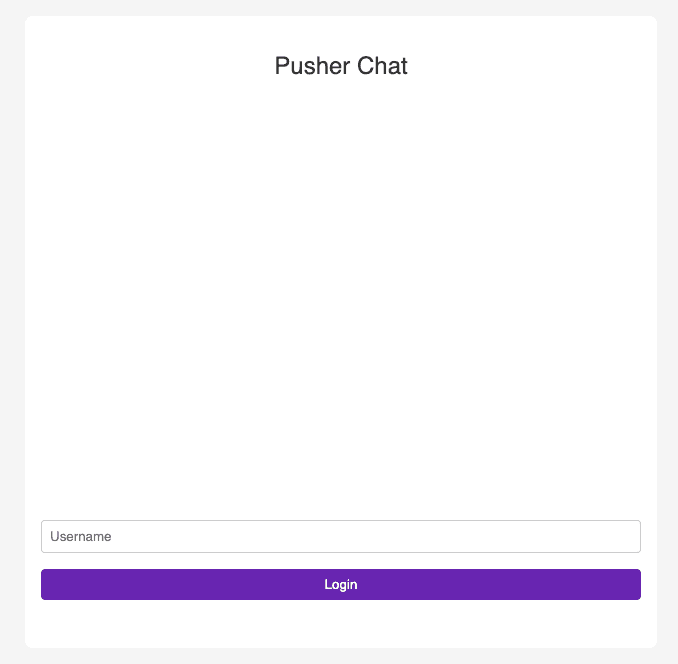
npm run dev. - Open the browser and navigate to
localhost:4000and you should get a barebones login page.
If you run into any issues at this point, ensure that you followed all steps above. If you’re still running into issues, please drop a message in our Discord channel.
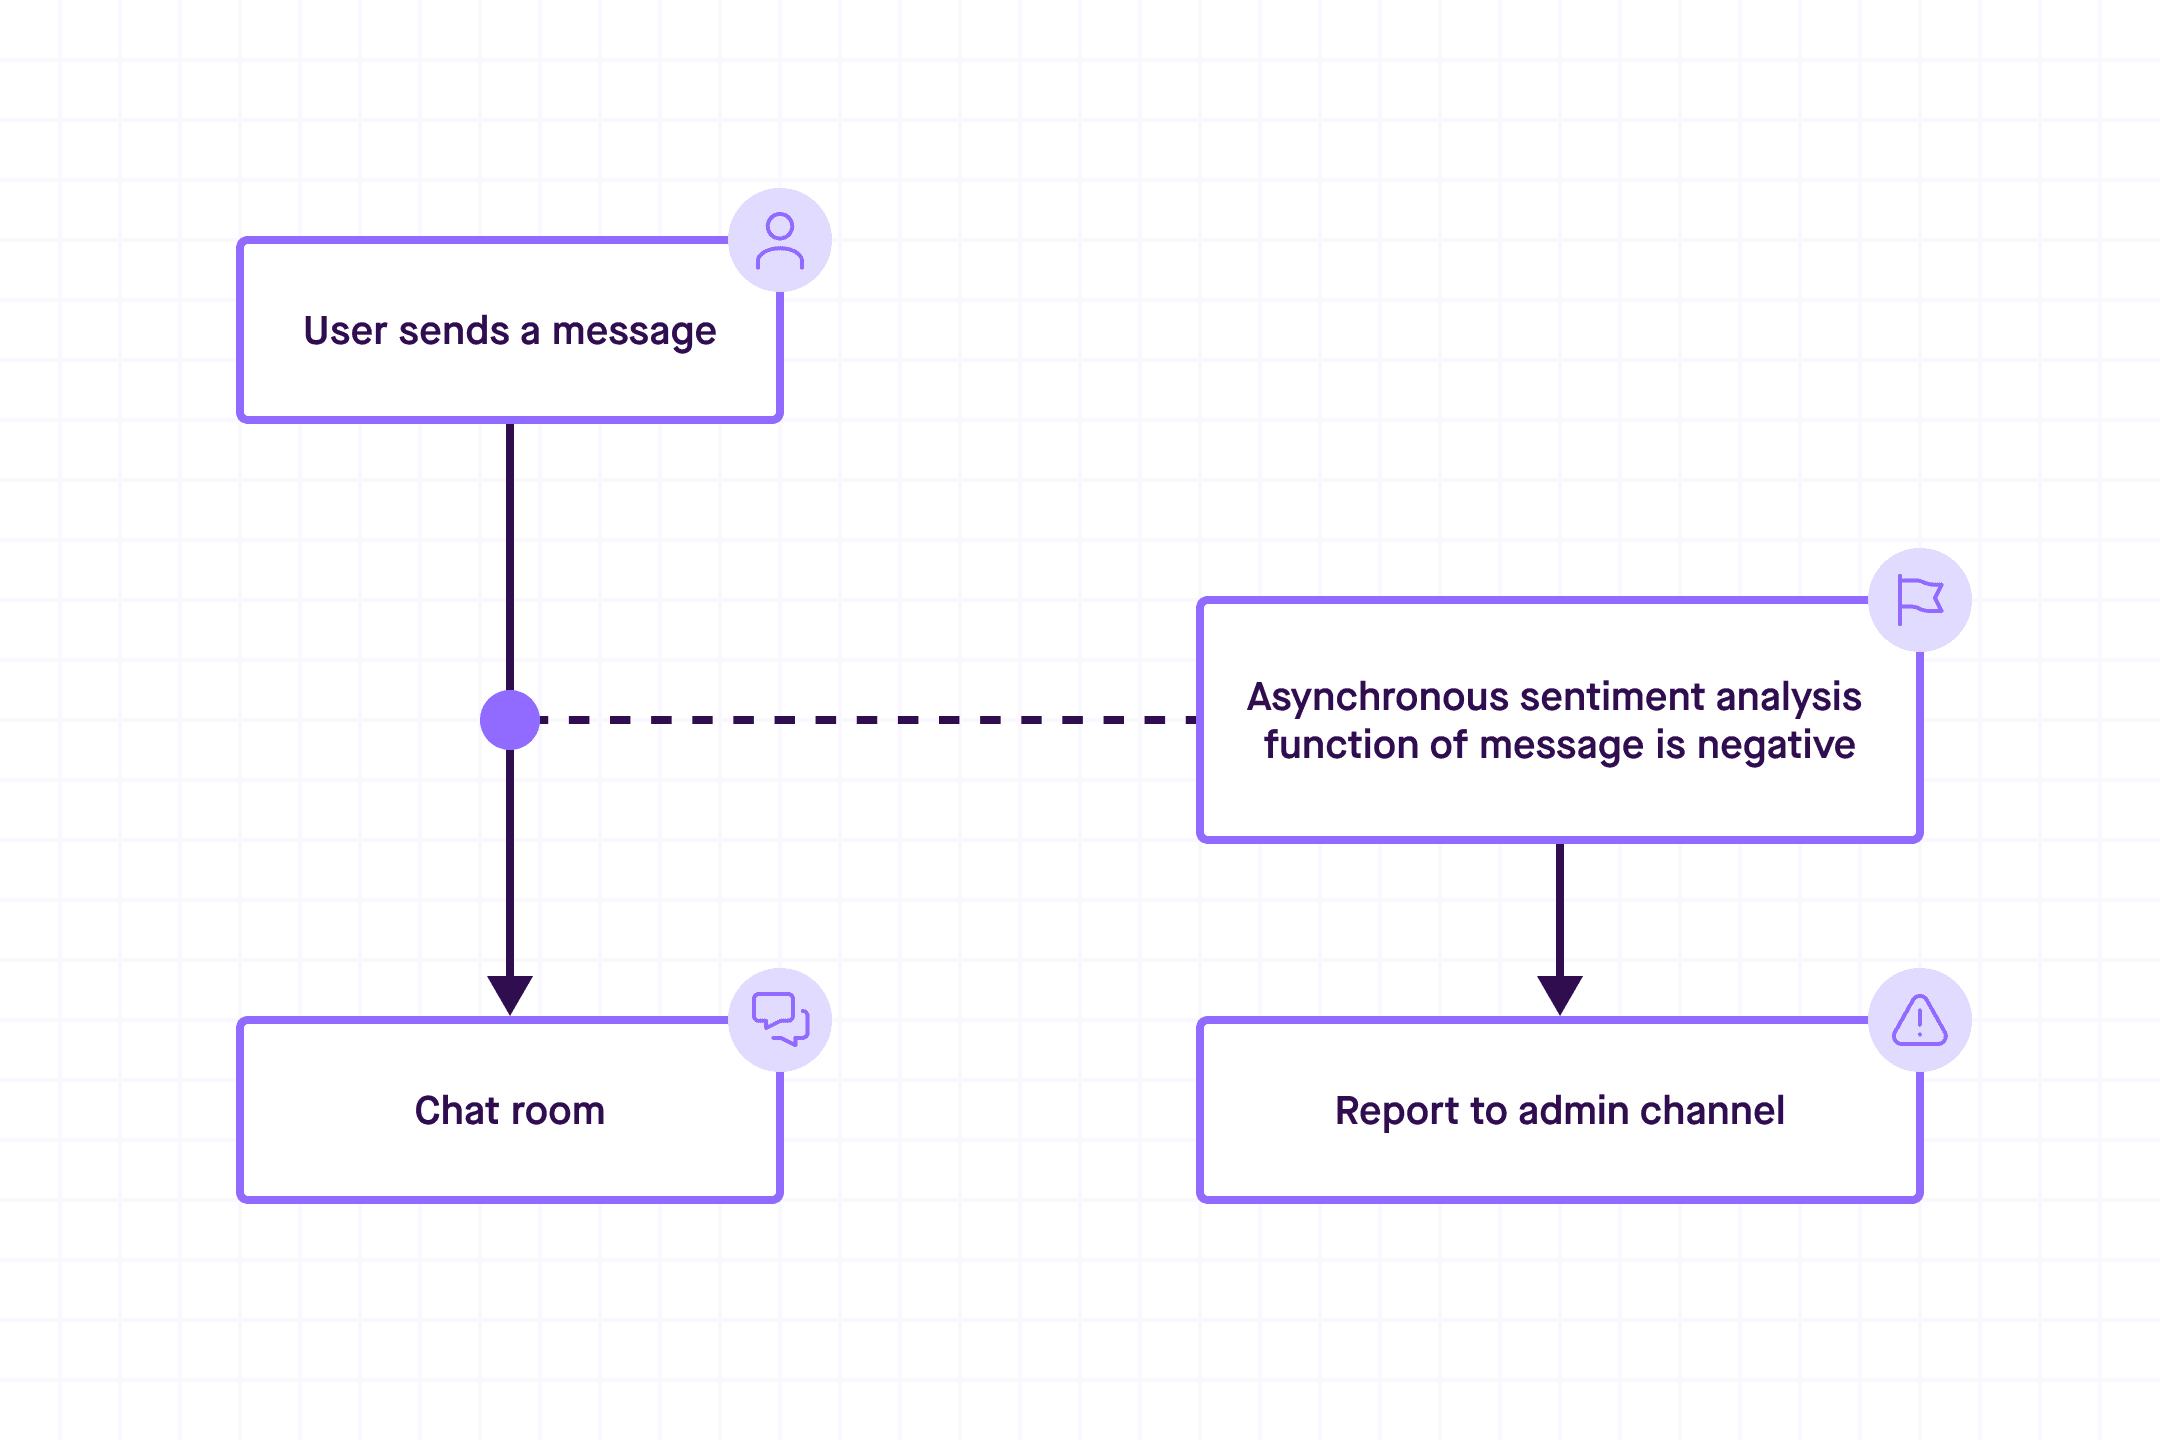
Here’s an overview of how this will work.
- You want a chat UI where anyone can log in and send messages (to keep things simple, use some dummy users from the
frontend/utils.js). - Log in and authorize the user to join the
private-chat-channel. (Clients can only send messages in Presence and Private channels). - Once authorized, the login form is hidden, a chat form displayed, and then the user should be able to send messages to anyone else in the
private-chat-channel. - Use an asynchronous Pusher Function to run sentiment analysis on every message sent in the channel.
- If the sentiment is negative, you send an event to the
admins-channelwith some information on why the message was deemed negative.
Let’s go ahead and start implementing the functionality.
Step 2 - Login and authorization
Because clients can only trigger Pusher events in Presence and Private channels, we need the following:
- Logic on the server to authorize users,
- Logic on the frontend to log in users and connect to the
private-chat-channel.
Backend logic for authorization
For this tutorial, follow the instructions from the Pusher docs on how to authorize users. Go ahead and open the server/index.js file. Add a new POST route to handle authorization requests.
1. Install the Pusher Node SDK by running npm install pusher.
2. Then add an import the Pusher package we just installed, the dummyUsers array, as well as the parseCookies helper function:
1// ...previous imports 2import Pusher from "pusher"; 3import { dummyUsers, parseCookies } from "../frontend/utils.js";
3. Below the config() invocation, instantiate a Pusher object like so (ensure you’ve run npm install as well as creating a .env file with the appropriate values added).
1config() 2 3const pusher = new Pusher({ 4 appId: process.env.PUSHER_APP_ID, 5 key: process.env.PUSHER_APP_KEY, 6 secret: process.env.PUSHER_APP_SECRET, 7 cluster: process.env.PUSHER_APP_CLUSTER, 8 useTLS: true, 9}); 10 11// ...code continues below
4. Below the last app.use() statement, let’s add the code for authorizing a user to a channel.
1// ...app.use statements 2 3app.post("/pusher/auth", (req, res) => { 4 const socketId = req.body.socket_id; 5 const channel = req.body.channel_name; 6 const cookies = parseCookies(req); 7 const username = cookies.username; 8 9 const user = dummyUsers.find((user) => user.user_info.name === username); 10 if (!user) return res.status(403).send("Invalid username"); 11 12 const authResponse = pusher.authorizeChannel(socketId, channel, user); 13 14 res.json({ 15 ...authResponse, 16 channel_data: JSON.stringify(user), 17 }); 18}); 19 20// ...rest of code
Let’s take a look at what’s happening in the code snippets above.
- You are adding a new POST endpoint with
app.post("/pusher/auth"). This route will be called by Pusher when we later subscribe to theprivate-chat-channel. - Then you are reading a bunch of values from the request:
socketId- A unique string of numbers to identify this connection.channel- The channel we're subscribing to.username- The name of the user subscribing to the channel.
- Do a quick validation check to see if the user indeed exists in our dummy users array. If not, you return a
403response and the authorization fails. - If the user exists, go ahead with the authorization using the
pusher.authorizeChannelAPI with the information you read from the request. - Finally, you respond with an authorization token
(authResponse)as well as the information of the user being authorized(channel_data).
That’s all you need to handle any authorization requests from the frontend clients.
Frontend logic for authorization
With the backend server ready for authorization requests, can go ahead and add the required logic to frontend/index.js to log in a user and subscribe to private-chat-channel. Make sure you add in your public App Key and cluster in frontend/utils.js.
1. Let’s start with the necessary imports:
1import { 2 dummyUsers, 3 getPusherClient, 4 renderMessage, 5 setCookie, 6} from "./utils.js"; 7 8// ...code continues below
dummyUsersis what it says on the can. Since you not building a full-fledged authentication system, a hardcoded array of users will suffice.getPusherClientreturns an instance of the Pusher web SDK.renderMessageallows you to dynamically render text on the webpage. Use this to display messages.setCookie, again, does what it says on the can. You will store the logged in user in the cookies so you know which user to authorize on the server. You can revisit the code inserver/index.jswhere you can read from cookies to see where you use the cookie.
2. With the imports out of the way and continue with the login logic:
1// ...imports above 2 3let channel; 4 5const loginForm = document.querySelector("#login-form"); 6loginForm.addEventListener("submit", async (event) => { 7 event.preventDefault(); 8 9 const input = document.querySelector("#username"); 10 const username = input.value; 11 12 if (!dummyUsers.find((user) => user.user_info.name === username)) { 13 alert("User not found"); 14 return; 15 } 16 setCookie({ name: "username", value: username, expiryInDays: 1 }); 17 renderMessage({ 18 query: "#username-display", 19 message: `You have joined as ${username}`, 20 className: "heading", 21 }); 22 23 loginForm.style.display = "none"; 24 document.querySelector("#chat-area").style.display = "flex"; 25 26// ...code continues below
- Create an empty variable,
channel. You will update it later to hold an instance of the subscribedprivate-chat-channelafter a successful login. - Then, target the login form and add a
submitevent listener. Here, you are grabbing the username supplied, doing a check to see if that user actually exists in our dummy file. If it doesn’t exist, you show analertmessage and end execution here. - Otherwise, you save the username to the cookies, render a message to indicate to the user that they’re successfully logged in. Then you hide the login form while showing the chat area.
3. Next, go ahead and instantiate the Pusher web client, subscribe to the private-chat-channel (this will automatically call your authorization endpoint you’ve created in the previous section), and save this channel instance in your channel variable created at the beginning of the file.
1// ...continues from above 2 const pusherClient = await getPusherClient(); 3 4 channel = pusherClient.subscribe("private-chat-channel"); 5 channel.bind("client-chat-event", (data) => { 6 if (data) { 7 renderMessage({ 8 query: ".messages", 9 message: typeof data === "string" ? data : data?.message, 10 className: "message", 11 }); 12 } 13 }); 14}); 15 16// ...code continues below
Also, do a channel.bind on the client-chat-event with a callback. This will ensure that this channel is receiving any client-chat-event events and rendering them on the page.
At this point, if you type in any of the usernames in dummyUsers, and submit on the login page with your browser’s dev tools open, you should get a result like so:
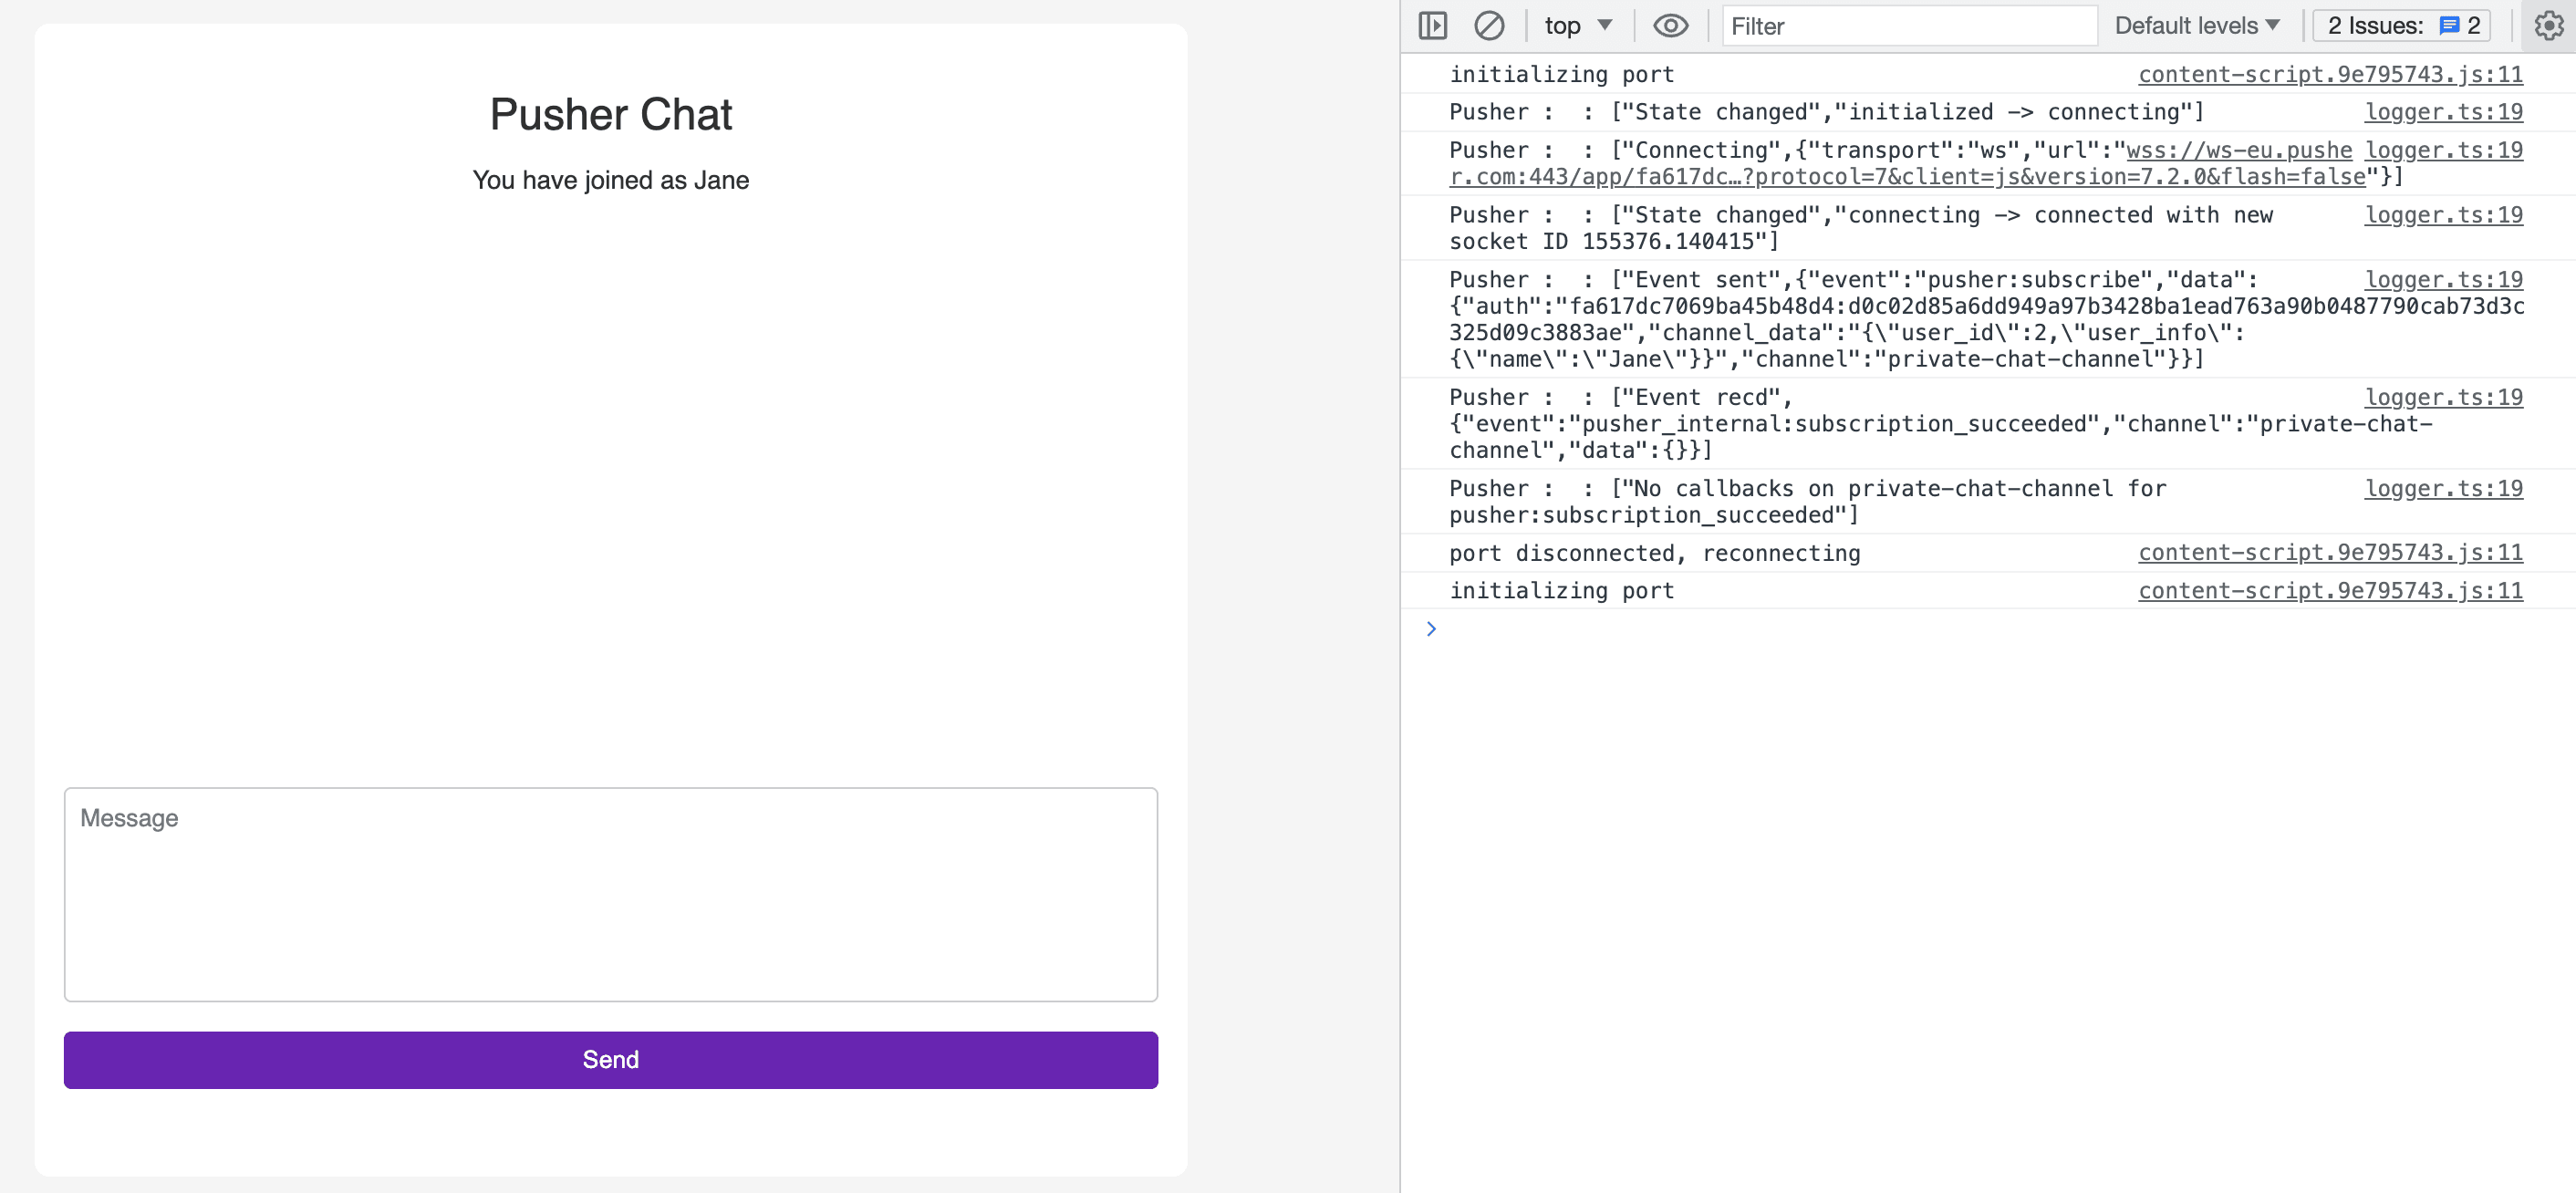
Notice how in the console, there's a pusher_internal:subscription_succeeded event on the private-chat-channel. If you take a look at the Network tab still in the browser dev tools, you’ll see a call to the auth endpoint you created earlier.
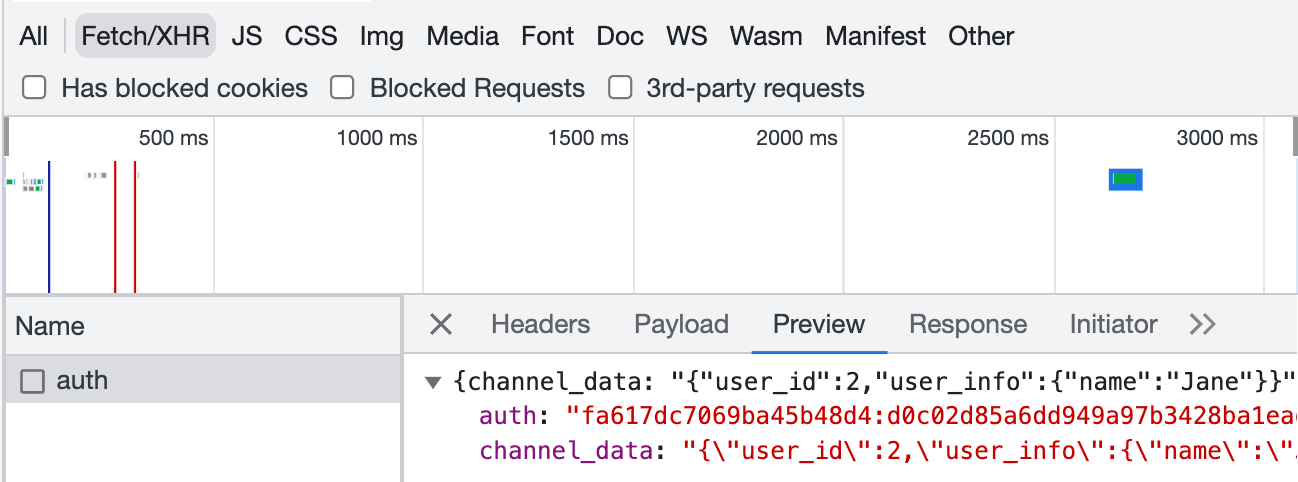
If you don’t see this, ensure you have followed all steps correctly and double-check that you have your .env file filled in, as well as providing a public key and cluster in frontend/utils.js.
At this stage, you have a user authorized to send and receive client-chat-event events on the private-presence-channel but the functionality of actually sending a message doesn’t work yet. Let’s fix that.
Step 3 - Sending and receiving messages
Since you already have a form and an input for sending messages in the HTML file, all you have to do is add some JavaScript logic to make it work. Still working in the frontend/index.js file, add the following to the end of the file.
1// ...login-form event listener above 2 3const messageForm = document.querySelector("#message-form"); 4messageForm.addEventListener("submit", async (event) => { 5 event.preventDefault(); 6 7 const input = document.querySelector("#message"); 8 const message = input.value; 9 10 await channel.trigger("client-chat-event", { 11 message, 12 }); 13 14 renderMessage({ 15 query: ".messages", 16 message: `You: ${message}`, 17 className: "message message-me", 18 }); 19 20 input.value = ""; 21});
- As you did for the login form, target the message form and add an event listener for submit events.
- Call
event.preventDefault()to prevent the form from trying to submit to a server as you’ll rely on Pusher to handle the submission. - Grab the value of the input field, save it to a
messagevariable, and then trigger theclient-chat-eventevent using the value of the input field as the message. - Then render the message you just sent to the channel on the page.
- Finally, clear the input field to get ready for the next message.
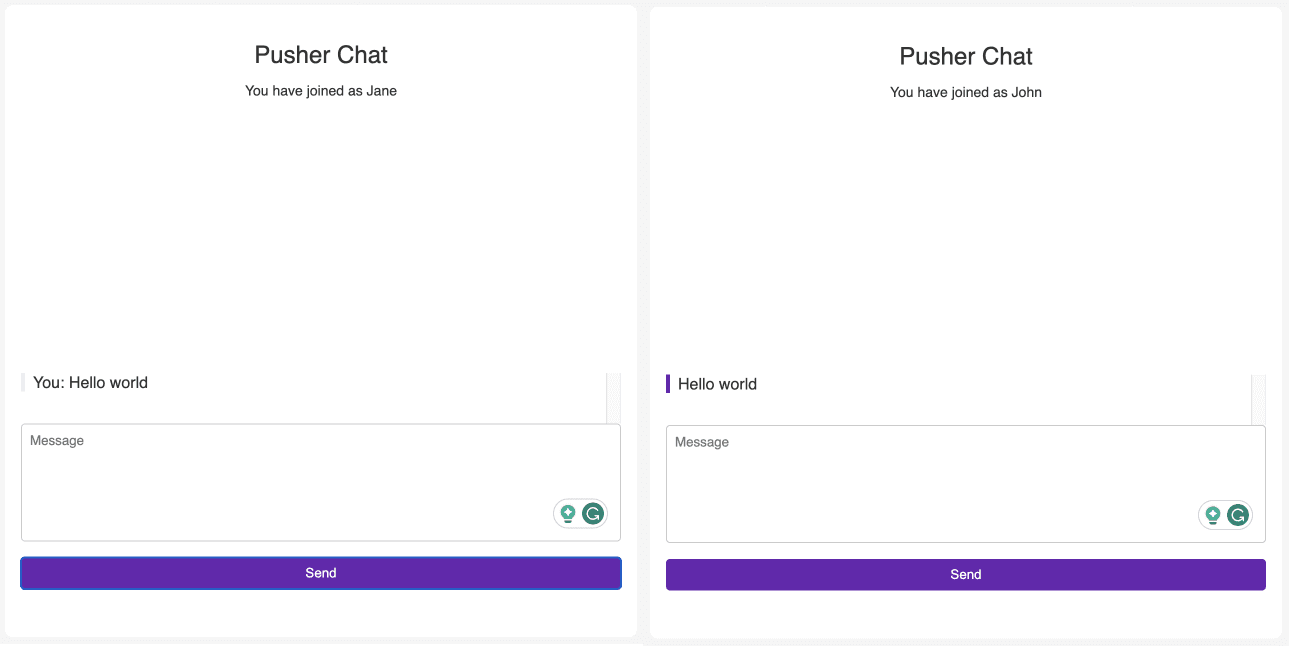
At this point, you should be able to type in a message, click Submit and have the message show up on the page. Even better if you have two tabs open and logged in with different accounts so you can see the sent message show up on the other account.
It should look something like this:
Here’s a recap of all you’ve done so far:
- You have set up a simple UI to login and authorize users in the
private-chat-channel. - You have implemented logic to allow sending and receiving of messages in this channel.
Step 4 - Running sentiment analysis in a Pusher Function
With the sending/receiving of chat messages now working, go ahead with the main crux of this tutorial—using an external Node module in an asynchronous Pusher Function to run sentiment analysis on every message that is sent on the private-chat-channel.
- On any
client-chat-eventmessage, run a simple sentiment analysis on the message. - If negative, trigger a new
flagged-message-eventto theadmins-channel.- Otherwise, do nothing.
Rendering flagged client-chat-event messages
Before starting with the function, you may have noticed we have an admin.html file that is served over localhost:4040/admin. This page is where all flagged-message-event events will be rendered.
So let’s go ahead and add the functionality to render flagged-message-event.
Open frontend/admin.js and paste in the following:
1import { getPusherClient, renderMessage } from "./utils.js"; 2 3const pusher = getPusherClient(); 4const channel = pusher.subscribe("admin-channel"); 5channel.bind("flagged-message-event", (data) => { 6 if (data) { 7 renderMessage({ 8 query: ".messages", 9 message: typeof data === "string" ? data : data?.message, 10 className: "message message-admin", 11 }); 12 } 13});
Thankfully, this logic is significantly simpler than what you have in frontend/index.js. You instantiate a Pusher client, subscribe to the admin-channel, and bind this channel to receive and render any flagged-message-event it receives.
You do not need authentication/authorization for this channel because you will not be sending any client events. We’re only receiving and rendering the events.
Adding the Pusher Function to analyze the events
The next step is to create the function. You’ll need to install the sentiment-analysis module.
1. Open a terminal in the root of the project and run npm install sentiment. You’ll use this package to analyze every message sent in the private-chat-channel.
2. Create a directory and file for the function by running the following commands:
1mkdir sentiment-analysis-function 2touch sentiment-analysis-function/index.js
3. Open the newly created sentiment-analysis-function/index.js file and import and instantiate the necessary packages.
1import Sentiment from "sentiment"; 2import Pusher from "pusher"; 3 4const sentiment = new Sentiment(); 5 6const getPusherClient = async ({ 7 PUSHER_APP_KEY, 8 PUSHER_APP_SECRET, 9 PUSHER_APP_CLUSTER, 10 PUSHER_APP_ID, 11}) => 12 new Pusher({ 13 appId: PUSHER_APP_ID, 14 key: PUSHER_APP_KEY, 15 secret: PUSHER_APP_SECRET, 16 cluster: PUSHER_APP_CLUSTER, 17 useTLS: true, 18 }); 19 20 // ...code continues below
4. Add the logic for the function.
1// ...code continues from above 2 3async function handler(pusher) { 4 try { 5 const { data, channel } = pusher; 6 const result = sentiment.analyze(data.message); 7 8 if (result.score < 0) { 9 const [ 10 PUSHER_APP_KEY, 11 PUSHER_APP_SECRET, 12 PUSHER_APP_CLUSTER, 13 PUSHER_APP_ID, 14 ] = await Promise.all([ 15 pusher.getConfig("PUSHER_APP_KEY"), 16 pusher.getConfig("PUSHER_APP_SECRET"), 17 pusher.getConfig("PUSHER_APP_CLUSTER"), 18 pusher.getConfig("PUSHER_APP_ID"), 19 ]); 20 21 const pusherClient = await getPusherClient({ 22 PUSHER_APP_KEY, 23 PUSHER_APP_SECRET, 24 PUSHER_APP_CLUSTER, 25 PUSHER_APP_ID, 26 }); 27 28 await pusherClient.trigger("admin-channel", "flagged-message-event", { 29 message: ` 30 Hi admin, A negative message has been detected in the ${channel} channel. 31 The message was flagged as negative because of these words: ${result.words.join( 32 ", " 33 )}. 34 `, 35 }); 36 } 37 } catch (error) { 38 console.error("error >>>>", error); 39 } 40} 41 42exports.handler = handler;
Let’s go through the function above.
- This asynchronous function takes in a
pusherobject. Expect thispusherobject to havedataandchannelproperties. Here,datawould contain details about an event, andchannelsignifies the name of the Pusher channel that generated the event. - Initially, you analyze the
messageproperty ofdatausing thesentiment-analysislibrary you installed earlier. Thisanalyzefunction gives us an object containing ascoreproperty. Thisscorerepresents the overall sentiment of the message, be it negative, neutral, or positive. Then, compare thisscorewith0. - If the
scoreis less than0, it indicates a negative sentiment in the message. When such a case arises, you fetch the Pusher configuration details (PUSHER_APP_KEY,PUSHER_APP_SECRET,PUSHER_APP_CLUSTER, andPUSHER_APP_ID). Here, you are using Pusher Config Variables. - You are using these configuration details to create a Pusher client instance with the
getPusherClientfunction. With this client, you trigger a new event,flagged-message-eventon a channel namedadmin-channel. This event carries a warning message that a negative sentiment message has been detected in our originalchannel. It also lists out the words from the original message that flagged it as negative. - During the execution of this function, if you encounter any error, you can catch it and log it to the console. This way, you maintain visibility into any issues that arise during the process.
- Finally, you always want to export our function.
Now you are done with the code for the function but you still have to do a couple of things before deploying it.
Deploying our sentiment analysis function
Before you deploy the function and test it out, we have to do a couple of things.
1. Add the Config variables.
Since you’re making use of some sensitive data inside our function, you can’t afford to hardcode them in so you have to create some config variables. Open up your terminal again and for each config variable you use in the code (4 of them), you’ll run the following command (make sure to add the actual values):
1pusher channels apps functions configs create \ 2 --name <NAME_OF_VARIABLE> \ 3 --content <VALUE> \ 4 --description <DESCRIPTION> \ 5 --app-id <YOUR_PUSHER_APP_ID> \ 6 --type "secret"
Again, replace the placeholders with the actual values and run this command for each of the config variables used in the function.
2. Bundle up the external dependencies.
Since you will not have access to node_modules in the runtime environment for the function, you have to bundle all external dependencies along with our logic into a single file and then deploy that.
For this, use a package called Rollup. So let’s go through the following steps:
1. Install the Rollup package and some dependencies by running npm i -D rollup @rollup/plugin-commonjs @rollup/plugin-json @rollup/plugin-node-resolve.
2. Create a rollup.config.js file by running touch rollup.config.js and paste in the following:
1import commonjs from "@rollup/plugin-commonjs"; 2import json from "@rollup/plugin-json"; 3import { nodeResolve } from "@rollup/plugin-node-resolve"; 4import dotenv from "dotenv"; 5 6dotenv.config(); 7 8export default [ 9 { 10 input: "sentiment-analysis-function/index.js", 11 output: { 12 dir: "sentiment-analysis-function/dist", 13 format: "cjs", 14 }, 15 plugins: [json(), nodeResolve(), commonjs()], 16 }, 17];
3. With this config, Rollup will package all the external dependencies used in your function and put them in a single sentiment-analysis-function/dist/index.js file which you can then deploy.
4. Add the following bundle command in your package.json scripts so it looks like this:
1"scripts": { 2 "start": "node server/index.js", 3 "dev": "nodemon server/index.js", 4 "bundle": "rollup -c rollup.config.js" 5 },
5. Now you can bundle your function by running npm run bundle. You should see a dist folder under the sentiment-analysis-function folder.
6. You can then deploy the function by replacing the values below and running the command:
1pusher channels apps functions create ./sentiment-analysis-function/dist \ 2 --app-id <YOUR_APP_ID> \ 3 --name "sentiment-analysis-function" \ 4 --events "client-chat-event" \ 5 --mode asynchronous
If all goes well, you should see the following output in your terminal:
created function sentiment-analysis-function
NOTE:
You can update your function at any point by making your changes, running the npm run bundle command again, and then running the command below.
1pusher channels apps functions update "sentiment-analysis-function" ./sentiment-analysis-function/dist/ \ 2 --app-id <YOUR_APP_ID>
Conclusion
After all this work, you are ready to test it!
- Open the chat page (localhost:4040) and log in with one of the dummy accounts.
- Open the admin page in another tab (localhost:4040/admin).
- Send a message containing whatever you deem negative and watch as the admin page gets alerted.
Here’s a final recap and the main crux of what you’ve learnt today. Following this tutorial, you have done the following:
- Created a simple chat interface and feature.
- Used Express to implement a rudimentary server with a simple auth system for joining a Private channel,
private-chat-channel. - Created an asynchronous function that analyses all events on that channel using the sentiment node package and uses the Pusher Node SDK to trigger a message depending on the outcome of the analysis.
- Used Rollup to bundle up our function along with the external dependencies.
- Deployed that function and tested it.
Our docs are your best resource for learning more about Pusher Functions and the other features Pusher Channels provide to enable you to build realtime applications.
Want to share what you built? Get in touch with us on our Discord channel.


© 2024 Pusher Ltd. All rights reserved.
Pusher Limited is a company registered in England and Wales (No. 07489873) whose registered office is at MessageBird UK Limited, 3 More London Riverside, 4th Floor, London, United Kingdom, SE1 2AQ.