- Products

- Developers
- User stories
- Blog
- Pricing

Build a CMS with Laravel and Vue - Part 6: Adding Realtime Comments
- Introduction
- Prerequisites
- Adding comments to the backend
- Updating the comments migration file
- Defining the relationships among the Comment, User, and Post models
- Configuring Laravel to broadcast events using Pusher Channels
- Configuring Pusher Channels
- Broadcasting an event for when a new comment is sent
- Defining the routes for handling operations on a comment
- Setting up the action methods in the CommentController
- Adding a layer of authentication
- Adding comments to the frontend
- Installing Pusher and Laravel Echo
- Building the comments view
- Testing the application
- Conclusion
Introduction
In the previous part of this series, we finished building the backend of the application using Vue. We were able to add the create and update component, which is used for creating a new post and updating an existing post.
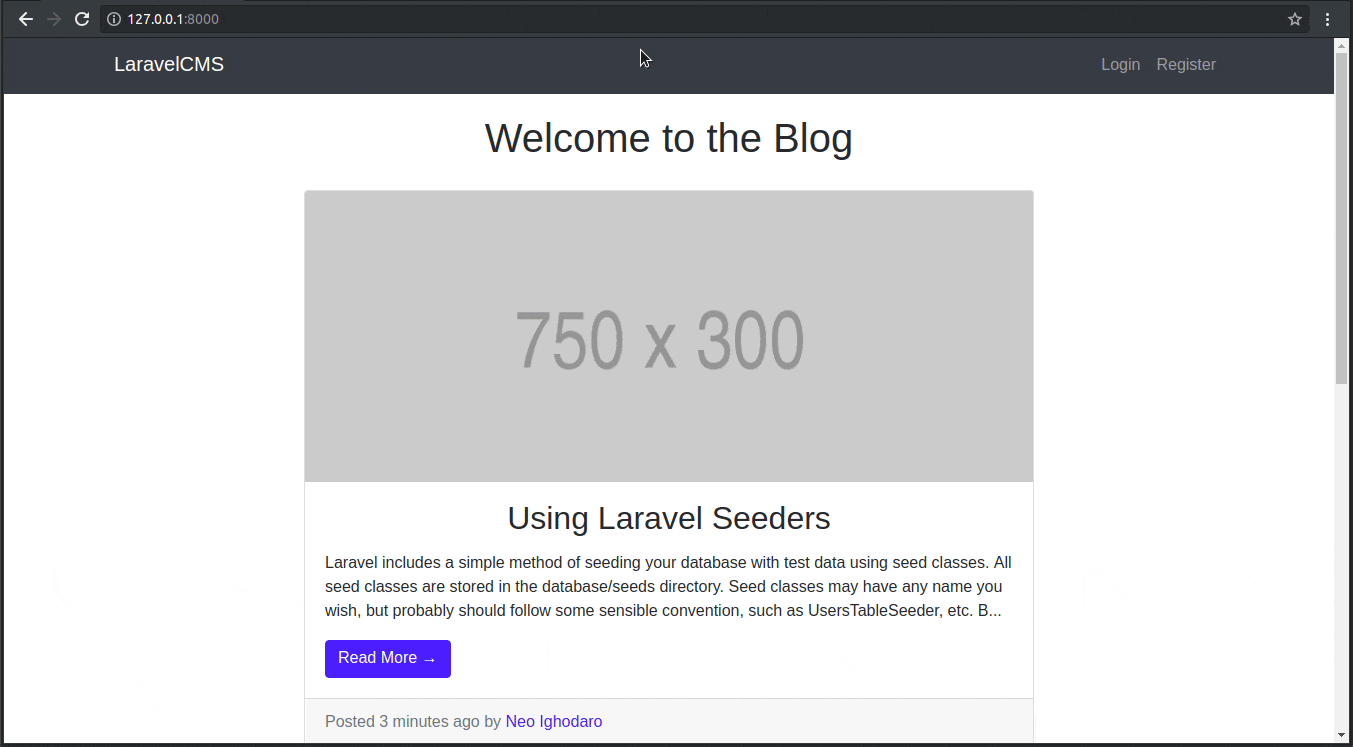
Here’s a screen recording of what we have been able to achieve:
In this final part of the series, we will be adding support for comments. We will also ensure that the comments on each post are updated in realtime, so a user doesn’t have to refresh the page to see new comments.
When we are done, our application will have new features and will work like this:
Prerequisites
To follow along with this series, a few things are required:
- Pusher Channels. Sign up](https://dashboard.pusher.com/accounts/sign_up) for a free Pusher account.
- Basic knowledge of PHP.
- Basic knowledge of the Laravel framework.
- Basic knowledge of JavaScript (ES6 syntax).
- Basic knowledge of Vue.
Adding comments to the backend
When we were creating the API, we did not add the support for comments to the post resource, so we will have to do so now. Open the API project in your text editor as we will be modifying the project a little.
The first thing we want to do is create a model, controller, and a migration for the comment resource. To do this, open your terminal and cd to the project directory and run the following command:
$ php artisan make:model Comment -mc
The command above will create a model called Comment, a controller called CommentController, and a migration file in the database/migrations directory.
Updating the comments migration file
To update the comments migration navigate to the database/migrations folder and find the newly created migration file for the Comment model. Let’s update the up() method in the file:
1// File: ./database/migrations/*_create_comments_table.php 2 public function up() 3 { 4 Schema::create('comments', function (Blueprint $table) { 5 $table->increments('id'); 6 $table->timestamps(); 7 $table->integer('user_id')->unsigned(); 8 $table->integer('post_id')->unsigned(); 9 $table->text('body'); 10 }); 11 }
We included user_id and post_id fields because we intend to create a link between the comments, users, and posts. The body field will contain the actual comment.
Defining the relationships among the Comment, User, and Post models
In this application, a comment will belong to a user and a post because a user can make a comment on a specific post, so we need to define the relationship that ties everything up.
Open the User model and include this method:
1// File: ./app/User.php 2 public function comments() 3 { 4 return $this->hasMany(Comment::class); 5 }
This is a relationship that simply says that a user can have many comments. Now let’s define the same relationship on the Post model. Open the Post.php file and include this method:
1// File: ./app/Post.php 2 public function comments() 3 { 4 return $this->hasMany(Comment::class); 5 }
Finally, we will include two methods in the Comment model to complete the second half of the relationships we defined in the User and Post models.
Open the app/Comment.php file and include these methods:
1// File: ./app/Comment.php 2 public function user() 3 { 4 return $this->belongsTo(User::class); 5 } 6 7 public function post() 8 { 9 return $this->belongsTo(Post::class); 10 }
Since we want to be able to mass assign data to specific fields of a comment instance during comment creation, we will include this array of permitted assignments in the app/Comment.php file:
protected $fillable = ['user_id', 'post_id', 'body'];
We can now run our database migration for our comments:
$ php artisan migrate
Configuring Laravel to broadcast events using Pusher Channels
We already said that the comments will have a realtime functionality and we will be building this using Pusher Channels, so we need to enable Laravel’s event broadcasting feature.
Open the config/app.php file and uncomment the following line in the providers array:
App\Providers\BroadcastServiceProvider
Next, we need to configure the broadcast driver in the .env file:
BROADCAST_DRIVER=pusher
Let’s pull in the Pusher PHP SDK using composer:
$ composer require pusher/pusher-php-server
Configuring Pusher Channels
To get started with Pusher Channels, sign up for a free Pusher account. Then go to the dashboard and create a new Channels app.
Once you have created an app, we will use the app details to configure pusher in the .env file:
1PUSHER_APP_ID=xxxxxx 2 PUSHER_APP_KEY=xxxxxxxxxxxxxxxxxxxx 3 PUSHER_APP_SECRET=xxxxxxxxxxxxxxxxxxxx 4 PUSHER_APP_CLUSTER=xx
Update the Pusher Channels keys with the app credentials provided for you under the Keys section on the Overview tab on the Pusher dashboard.
Broadcasting an event for when a new comment is sent
To make the comment update realtime, we have to broadcast an event based on the comment creation activity. We will create a new event and call it CommentSent. It is to be fired when there is a successful creation of a new comment.
Run command in your terminal:
php artisan make:event CommentSent
There will be a newly created file in the app\Events directory, open the CommentSent.php file and ensure that it implements the ShouldBroadcast interface.
Open and replace the file with the following code:
1// File: ./app/Events/CommentSent.php 2 <?php 3 4 namespace App\Events; 5 6 use App\Comment; 7 use App\User; 8 use Illuminate\Broadcasting\Channel; 9 use Illuminate\Queue\SerializesModels; 10 use Illuminate\Broadcasting\PrivateChannel; 11 use Illuminate\Broadcasting\PresenceChannel; 12 use Illuminate\Foundation\Events\Dispatchable; 13 use Illuminate\Broadcasting\InteractsWithSockets; 14 use Illuminate\Contracts\Broadcasting\ShouldBroadcast; 15 16 class CommentSent implements ShouldBroadcast 17 { 18 use Dispatchable, InteractsWithSockets, SerializesModels; 19 20 public $user; 21 22 public $comment; 23 24 public function __construct(User $user, Comment $comment) 25 { 26 $this->user = $user; 27 28 $this->comment = $comment; 29 } 30 31 public function broadcastOn() 32 { 33 return new PrivateChannel('comment'); 34 } 35 }
In the code above, we created two public properties, user and comment, to hold the data that will be passed to the channel we are broadcasting on. We also created a private channel called comment. We are using a private channel so that only authenticated clients can subscribe to the channel.
Defining the routes for handling operations on a comment
We created a controller for the comment model earlier but we haven’t defined the web routes that will redirect requests to be handled by that controller.
Open the routes/web.php file and include the code below:
1// File: ./routes/web.php 2 Route::get('/{post}/comments', 'CommentController@index'); 3 Route::post('/{post}/comments', 'CommentController@store');
Setting up the action methods in the CommentController
We need to include two methods in the CommentController.php file, these methods will be responsible for storing and retrieving methods. In the store() method, we will also be broadcasting an event when a new comment is created.
Open the CommentController.php file and replace its contents with the code below:
1// File: ./app/Http/Controllers/CommentController.php 2 <?php 3 4 namespace App\Http\Controllers; 5 6 use App\Comment; 7 use App\Events\CommentSent; 8 use App\Post; 9 use Illuminate\Http\Request; 10 11 class CommentController extends Controller 12 { 13 public function store(Post $post) 14 { 15 $this->validate(request(), [ 16 'body' => 'required', 17 ]); 18 19 $user = auth()->user(); 20 21 $comment = Comment::create([ 22 'user_id' => $user->id, 23 'post_id' => $post->id, 24 'body' => request('body'), 25 ]); 26 27 broadcast(new CommentSent($user, $comment))->toOthers(); 28 29 return ['status' => 'Message Sent!']; 30 } 31 32 public function index(Post $post) 33 { 34 return $post->comments()->with('user')->get(); 35 } 36 }
In the store method above, we are validating then creating a new post comment. After the comment has been created, we broadcast the CommentSent event to other clients so they can update their comments list in realtime.
In the index method we just return the comments belonging to a post along with the user that made the comment.
Adding a layer of authentication
Let’s add a layer of authentication that ensures that only authenticated users can listen on the private comment channel we created.
Add the following code to the routes/channels.php file:
1// File: ./routes/channels.php 2 Broadcast::channel('comment', function ($user) { 3 return auth()->check(); 4 });
Adding comments to the frontend
In the second article of this series, we created the view for the single post landing page in the single.blade.php file, but we didn’t add the comments functionality. We are going to add it now. We will be using Vue to build the comments for this application so the first thing we will do is include Vue in the frontend of our application.
Open the master layout template and include Vue to its <head> tag. Just before the <title> tag appears in the master.blade.php file, include this snippet:
1<!-- File: ./resources/views/layouts/master.blade.php --> 2 <meta name="csrf-token" content="{{ csrf_token() }}"> 3 <script src="{{ asset('js/app.js') }}" defer></script>
The csrf_token() is there so that users cannot forge requests in our application. All our requests will pick the randomly generated csrf-token and use that to make requests.
Related: CSRF in Laravel: how VerifyCsrfToken works and how to prevent attacks
Now the next thing we want to do is update the resources/assets/js/app.js file so that it includes a template for the comments view.
Open the file and replace its contents with the code below:
1require('./bootstrap'); 2 3 import Vue from 'vue' 4 import VueRouter from 'vue-router' 5 import Homepage from './components/Homepage' 6 import Create from './components/Create' 7 import Read from './components/Read' 8 import Update from './components/Update' 9 import Comments from './components/Comments' 10 11 Vue.use(VueRouter) 12 13 const router = new VueRouter({ 14 mode: 'history', 15 routes: [ 16 { 17 path: '/admin/dashboard', 18 name: 'read', 19 component: Read, 20 props: true 21 }, 22 { 23 path: '/admin/create', 24 name: 'create', 25 component: Create, 26 props: true 27 }, 28 { 29 path: '/admin/update', 30 name: 'update', 31 component: Update, 32 props: true 33 }, 34 ], 35 }); 36 37 const app = new Vue({ 38 el: '#app', 39 components: { Homepage, Comments }, 40 router, 41 });
Above we imported the Comment component and then we added it to the list of components in the applications Vue instance.
Now create a Comments.vue file in the resources/assets/js/components directory. This is where all the code for our comment view will go. We will populate this file later on.
Installing Pusher and Laravel Echo
For us to be able to use Pusher and subscribe to events on the frontend, we need to pull in both Pusher and Laravel Echo. We will do so by running this command:
$ npm install --save laravel-echo pusher-js
Laravel Echo is a JavaScript library that makes it easy to subscribe to channels and listen for events broadcast by Laravel.
Now let’s configure Laravel Echo to work in our application. In the resources/assets/js/bootstrap.js file, find and uncomment this snippet of code:
1import Echo from 'laravel-echo' 2 3 window.Pusher = require('pusher-js'); 4 5 window.Echo = new Echo({ 6 broadcaster: 'pusher', 7 key: process.env.MIX_PUSHER_APP_KEY, 8 cluster: process.env.MIX_PUSHER_APP_CLUSTER, 9 encrypted: true 10 });
The
keyandclusterwill pull the keys from your.envfile so no need to enter them manually again.
Now let’s import the Comments component into the single.blade.php file and pass along the required the props.
Open the single.blade.php file and replace its contents with the code below:
1{{-- File: ./resources/views/single.blade.php --}} 2 @extends('layouts.master') 3 4 @section('content') 5 <div class="container"> 6 <div class="row"> 7 <div class="col-lg-10 mx-auto"> 8 <br> 9 <h3 class="mt-4"> 10 {{ $post->title }} 11 <span class="lead">by <a href="#">{{ $post->user->name }}</a></span> 12 </h3> 13 <hr> 14 <p>Posted {{ $post->created_at->diffForHumans() }}</p> 15 <hr> 16 <img class="img-fluid rounded" src="{!! !empty($post->image) ? '/uploads/posts/' . $post->image : 'http://placehold.it/750x300' !!}" alt=""> 17 <hr> 18 <div> 19 <p>{{ $post->body }}</p> 20 <hr> 21 <br> 22 </div> 23 24 @auth 25 <Comments 26 :post-id='@json($post->id)' 27 :user-name='@json(auth()->user()->name)'> 28 </Comments> 29 @endauth 30 </div> 31 </div> 32 </div> 33 @endsection
Building the comments view
Open the Comments.vue file and add the following markup template below:
1<template> 2 <div class="card my-4"> 3 <h5 class="card-header">Leave a Comment:</h5> 4 <div class="card-body"> 5 <form> 6 <div class="form-group"> 7 <textarea ref="body" class="form-control" rows="3"></textarea> 8 </div> 9 <button type="submit" @click.prevent="addComment" class="btn btn-primary"> 10 Submit 11 </button> 12 </form> 13 </div> 14 <p class="border p-3" v-for="comment in comments"> 15 <strong>{{ comment.user.name }}</strong>: 16 <span>{{ comment.body }}</span> 17 </p> 18 </div> 19 </template>
Now, we’ll add a script that defines two methods:
fetchComments()- this will fetch all the existing comments when the component is created.addComment()- this will add a new comment by hitting the backend server. It will also trigger a new event that will be broadcast so all clients receive them in realtime.
In the same file, add the following below the closing template tag:
1<script> 2 export default { 3 props: { 4 userName: { 5 type: String, 6 required: true 7 }, 8 postId: { 9 type: Number, 10 required: true 11 } 12 }, 13 data() { 14 return { 15 comments: [] 16 }; 17 }, 18 19 created() { 20 this.fetchComments(); 21 22 Echo.private("comment").listen("CommentSent", e => { 23 this.comments.push({ 24 user: {name: e.user.name}, 25 body: e.comment.body, 26 }); 27 }); 28 }, 29 30 methods: { 31 fetchComments() { 32 axios.get("/" + this.postId + "/comments").then(response => { 33 this.comments = response.data; 34 }); 35 }, 36 37 addComment() { 38 let body = this.$refs.body.value; 39 axios.post("/" + this.postId + "/comments", { body }).then(response => { 40 this.comments.push({ 41 user: {name: this.userName}, 42 body: this.$refs.body.value 43 }); 44 this.$refs.body.value = ""; 45 }); 46 } 47 } 48 }; 49 </script>
In the created() method above, we first made a call to the fetchComments() method, then we created a listener to the private comment channel using Laravel Echo. Once this listener is triggered, the comments property is updated.
Testing the application
Now let’s test the application to see if it is working as intended. Before running the application, we need to refresh our database so as to revert any changes. To do this, run the command below in your terminal:
$ php artisan migrate:fresh --seed
Next, let’s build the application so that all the changes will be compiled and included as a part of the JavaScript file. To do this, run the following command on your terminal:
$ npm run dev
Finally, let’s serve the application using this command:
$ php artisan serve
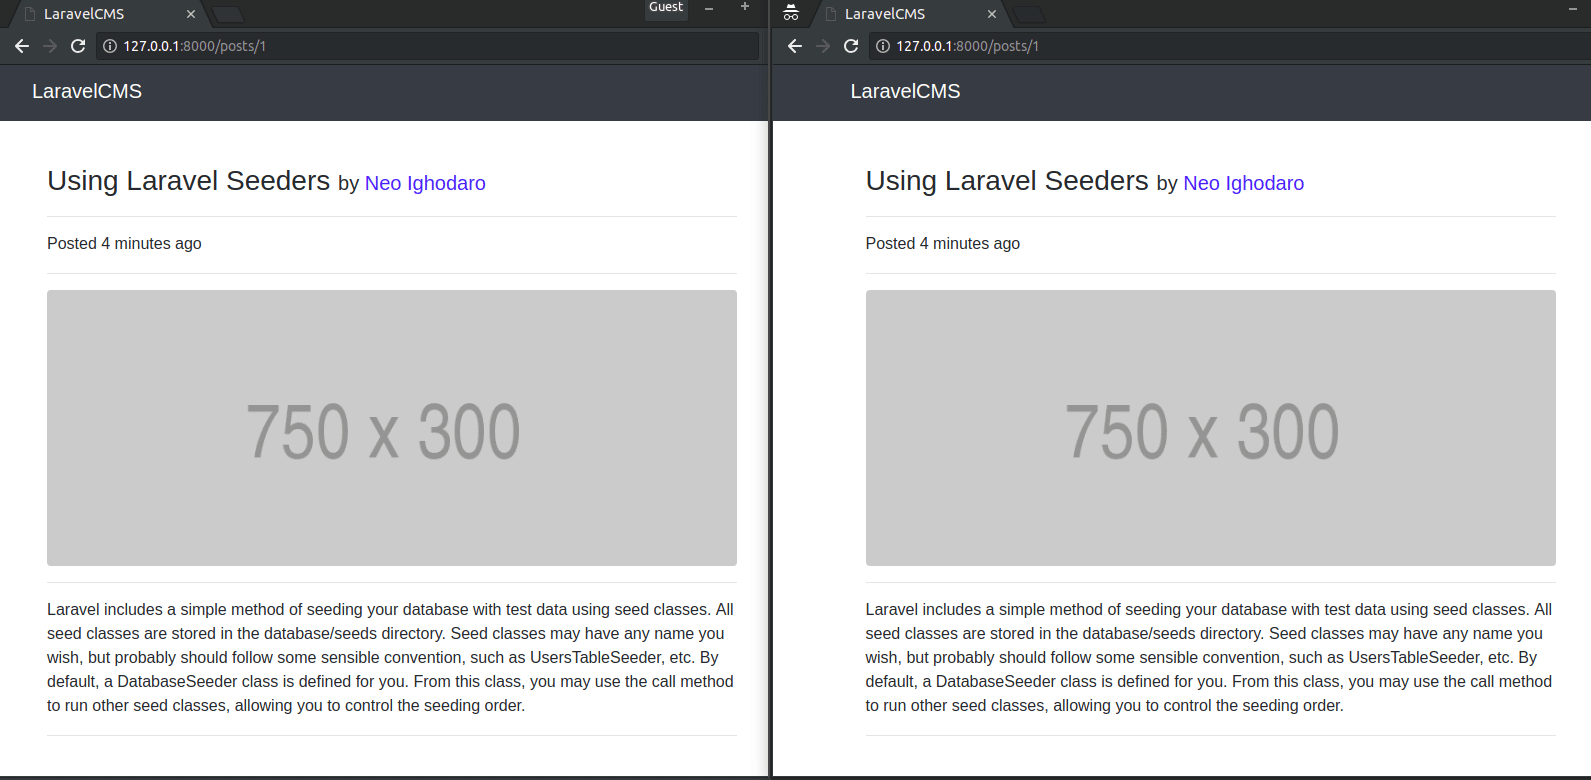
To test that our application works visit the application URL http://localhost:8000 on two separate browser windows, we will log in to our application on each of the windows as a different user.
We will finally make a comment on the same post on each of the browser windows and check that it updates in realtime on the other window:
Conclusion
In this final tutorial of this series, we created the comments feature of the CMS and also made it realtime. We were able to accomplish the realtime functionality using Pusher.
In this entire series, we learned how to build a CMS using Laravel and Vue.


© 2024 Pusher Ltd. All rights reserved.
Pusher Limited is a company registered in England and Wales (No. 07489873) whose registered office is at MessageBird UK Limited, 3 More London Riverside, 4th Floor, London, United Kingdom, SE1 2AQ.