- Products

- Developers
- User stories
- Blog
- Pricing

Build an online collaborative text editor using .NET
- Introduction
- Prerequisites
- Setting up your Pusher app
- Creating an ASP.NET Core MVC project
- Adding models
- Creating the database context
- Setting up the database and running migrations
- Registering the database context
- Running the migration
- Creating the controller
- Creating the app UI
- Creating new pens
- Making it realtime
- Installing the Pusher library
- Trigger an event to Pusher when a user edits a pen’s content
- Trigger an event to Pusher when a user adds a new pen
- Conclusion
Introduction
Whether it’s realtime audio or video chats, or just collaborating on documents in realtime via Google Docs, there are many times when collaborating online in realtime is a huge time saver and a necessity to keep up with your productivity.
In this article, I’ll walk you through building a basic collaborative text editor using ASP.NET Core. A user can create any number of documents, view or update the document. I’ll reference these documents as pen.
Prerequisites
This tutorial uses the following:
- JavaScript (jQuery)
- ASP.NET Core
- Visual Studio Code
- .NET Core SDK (Download and install it here if you don’t have it)
- Visual Studio Code C# extension (Install C# extension from the Visual Studio Code Marketplace if you don’t have it installed)
- A Pusher account
Verify your setup by typing the following in your command line:
dotnet --version
The command should print out the version of .NET Core you have installed.
Setting up your Pusher app
To start utilizing Pusher’s technology, you need to create a Pusher app and get the app keys. Login or signup (If you don’t have an account already) for a free account.
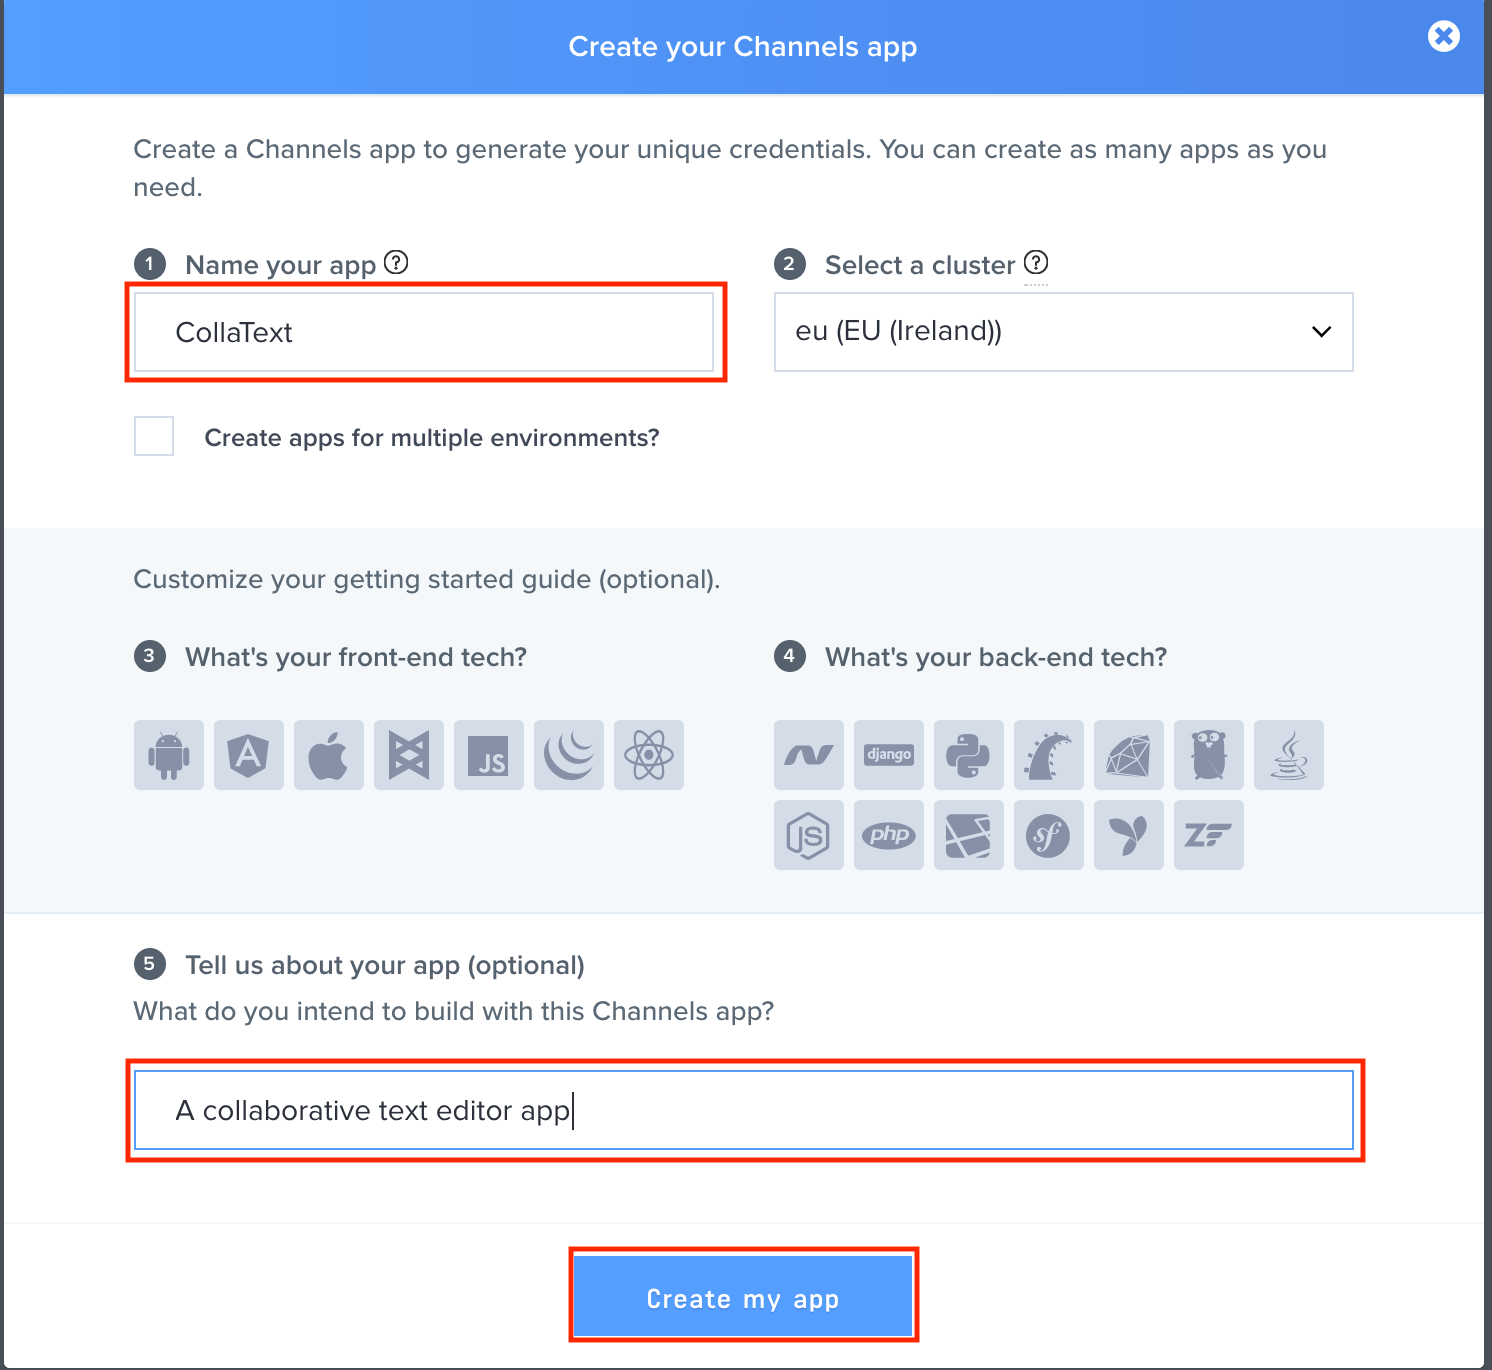
Once you are logged in, scroll down and click on Create new Channels app. You will see a modal, fill in the form and then click on Create my app.
After submitting the form, the next page that appears is a getting started page with code samples. Click on App Keys tab to get your Pusher app details.
Keep the keys handy, we’ll need them later:
1app_id = <PUSHER_APP_ID> 2 key = <PUSHER_APP_KEY> 3 secret = <PUSHER_APP_SECRET> 4 cluster = <PUSHER_APP_CLUSTER>
Creating an ASP.NET Core MVC project
First, create a new folder on your system called CollaText. Then from your command line, cd into the folder you just created. NB: CollaText can be any name you want.
Next, from your command line, run the following command:
dotnet new mvc
This command will create a new ASP.NET Core MVC project in your current folder.
Next,
- Open the
CollaTextfolder in Visual Studio Code editor and select theStartup.csfile.
💡 If your Visual Studio Code has been added to your system path, you can open the project by typing “code .****” (without quotes) in your command prompt.
- Select Yes to the Warn message "Required assets to build and debug are missing from 'CollaText'. Add them?"
- Select Restore to the Info message "There are unresolved dependencies".
Now, Press Debug (F5) to build and run the program. The address in which the project is running will open automatically if there is no error. In case it does not open automatically, navigate to http://localhost:5000/ from your browser. You should see a default page.
Next, update CollaText.csproj with the following code:
1<Project Sdk="Microsoft.NET.Sdk.Web"> 2 <PropertyGroup> 3 <TargetFramework>netcoreapp2.0</TargetFramework> 4 </PropertyGroup> 5 <ItemGroup> 6 <PackageReference Include="Microsoft.AspNetCore.All" Version="2.0.3" /> 7 <PackageReference Include="Microsoft.VisualStudio.Web.CodeGeneration.Design" Version="2.0.0" /> 8 </ItemGroup> 9 <ItemGroup> 10 <DotNetCliToolReference Include="Microsoft.EntityFrameworkCore.Tools.DotNet" Version="2.0.0" /> 11 <DotNetCliToolReference Include="Microsoft.VisualStudio.Web.CodeGeneration.Tools" Version="2.0.1" /> 12 </ItemGroup> 13 </Project>
Save the file and select Restore to the Info message "There are unresolved dependencies". This will prepare the project for scaffolding.
Adding models
A model is an object that represents the data in our application. For this project, we’ll create a table that holds data for created pen known as Pens.
Create a new file called Pen.cs in the Models folder and add the following code to it:
1using System; 2 namespace CollaText.Models 3 { 4 public class Pen 5 { 6 public int ID { get; set; } 7 public string Title { get; set; } 8 public string Content { get; set; } 9 } 10 }
Creating the database context
The database context is the main class that coordinates Entity Framework functionality for a given data model. We’ll derive from the Microsoft.EntityFrameworkCore.DbContext to create this class.
Create a new file called CollaTextPenContext.cs in the Models folder and add the following code to it:
1using Microsoft.EntityFrameworkCore; 2 3 namespace CollaText.Models 4 { 5 public class CollaTextPenContext : DbContext 6 { 7 public CollaTextPenContext (DbContextOptions<CollaTextPenContext> options) 8 : base(options) 9 { 10 } 11 public DbSet<Pen> Pens { get; set; } 12 } 13 }
Setting up the database and running migrations
Now that we have created our models, we can easily generate a migration file that will contain code for creating and updating our table schema.
In this article, we’ll make use of SQLite for our database.
Registering the database context
We’ll register the database context with the dependency injection container. Services (such as the DB context) that are registered with the dependency injection container are available to the controllers.
Update the code in ConfigureServices method of /Startup.cs file with the following code:
1[...] 2 public void ConfigureServices(IServiceCollection services) 3 { 4 [...] 5 services.AddDbContext<CollaTextPenContext>(options => 6 options.UseSqlite("Data Source=CollaText.db")); 7 [...] 8 } 9 [...]
This tells Entity Framework which model classes are included in the data model.
Finally, add the following usings to the header of Startup.cs file:
1using CollaText.Models; 2 using Microsoft.EntityFrameworkCore;
You can see the database context as a database connection and a set of tables, and the Dbset as a representation of the tables themselves. The database context allows us to link our model properties to our database with a connection string (in our case, we are using SQLite)
Running the migration
From your command line, run the following command:
1dotnet ef migrations add CollaText 2 dotnet ef database update
- The first command will create a migration script that will be used for managing our database tables.
- The second command will execute the migration script, thereby applying the migration to the database to create the schema.
💡 If you got an error while running the command, stop the debugging or the server and try again.
Creating the controller
We’ll create a controller called PenController.cs for handling browser requests.
Create a new file called PenController.cs in the Controllers folder and add the following code to it:
1using System.Linq; 2 using System.Threading.Tasks; 3 using Microsoft.AspNetCore.Mvc; 4 using Microsoft.EntityFrameworkCore; 5 using CollaText.Models; 6 using System.Net; 7 8 namespace CollaText.Controllers 9 { 10 public class PenController : Controller 11 { 12 private readonly CollaTextPenContext _context; 13 public PenController(CollaTextPenContext context) 14 { 15 _context = context; 16 } 17 // GET: Pen 18 public async Task<IActionResult> Index(int? id) 19 { 20 ViewData["Pen"] = _context.Pens.SingleOrDefault(d => d.ID == id); 21 return View(await _context.Pens.ToListAsync()); 22 } 23 } 24 }
In the preceding code:
- The constructor uses dependency injection to inject the database context (
CollaTextPenContext) into the controller. We have injected*CollaTextPenContext*context into the class so we can have access to the context. int? idparameter passed in theIndexmethod indicates that theidparameter is optional for the route.- Next, we fetched a single pen using the passed in
id, which is passed to the view viaViewData. - Lastly, with
await _context.Pens.ToListAsync(), we fetched all pens in the database and passed it down to the view.
With that, we now have a route - localhost:xxxx/Pen/Index/{id}.
Creating the app UI
Add the following styling to wwwroot/css/site.css:
1.vertical-center { 2 min-height: 80%; 3 min-height: 80vh; 4 display: grid; 5 align-items: center; 6 } 7 8 .pen > a:link, a:visited { 9 display: block; 10 text-decoration: none; 11 background: gray; 12 color:azure; 13 padding: 9px; 14 border-radius: 3px; 15 margin: 4px; 16 font-weight: bolder; 17 } 18 .pen > a:hover, a:active { 19 border-left: 4px solid burlywood; 20 } 21 22 #editor[contenteditable=true] { 23 min-height: 150px; 24 border: 1px solid lightblue; 25 border-radius: 4px; 26 padding: 3px; 27 } 28 29 #title[contenteditable=true] { 30 min-height: 40px; 31 border: 1px solid lightblue; 32 border-radius: 4px; 33 line-height: 2.6; 34 padding: 3px; 35 margin-bottom: 6px; 36 font-size: 16px; 37 } 38 39 [contenteditable=true]:empty:before { 40 content: attr(placeholder); 41 display: block; 42 }
Next, let’s add our view file. Create a new folder called Pen in the Views folder. Then create a Index.cshtml file in the Views/Pen folder.
Now, add the following code to Index.cshtml:
1@model IEnumerable<CollaText.Models.Pen> 2 @{ 3 ViewData["Title"] = "Index"; 4 Pen pen = (Pen) ViewData["Pen"]; 5 } 6 <div class="container-fluid vertical-center"> 7 <h3 class="text-center"> Realtime collaborative text editor </h3> 8 <div class="row"> 9 <div class="col-md-3"> 10 <div class="pen"> 11 <a class="" href="#" data-toggle="modal" data-target="#myModal"> 12 Create New Pen 13 </a> 14 </div> <br> 15 <div id="Pen"> 16 @foreach (var item in Model) { 17 <div class="pen"> 18 <a class="" asp-route-id="@item.ID"> 19 @Html.DisplayFor(modelItem => item.Title) 20 </a> 21 </div> 22 } 23 </div> 24 </div> 25 @if(pen != null) { 26 <div class="col-md-9"> 27 <div class="form-group"> 28 <div id="title" contenteditable="true" placeholder="Enter title here...">@pen.Title</div> 29 <div id="editor" contenteditable="true" placeholder="Enter content here...">@pen.Content</div> 30 </div> 31 </div> 32 <input type="hidden" value="@pen.ID" id="penId"> 33 } 34 else { 35 <p class="text-center"> Select any pen to start editing... </p> 36 } 37 </div> 38 </div> 39 <!-- Modal --> 40 <div id="myModal" class="modal fade" role="dialog"> 41 <div class="modal-dialog"> 42 <!-- Modal content--> 43 <div class="modal-content"> 44 <div class="modal-header"> 45 <button type="button" class="close" data-dismiss="modal">×</button> 46 <h4 class="modal-title">Create new pen</h4> 47 </div> 48 <div class="modal-body"> 49 <form asp-action="Create"> 50 <div class="form-group"> 51 <label for="pen">Pen Name</label> 52 <input type="text" name="Title" class="form-control" id="Title" placeholder="Pen"> 53 </div> 54 <button type="submit" class="btn btn-primary btn-block">Submit</button> 55 </form> 56 </div> 57 <div class="modal-footer"> 58 <button type="button" class="btn btn-default" data-dismiss="modal">Close</button> 59 </div> 60 </div> 61 </div> 62 </div> 63 64 <script src="https://js.pusher.com/4.1/pusher.min.js"></script>
When a user visits the route - /Pen/Index/ , The Views/Pen/Index.chtml file will be loaded for the user.
In the preceding code:
- With
Pen pen = (Pen) ViewData["Pen"], we are casting the data passed via ViewData to a Pen Model Object so we can easily access data in the object. - With
@foreach (var item in Model) { …, we are displaying all pen in the database to the view. - Finally, we included Pusher JavaScript library.
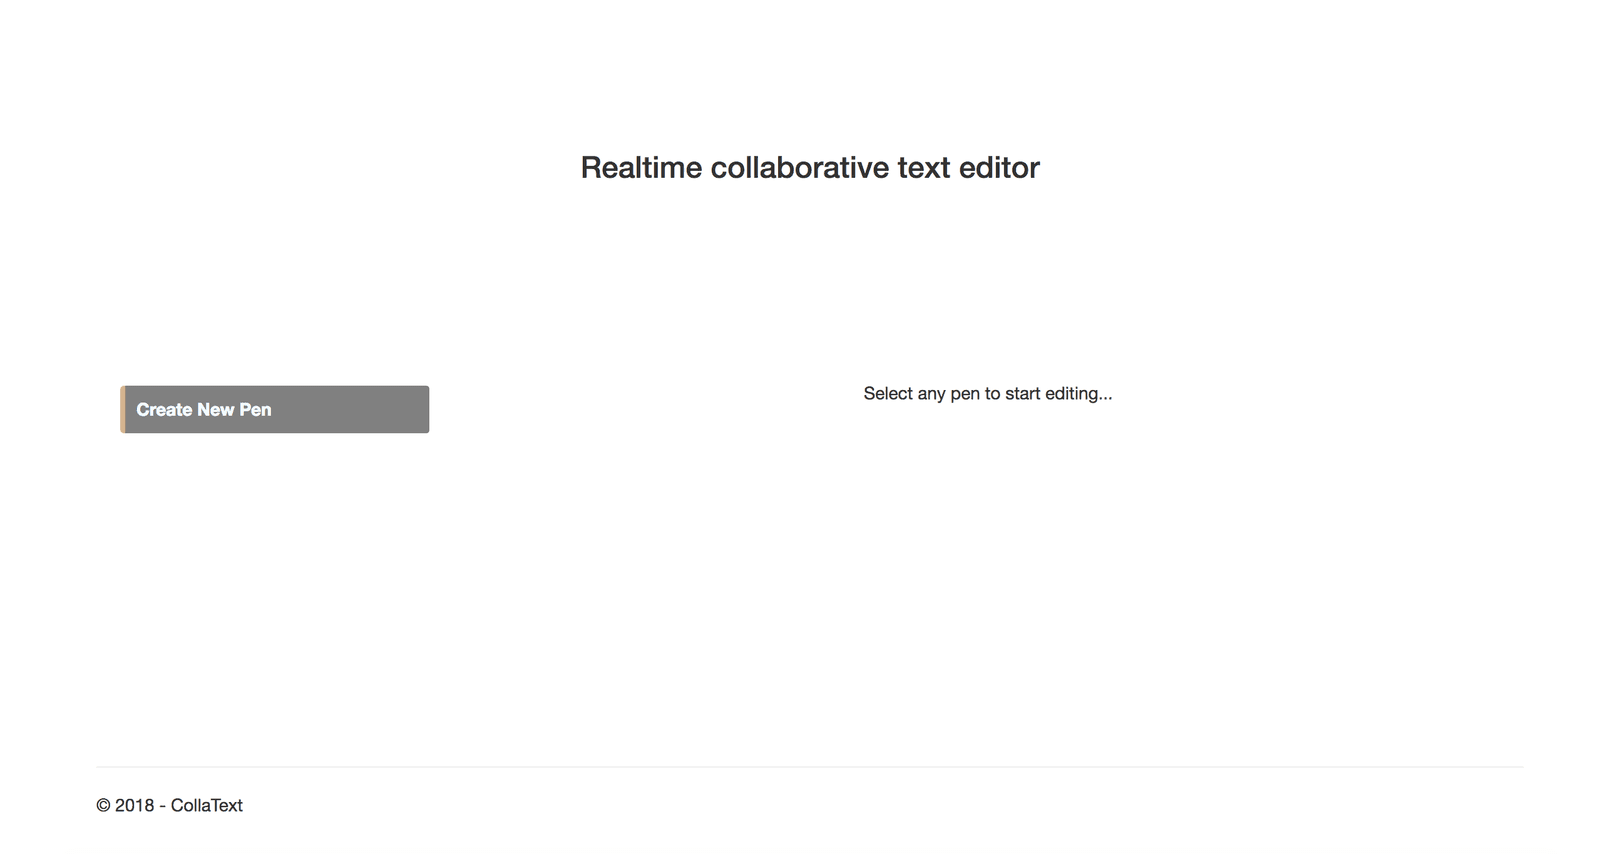
Now, visit http://localhost:5000/Pen/Index, the page should be similar to:
Creating new pens
Let’s add a method for creating a new pen. When a user clicks on Create New Pen, a pop up will show up which contains a form for creating new pen.
Add the following code to the PenController class in PenController.cs :
1[HttpPost] 2 [ValidateAntiForgeryToken] 3 public async Task<IActionResult> Create([Bind("ID,Title")] Pen pen) 4 { 5 if (ModelState.IsValid) 6 { 7 _context.Add(pen); 8 await _context.SaveChangesAsync(); 9 10 return RedirectToAction(nameof(Index)); 11 } 12 return View(pen); 13 }
With this, we now have a POST method route - /Pen/Create for creating a new pen.
Making it realtime
So far, users can create a new pen, view the pen, and edit it. However other users are not aware of any changes done by other users in realtime. We’ll use Pusher to add realtime feature to our application.
Installing the Pusher library
Pusher has a .NET library that makes it easy to interact with its API. We need to add this to the project.
From your command line, run the following command:
dotnet add package PusherServer
Next, add the following code to the PenController class in PenController.cs:
1public async Task<IActionResult> Trigger(object data, string channelName, string eventName) 2 { 3 var options = new PusherOptions 4 { 5 Cluster = "<PUSHER_APP_CLUSTER>", 6 Encrypted = true 7 }; 8 9 var pusher = new Pusher( 10 "<PUSHER_APP_ID>", 11 "<PUSHER_APP_KEY>", 12 "<PUSHER_APP_SECRET>", 13 options 14 ); 15 16 var result = await pusher.TriggerAsync( 17 channelName, 18 eventName, 19 data 20 ); 21 22 return new OkObjectResult(data); 23 }
We’ll use this method to trigger events to Pusher. Make sure to update the code with your correct pusher Keys you have noted down.
Finally, add the below using to the header of PenController.cs:
using PusherServer;
Trigger an event to Pusher when a user edits a pen’s content
When a user updates a pen’s content, we’ll trigger an event to pusher so that Pusher will broadcast the message to all other connected users.
Add the following code to to the PenController class in PenController.cs:
1[HttpPost] 2 public async Task<IActionResult> ContentChange(int penId, string Content, string sessionID) 3 { 4 await Trigger(new {Content = Content, penId = penId, sessionID = sessionID}, "coll-text-editor", "contentChange"); 5 6 var pen = await _context.Pens.SingleOrDefaultAsync(m => m.ID == penId); 7 if( pen != null) { 8 pen.Content = Content; 9 _context.SaveChanges(); 10 } 11 return new OkObjectResult(new { content = Content, penId = penId, sessionID = sessionID }); 12 }
In the preceding code:
- We are triggering an event to Pusher using the
Triggermethod we added earlier. - In the
Triggermethod, we passed along the data we want to send to Pusher, the channel name -*coll-text-editor*, and the event name -*contentChange*. - Then we’ll save the updated content to the database.
Trigger an event to Pusher when a user adds a new pen
Pusher assigns all connected users a unique sessionID. We’ll use this ID to identify users. Update the parameter of the Create method in the PenController.cs so it includes this sessionID:
public async Task<IActionResult> Create([Bind("ID,Title")] Pen pen, string sessionID)
Next, add the following code to the Create method in PenController.cs:
await Trigger(new {Title = pen.Title, penId = pen.ID, sessionID = sessionID}, "coll-text-editor", "newPen");
If you have followed closely, the Create method will look like this:
1[HttpPost] 2 [ValidateAntiForgeryToken] 3 public async Task<IActionResult> Create([Bind("ID,Title")] Pen pen, string sessionID) 4 { 5 if (ModelState.IsValid) 6 { 7 _context.Add(pen); 8 await _context.SaveChangesAsync(); 9 await Trigger(new {Title = pen.Title, penId = pen.ID, sessionID = sessionID}, "coll-text-editor", "newPen"); 10 11 return RedirectToAction(nameof(Index)); 12 } 13 return View(pen); 14 }
Initializing the Pusher JavaScript client library
Add the following code to wwwroot/js/site.js:
1var pusher = new Pusher('<PUSHER_APP_KEY>', { 2 cluster: '<PUSHER_APP_CLUSTER>', 3 encrypted: true 4 });
Next, let’s subscribe to a channel. Add the following code to wwwroot/js/site.js:
let channel = pusher.subscribe('coll-text-editor');
In this case, coll-text-editor is the channel name we want to subscribe to.
Next, add the following code to wwwroot/js/site.js:
1let timeout = null; 2 // Sends the text to the server which in turn is sent to Pusher's server 3 $("#editor").keyup(function () { 4 let content = $("#editor").text(); 5 clearTimeout(timeout); 6 timeout = setTimeout(function() { 7 8 $.post("/Pen/ContentChange", { content: content, penId: $("#penId").val(), sessionID: pusher.sessionID}) 9 }, 300); 10 });
When a user updates a pen’s content, we will send a request to the ContentChange method in Controllers/PenContoller.cs which in turn triggers an event to Pusher.
Next, let’s listen for contentChange event. Add the following code to wwwroot/js/style.js:
1channel.bind('contentChange', function(data) { 2 if ( (data.sessionID != pusher.sessionID) && (data.penId == $("#penId").val()) ) { 3 $("#editor").text(data.Content) 4 } 5 });
Here, when there is a contentChange event, we’ll update the content of the pen for the user. The if condition makes sure the current user is the user that made the change to the pen. Also if the current pen the user is viewing is what is changed so we don’t bother updating the content for that particular user.
Finally, let’s listen for newPen event. Add the following code to wwwroot/js/site.js:
1channel.bind('newPen', function(data) { 2 if (data.sessionID != pusher.sessionID) { 3 $("#Pen").append( 4 ` 5 <div class="pen"> 6 <a class="" href="/Pen/Index/${data.penId}"> 7 ${data.Title} 8 </a> 9 </div> 10 ` 11 ) 12 } 13 });
When a new pen is created, we’ll append the pen for other connected users in realtime.
Well done! You have just built a realtime collaborative text editor using Pusher’s amazing technology. To test what you have built, load up the app in a different tab on your browser, then start collaborating.
Conclusion
In this tutorial, we discussed how to set up an ASP.NET Core application in Visual Studio Code. We’ve also built a realtime collaborative text editor using ASP.NET Core and Pusher. There is no limit of what you can do here, feel free to add new features to the application. You can get the full project on Github.


© 2024 Pusher Ltd. All rights reserved.
Pusher Limited is a company registered in England and Wales (No. 07489873) whose registered office is at MessageBird UK Limited, 3 More London Riverside, 4th Floor, London, United Kingdom, SE1 2AQ.