- Products

- Developers
- User stories
- Blog
- Pricing

Build a multiplayer quiz game with Vue.js
- Introduction
- What are Presence Channels?
- What are Client Events?
- Setting up Pusher
- Initializing the Vue.js application
- Setting up a Node.js Server
- Building the game
- fetchData ()
- getUniqueId ()
- checkPresenceID ()
- checkAnswer ()
- getRandomQuestions ()
- getNewQuestion ()
- Setting up Firebase Hosting
- Preparing the Vue.js app for deployment
- Deploying to Firebase
- Conclusion
Introduction
As developers, deploying applications and websites can be a pain point at times and we generally tend to prefer solutions that are easy and scalable.
Hosting solutions that require SSHing and having to make configurations and a million things to do before deploying can (and will) get tedious after a while. This is where Firebase Hosting comes in.
We’ll build a static website and deploy it to the web using Firebase Hosting. We are going to build a realtime multiplayer trivia game, the game is going to work like the popular multiplayer game QuizUp.
Here’s how the game is going to work. The questions are going to be gotten from the lyrics from Hamilton: An American Musical and users have to answer correctly the name of the character in the musical who sang that line. The game tests the user’s knowledge of Hamilton and users can play for as long as they like. See a demo below.
https://player.vimeo.com/video/230121610
Our game will be built with Vue.js and will use Pusher’s Client Events and Presence Channels to make sure a user’s move is shown realtime.
What are Presence Channels?
Pusher’s Presence channels expose the additional feature of an awareness of who is subscribed to that channel. This gives developers the ability to build features like chat rooms, collaborators on a document and multiplayer games.
All Presence Channels must be subscribed with the prefix of presence- and as with private channels a HTTP Request is made to a configurable authentication URL to determine if the current user has permissions to access the channel.
What are Client Events?
Client events are simply a way in which events can be triggered directly from the client-side as opposed to triggering from the backend server. Client Events are used in instances where some actions may not need validation or persistence and can go directly via the socket to all the other clients connected to the channel.
In our case, we use the Client Events to update a user on the current score of the other user playing the game.
Client Events have a number of enforced restrictions to ensure that the user subscribing to the channel is an authenticated user:
- Client events must be enabled for the application. You can do this in the Settings tab for your app within the Pusher dashboard.
- The user must be subscribed to the channel that the event is being triggered on.
- Client events can only be triggered on private and presence channels because they require authentication.
- Client events must be prefixed by
client-. Events with any other prefix will be rejected by the Pusher server, as will events sent to channels to which the client is not subscribed.
You can read more on Client Events by going through the documentation.
Setting up Pusher
Log in to your dashboard (or create a free account if you don’t already have one) and create a new app. Copy your app_id, key, secret and cluster and store them somewhere as we’ll be needing them later.
One more thing. In your dashboard, navigate to the App Settings tab and make sure the Enable Client Events checkbox is checked. This lets clients communicate directly with each other.
Initializing the Vue.js application
Vue.js is the preferred JavaScript framework to build the game because of its popularity and low barrier to getting started. There are some Vue.js tutorials on Pusher which you can read here, here and here.
We’re going to be using the vue-cli to scaffold a Vue.js project. The vue-cli is a simple CLI for scaffolding Vue.js projects. It ships with many templates like webpack, browserify, pwa and simple. We’ll install vue-cli and then use it to bootstrap the app using the webpack template, with the following commands:
1npm install -g vue-cli 2 vue init webpack hamiltonlyrics
This creates a Vue.js app inside the a folder titled hamiltonlyrics. Navigate into the folder and run the command npm run dev to see the Vue.js application.
Setting up a Node.js Server
As explained above, Client Events require authentication to make sure a user is subscribed to the channel. Therefore, we are going to create a Node.js server so that Client Events can have an authentication route.
Let’s install the modules we’ll need for the Node.js server.
npm i express body-parser pusher
In the root of the project directory, create a file named server.js and type in the following code:
1// server.js 2 const express = require('express') 3 const path = require('path') 4 const bodyParser = require('body-parser') 5 const app = express() 6 const Pusher = require('pusher') 7 const crypto = require('crypto') 8 9 //initialize Pusher with your appId, key and secret 10 const pusher = new Pusher({ 11 appId: 'APP_ID', 12 key: 'APP_KEY', 13 secret: 'APP_SECRET', 14 cluster: 'YOUR_CLUSTER', 15 encrypted: true 16 }) 17 18 // Body parser middleware 19 app.use(bodyParser.json()) 20 app.use(bodyParser.urlencoded({ extended: false })) 21 22 // The code below helps to fix any potential CORS issue. 23 app.use((req, res, next) => { 24 // Website you wish to allow to connect 25 res.setHeader('Access-Control-Allow-Origin', '*') 26 // Request methods you wish to allow 27 res.setHeader('Access-Control-Allow-Methods', 'GET, POST, OPTIONS, PUT, PATCH, DELETE') 28 // Request headers you wish to allow 29 res.setHeader('Access-Control-Allow-Headers', 'X-Requested-With,content-type') 30 // Set to true if you need the website to include cookies in the requests sent 31 // to the API (e.g. in case you use sessions) 32 res.setHeader('Access-Control-Allow-Credentials', true) 33 // Pass to next layer of middleware 34 next() 35 }) 36 37 // Index API route for the Express app 38 app.get('/', (req, res) => { 39 res.send('Welcome') 40 }) 41 42 // API route used by Pusher as a way of authenticating users 43 app.post('/pusher/auth', (req, res) => { 44 let socketId = req.body.socket_id 45 let channel = req.body.channel_name 46 // Generate a random string and use as presence channel user_id 47 let presenceData = { 48 user_id: crypto.randomBytes(16).toString('hex') 49 } 50 let auth = pusher.authenticate(socketId, channel, presenceData) 51 res.send(auth) 52 }) 53 54 // Set port to be used by Node.js 55 app.set('port', (5000)) 56 57 app.listen(app.get('port'), () => { 58 console.log('Node app is running on port', app.get('port')) 59 })
In the code block above, Pusher is initialized with the dashboard credentials. The /pusher/auth route is also created.
Now we can simply run node server.js and the Node.js app should be up and running. Before we go on let’s add the command above to the existing scripts object in the package.json file so we don’t have to type in the command every time. Open up the package.json file and edit the dev line inside the scripts object with the one below.
"dev": "nodemon server.js & node build/dev-server.js"
Building the game
Let’s get started on building the game. We’ll be working with two files throughout the course of this tutorial, a Home.vue file and a ChannelDetails.vue file.
Navigate to the components folder inside the src folder and create a new file called ChannelDetails.vue. This will contain the JavaScript code that establishes a connection to Pusher from the client side. Open the file and type in the following code:
1<script> 2 import Pusher from 'pusher-js' 3 const pusher = new Pusher('APP_KEY', { 4 cluster: 'YOUR_CLUSTER', 5 encrypted: true, 6 authEndpoint: 'http://localhost:5000/pusher/auth' 7 }) 8 9 export default ({ 10 getPresenceID () { 11 // This function checks the address bar of the browser for params 12 let getQueryString = (field, url) => { 13 let href = url ? url : window.location.href 14 let reg = new RegExp('[?&]' + field + '=([^&#]*)', 'i') 15 let string = reg.exec(href) 16 return string ? string[1] : null 17 } 18 // Appends 'presence' to the result 19 let id = getQueryString('id') 20 id = 'presence-' + id 21 return id 22 }, 23 subscribeToPusher () { 24 let presenceid = this.getPresenceID() 25 let channel = pusher.subscribe(presenceid) 26 return channel 27 } 28 }) 29 </script>
If you use ESLint, you should be getting a warning that the Pusher JS library has not been installed. That can be installed by running this command npm i pusher-js. So what’s happening up there?
Firstly, Pusher is imported and a connection is established using credentials like APP_KEY, and CLUSTER. An authEndpoint is added to the Pusher instance. The authEndpoint is the endpoint Pusher uses to authenticate users.
Secondly, there are two functions above which are being exported. The first function getPresenceID() checks the address bar of the browser for URL parameters and then appends presence to the result. This is done so that the channel name will always have a prefix of presence- since we are using Presence channels.
The second function uses the result of the getPresenceID() function and uses it to subscribe to a channel (a Presence Channel to be specific).
The next thing to do is to start writing code for the game itself. Open up the App.vue file inside the src folder and make sure its content is similar to the code below:
1<template> 2 <div id="app"> 3 <router-view></router-view> 4 </div> 5 </template> 6 7 <script> 8 export default { 9 name: 'app' 10 } 11 </script> 12 13 <style>a 14 html { 15 background: #7fd4d3; 16 } 17 body { 18 background: #7fd4d3; 19 padding: 20px; 20 } 21 #app { 22 height: 100vh; 23 -webkit-font-smoothing: antialiased; 24 -moz-osx-font-smoothing: grayscale; 25 text-align: center; 26 color: #fff; 27 } 28 .fade-enter-active, .fade-leave-active { 29 transition: opacity .5s 30 } 31 .fade-enter, .fade-leave-to /* .fade-leave-active in <2.1.8 */ { 32 opacity: 0 33 } 34 </style>
Navigate to the src/components directory and you should see a Hello.vue file. You can either delete that file or rename to Home.vue as we will be needing a Home.vue file inside the components folder. Open up the file and type in/replace with the code below:
1<script> 2 // Import ChannelDetails component created above 3 import ChannelDetails from '@/components/ChannelDetails' 4 // An array that holds the lyrics questions and their correct answers. All questions can be seen here https://gist.github.com/yomete/2d851c2adc008a9763a0db9f85879083 5 const lyrics = [ 6 { 7 lyric: 'When he was ten his father split, full of it, debt-ridden. Two years later, see Alex and his mother bed-ridden. Half-dead sittin\' in their own sick, the scent thick', 8 options: [{name: 'Aaron Burr', correct: false}, {name: 'James Madison', correct: false}, {name: 'John Laurens', correct: false}, {name: 'Eliza Hamilton', correct: true}], 9 answer: 'Eliza Hamilton' 10 }, 11 { 12 lyric: 'I am sailing off to London. I’m accompanied by someone who always pays. I have found a wealthy husband. Who will keep me in comfort for all my days. He is not a lot of fun, but there’s no one', 13 options: [{name: 'Eliza', correct: false}, {name: 'Peggy', correct: false}, {name: 'Angelica', correct: true}, {name: 'Maria', correct: false}], 14 answer: 'Angelica' 15 } 16 ] 17 export default { 18 name: 'home', 19 data () { 20 return { 21 // This holds the current presence-id 22 presenceid: null, 23 // This checks if a question has been answered, default to false 24 hasAnswered: false, 25 // This holds the current question 26 question: null, 27 // This holds the options for the current question 28 options: null, 29 // This holds the correct answer for the current question 30 correctanswer: null, 31 // This is used for a countdown timer 32 count: null, 33 // Number of players in the game 34 players: 1, 35 // This checks if there's a second player, it becomes true when players = 2 36 secondplayer: false, 37 // This holds the player data for both players 38 playerdata: { 39 one: { 40 id: null, 41 score: 0, 42 userid: null 43 }, 44 two: { 45 id: null, 46 score: 0, 47 userid: null 48 } 49 }, 50 // This holds the userid for the current player 51 userid: null, 52 // This holds the current URL of the game 53 url: null 54 } 55 }, 56 created () { 57 this.fetchData() 58 }, 59 methods: { 60 fetchData () {}, 61 getUniqueId () {} 62 checkPresenceID () {} 63 checkAnswer (item) {} 64 getRandomQuestions (array, count) {} 65 getNewQuestion () {} 66 } 67 } 68 </script> 69 70 <!-- Add "scoped" attribute to limit CSS to this component only --> 71 <style scoped> 72 .home { 73 display: flex; 74 align-items: center; 75 justify-content: center; 76 height: 100vh; 77 } 78 h1 { 79 font-size: 3rem; 80 font-weight: bold; 81 } 82 p { 83 font-size: 1.5rem; 84 margin: 0 0 20px 0; 85 } 86 .play--button { 87 background-color: white; 88 color: #7fd4d3; 89 font-weight: bold; 90 border-radius: 20px; 91 letter-spacing: 1px; 92 padding: 20px; 93 transition: all .3s ease; 94 text-shadow: 0 1px 3px rgba(36,180,126,.4); 95 text-transform: uppercase; 96 box-shadow: 0 4px 6px rgba(50,50,93,.11), 0 1px 3px rgba(0,0,0,.08); 97 } 98 .play--button:hover { 99 background-color: white; 100 color: #7fd4d3; 101 transform: translateY(-1px); 102 box-shadow: 0 7px 14px rgba(50,50,93,.1), 0 3px 6px rgba(0,0,0,.08); 103 } 104 .fade-enter-active, .fade-leave-active { 105 transition: opacity .5s 106 } 107 .fade-enter, .fade-leave-to { 108 opacity: 0 109 } 110 a { 111 color: #fff; 112 } 113 p { 114 color: #fff; 115 } 116 h1 { 117 font-size: 3rem; 118 font-weight: bold; 119 text-align: center; 120 } 121 .fade-enter-active, .fade-leave-active { 122 transition: opacity .5s 123 } 124 .fade-enter, .fade-leave-to /* .fade-leave-active in <2.1.8 */ { 125 opacity: 0 126 } 127 .play--button { 128 background-color: white; 129 color: #7fd4d3; 130 font-weight: bold; 131 border-radius: 20px; 132 letter-spacing: 1px; 133 padding: 20px; 134 transition: all .3s ease; 135 text-shadow: 0 1px 3px rgba(36,180,126,.4); 136 text-transform: uppercase; 137 box-shadow: 0 4px 6px rgba(50,50,93,.11), 0 1px 3px rgba(0,0,0,.08); 138 position: absolute; 139 top: 20px; 140 right: 20px; 141 z-index: 5; 142 } 143 .play--button:hover { 144 background-color: white; 145 color: #7fd4d3; 146 transform: translateY(-1px); 147 box-shadow: 0 7px 14px rgba(50,50,93,.1), 0 3px 6px rgba(0,0,0,.08); 148 } 149 .hamilton--header--text { 150 margin-top: 50px; 151 } 152 .hamilton--inner { 153 margin-top: 20px; 154 } 155 .hamilton--inner .left{ 156 text-align: left; 157 } 158 .hamilton--inner .right{ 159 text-align: right; 160 } 161 .title { 162 font-weight: bold; 163 } 164 .hamilton--lyrics--text { 165 width: 600px; 166 margin: 0 auto; 167 } 168 .hamilton--lyrics--text p { 169 font-weight: bold; 170 } 171 .hamilton--answers a{ 172 display: block; 173 border: 3px solid white; 174 border-radius: 50px; 175 margin: 20px auto; 176 width: 500px; 177 padding: 10px; 178 } 179 .wronganswer { 180 background-color: #ec6969; 181 border: none !important; 182 opacity: 0.4; 183 transition: background-color 0.5s ease; 184 } 185 .correctanswer { 186 background-color: #00c4a7; 187 border: none !important; 188 transition: background-color 0.5s ease; 189 } 190 </style>
In the code block above, we set up the foundation for the game and how it’s going to work. Inside the <style> tag and inside the <script> tag, there are a couple of functions that we will need to create and add logic to.
Let’s take a look at the functions we need to create.
fetchData ()
This function is called inside the created hook and that means it will always be called whenever the instance has been created. Let’s write the code for this function.
1// Sets the data instance presenceid variable to the result of the getUniqueId function 2 this.presenceid = this.getUniqueId() 3 // This checks if there's no presence ID in the URL via the checkPresenceID function and appends the presenceid to the current URL so that we can have the URL end with a parameter like this https://hamilton-lyrics.firebaseapp.com/#/?id=agbew0gz 4 if (!this.checkPresenceID()) { 5 var separator = (window.location.href.indexOf('?') === -1) ? '?' : '&' 6 window.location.href = window.location.href + separator + this.presenceid 7 } 8 // Sets the data instance url variable to the current URL. 9 this.url = window.location.href 10 // Gets a new question via the getNewQuestion() function 11 this.getNewQuestion() 12 // The channel variable is set to to the subscribeToPusher function in ChannelDetails. 13 let channel = ChannelDetails.subscribeToPusher() 14 15 // The pusher:member_added event is triggered when a user joins a channel. We increase the number of players by one and also set the secondplayer boolean to true. 16 channel.bind('pusher:member_added', members => { 17 this.players += 1 18 this.secondplayer = true 19 }) 20 21 // Once a subscription has been made to a presence channel, an event is triggered with a members iterator. 22 channel.bind('pusher:subscription_succeeded', members => { 23 // This checks if its just one player online and sets them up as player one and the required info for the game 24 if (members.count === 1 && !this.playerdata.one.id) { 25 this.playerdata.one.id = members.myID 26 this.playerdata.one.userid = 1 27 this.userid = 1 28 // This checks if there's a player online already and sets the new player as player two. 29 } else if (members.count === 2) { 30 this.secondplayer = true 31 this.playerdata.two.id = members.myID 32 this.playerdata.two.userid = 2 33 this.userid = 2 34 } 35 }) 36 // The pusher:member_removed is triggered when a user leaves a channel. We decrease the number of players by one and also set the secondplayer boolean to false. 37 channel.bind('pusher:member_removed', member => { 38 this.players -= 1 39 if (member.count === 1) { 40 this.secondplayer = false 41 } 42 }) 43 // This function receives new data from Pusher and updates the exisiting scores. This is what updates each player's score in realtime. 44 channel.bind('client-send', (data) => { 45 if (this.userid === 1) { 46 this.playerdata.two.score = data.data.two.score 47 } else if (this.userid === 2) { 48 this.playerdata.one.score = data.data.one.score 49 } 50 })
getUniqueId ()
This function simply generates random alphanumeric characters and adds a prefix of id= to the result.
1getUniqueId () { 2 return 'id=' + Math.random().toString(36).substr(2, 8) 3 }
checkPresenceID ()
This function checks the address bar of the browser for URL parameters, in this case, any parameter that starts with ?id= prefix and then returns the alphanumeric character at the end of the prefix. For example, this URL https://hamilton-lyrics.firebaseapp.com/#/?id=agbew0gz will return agbew0gz.
1checkPresenceID () { 2 let getQueryString = (field, url) => { 3 let href = url ? url : window.location.href 4 let reg = new RegExp('[?&]' + field + '=([^&#]*)', 'i') 5 let string = reg.exec(href) 6 return string ? string[1] : null 7 } 8 let id = getQueryString('id') 9 return id 10 }
checkAnswer ()
This function is used to check if the answer chosen is correct or incorrect. If the chosen answer is correct, 10 points will be added to the current score and if the answer is incorrect, 10 points will be deducted. The score is also sent to other subscribers of the channel via the channel.trigger() function. At the end of it all, a new question is gotten via the getNewQuestion() function.
1checkAnswer (item) { 2 let channel = ChannelDetails.subscribeToPusher() 3 this.hasAnswered = true 4 if (item.name === this.correctanswer) { 5 if (this.userid === 1) { 6 this.playerdata.one.score += 10 7 } else if (this.userid === 2) { 8 this.playerdata.two.score += 10 9 } 10 } else { 11 if (this.userid === 1) { 12 this.playerdata.one.score = Math.max(0, this.playerdata.one.score -= 10) 13 } else if (this.userid === 2) { 14 this.playerdata.two.score = Math.max(0, this.playerdata.two.score -= 10) 15 } 16 } 17 channel.trigger('client-send', {data: this.playerdata}) 18 this.count = 3 19 let countdown = setInterval(() => { 20 this.count -= 1 21 if (this.count === 0) { 22 clearInterval(countdown) 23 this.getNewQuestion() 24 } 25 }, 1000) 26 }
getRandomQuestions ()
This function is used to select questions randomly from the lyrics array that holds the various questions. It takes in two arguments, array and count.
array would be the array we are trying to pick a random item from (lyrics) and count is the number of item to be chosen (1 item). This function is called in the getNewQuestion() function below.
1getRandomQuestions (array, count) { 2 let length = array.length 3 let randomIndexes = [] 4 let randomItems = [] 5 let index, item 6 7 count = count | 1 8 9 while (count) { 10 index = Math.floor(Math.random() * length) 11 if (randomIndexes.indexOf(index) === -1) { 12 count-- 13 randomIndexes.push(index) 14 } 15 } 16 17 randomIndexes.forEach((index) => { 18 item = array.slice(index, index + 1).pop() 19 randomItems.push(item) 20 }) 21 22 if (randomItems.length === 1) { 23 return randomItems.pop() 24 } else { 25 return randomItems 26 } 27 }
getNewQuestion ()
This function is used to get a new question for the game. It utilizes the getRandomQuestions() to get a new random question and sets it to the question variable. It also uses the question’s data in the question variable to initialize the various data instances.
1getNewQuestion () { 2 let question = this.getRandomQuestions(lyrics, 1) 3 this.question = question 4 this.options = question.options 5 this.correctanswer = question.answer 6 this.hasAnswered = false 7 }
We are done with the functions. Let’s create the template tag and write the HTML code that will display the view for the game.
1<template> 2 <transition name="fade"> 3 <div class="home" v-if="!secondplayer"> 4 <div class="inner"> 5 <h1>Do you know your Hamilton Lyrics?</h1> 6 <p>Test your knowledge of Hamilton: An American Musical by guessing who sang what lyric.</p> 7 <p>Invite a second player by sending them this link {{url}}.</p> 8 </div> 9 </div> 10 <div class="play" v-if="secondplayer"> 11 <div> 12 <div class="container hamilton--header--text"> 13 <h1>Do you know your Hamilton Lyrics?</h1> 14 15 <div class="columns hamilton--inner"> 16 <div class="column is-half left"> 17 <p class="title">User 1</p> 18 <p class="subtitle">Total Score: {{playerdata.one.score}}</p> 19 </div> 20 <div v-if="secondplayer" class="column is-half right"> 21 <p class="title">User 2</p> 22 <p class="subtitle">Total Score: {{playerdata.two.score}}</p> 23 </div> 24 </div> 25 26 <div class="hamilton--lyrics--text"> 27 <p>{{question.lyric}} 28 </p> 29 <div class="hamilton--answers"> 30 <a v-bind:class="{ 'wronganswer': hasAnswered && !item.correct, 'correctanswer': hasAnswered && item.correct}" @click="checkAnswer(item)" v-for="(item, index) in options">{{item.name}}</a> 31 </div> 32 </div> 33 </div> 34 </div> 35 </div> 36 </transition> 37 </template>
In the code above, we enclose everything in a transition tag with an attribute of fade. There are two div sections that display conditionally. The div tag with a class of home is shown when there’s just one player online and the div tag with a class of play is only shown when two players are online.
At the end of it all, your Home.vue file should look like this.
Setting up Firebase Hosting
Now that our application is ready and working well, let’s deploy the application using Firebase Hosting.
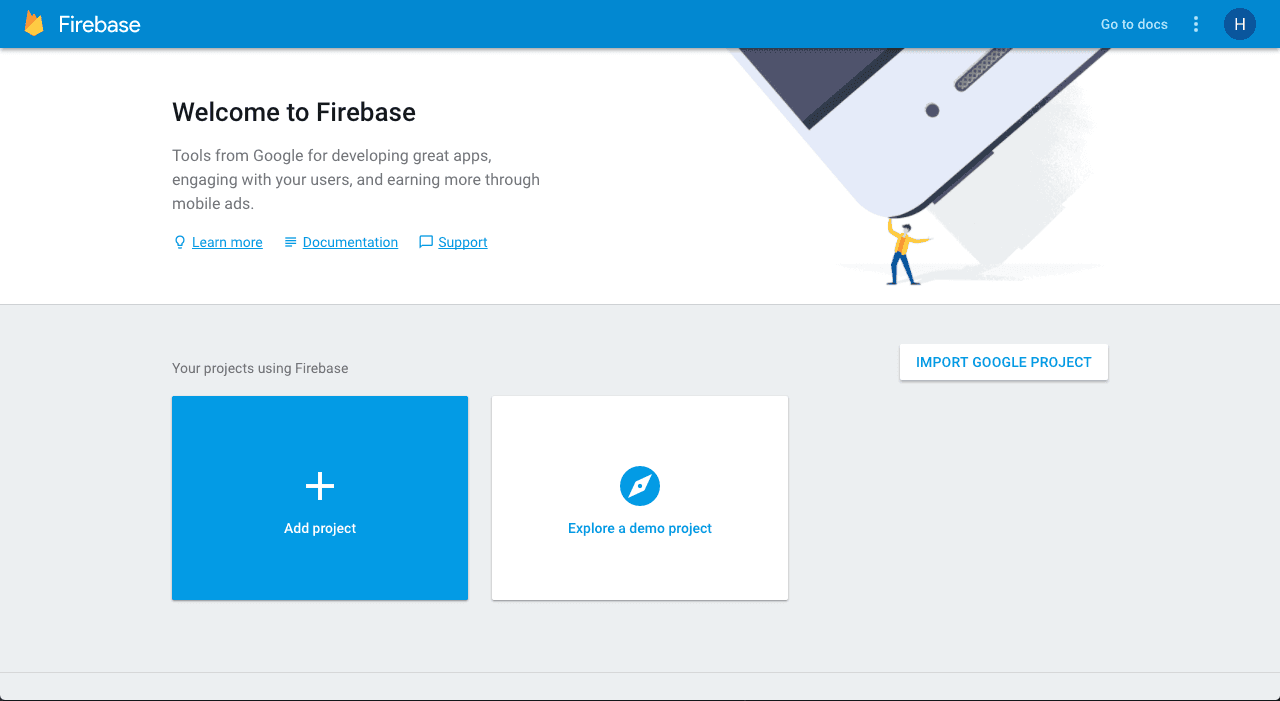
Getting started with Firebase Hosting is straightforward. Go over to console.firebase.google.com and create a new account or sign in if you already have an account.
Since this is a platform hosted by Google, you’ll need a Gmail account to be able to sign up and use the Firebase Console
Your dashboard should look like this (if you’re a new user). Let’s add a new project by clicking on the Add Project button.
That opens up a modal box that asks you to give your project a name and also choose your region. Once that’s done, you should be redirected to the project’s dashboard which looks like this.
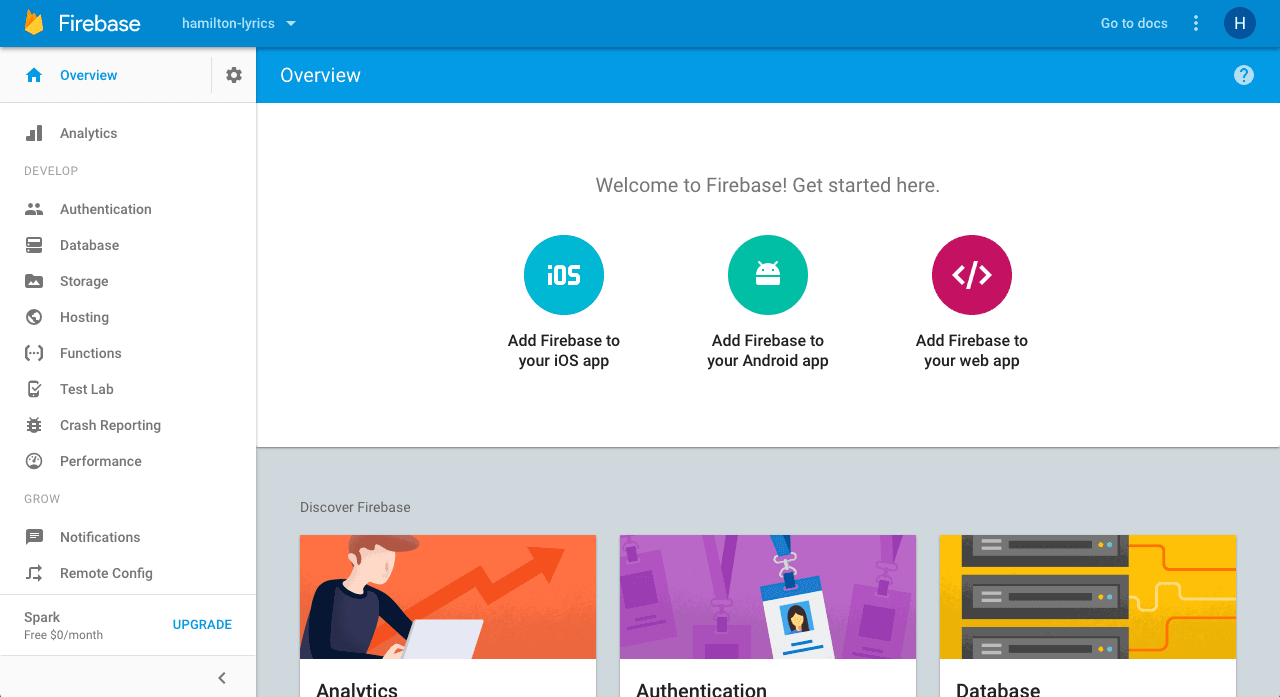
The dashboard menu on the left shows all the Firebase services you can use in your application. Before we start deploying apps with Firebase Hosting, we need to install the Firebase CLI using npm.
npm install -g firebase-tools
If you've previously installed Firebase command line tools, run the install command again to make sure you have the latest version. Once the Firebase CLI has been successfully installed, we can deploy apps to Firebase Hosting with a single command.
Next step is to sign in to Google from the terminal so Firebase knows which account to use. Run the command firebase login in your terminal. This process takes you to a login page in a browser where you enter your Google credentials and you are then logged in. Now Firebase is installed on our computer and we can begin deployment.
Preparing the Vue.js app for deployment
Now that we are done with the development of the app, it’s time to deploy the application to production via Firebase Hosting. How exactly do we do that? First of all, we need to build the Vue.js app for production and then run the Firebase deploy command. Let’s get started on that by running the command below.
npm run build
The command above helps to minify JS, HTML, and CSS. All static assets are also compiled with version hashes for efficient long-term caching, and a production index.html is auto-generated with proper URLs to these generated assets.
Once the command is done with its process, the production-ready app can be found in the dist folder. That is where the firebase deploy command will be used.
Deploying to Firebase
We’ll need to initiate Firebase for this project, specifically inside the dist folder. So run the command firebase init. That command prompts the following:
- You’ll be prompted to choose which of the Firebase CLI feature you want to use, choose Hosting.
- You’ll be prompted to associate the current project directory with a Firebase project. Choose a Firebase project or create a new one.
- You’ll be prompted to type in the name of the folder you want to use as a public directory. This public directory is the folder (relative to your project directory) that will contain Hosting assets to be uploaded with firebase deploy. In this case, the name of the folder is
dist. - You’ll be prompted to choose whether to configure the project as a single-page app. Choose Y.
The initialization process should be completed and we can run the firebase deploy command now. When the deploy process is done, a live URL will be generated automatically by Firebase, in this case, hamilton-lyrics.firebaseapp.com. Firebase allows you to connect a domain to your Hosting instance so you can use a custom domain for your applications.
Conclusion
In this tutorial, we learnt how to deploy static pages to Firebase Hosting and making it realtime by using Pusher. We saw how to implement Pusher’s Presence Channels by using it to identify two different users online and then using it to build a multiplayer game. We also learnt how Client Events work, how to trigger events from the client side as opposed to triggering from a backend server.
Firebase offers a slew of services that can help you to build apps faster and you can read about them on the Firebase site.
If you want to go through the source code for the game above, you can do that on Github. You can also see the live demo at hamilton-lyrics.firebaseapp.com.


© 2024 Pusher Ltd. All rights reserved.
Pusher Limited is a company registered in England and Wales (No. 07489873) whose registered office is at MessageBird UK Limited, 3 More London Riverside, 4th Floor, London, United Kingdom, SE1 2AQ.