- Products

- Developers
- User stories
- Blog
- Pricing

Build a geofencing web app using Ember
Introduction
Introduction
A geofence is a virtual perimeter for a real-world geographic area. With a geofencing app, we can define a virtual boundary and be notified when users enter and exits the boundary.
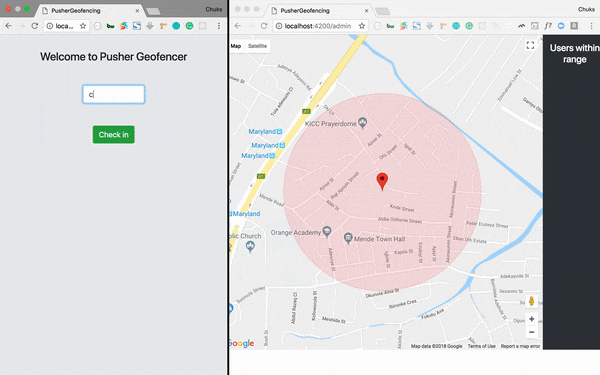
In this tutorial, we’ll be building a simple geofencing web application using Ember.js. Below is a sneak peek of what we’ll be building:
Prerequisites
To follow this tutorial, you need both Node and NPM installed on your machine. A basic JavaScript understanding will help you get the most out of this tutorial. If you don’t have Node.js installed, go to https://nodejs.org/ and install the recommended version for your operating system.
Installing Ember.js
Ember, like lots of frameworks out there offers a command line utility used to create, build, serve, and test Ember.js apps and addons. The Ember CLI helps us spin up Ember apps with a single command. Run the following command to install the Ember CLI on your machine:
$ npm install -g ember-cli
The command above installs the Ember CLI globally on your machine. Once it is done installing, run the following command to create a new Ember app and then move to this new directory:
1$ ember new pusher-geofencing 2 $ cd pusher-geofencing
Once in the pusher-geofencing directory, you can serve the app running the following command:
$ ember s
This command starts up Ember’s built-in “live-reloading” development server on port 4200. You can see the app in your browser by visiting http://localhost:4200.
Pusher account setup
Head over to Pusher and sign up for a free account.
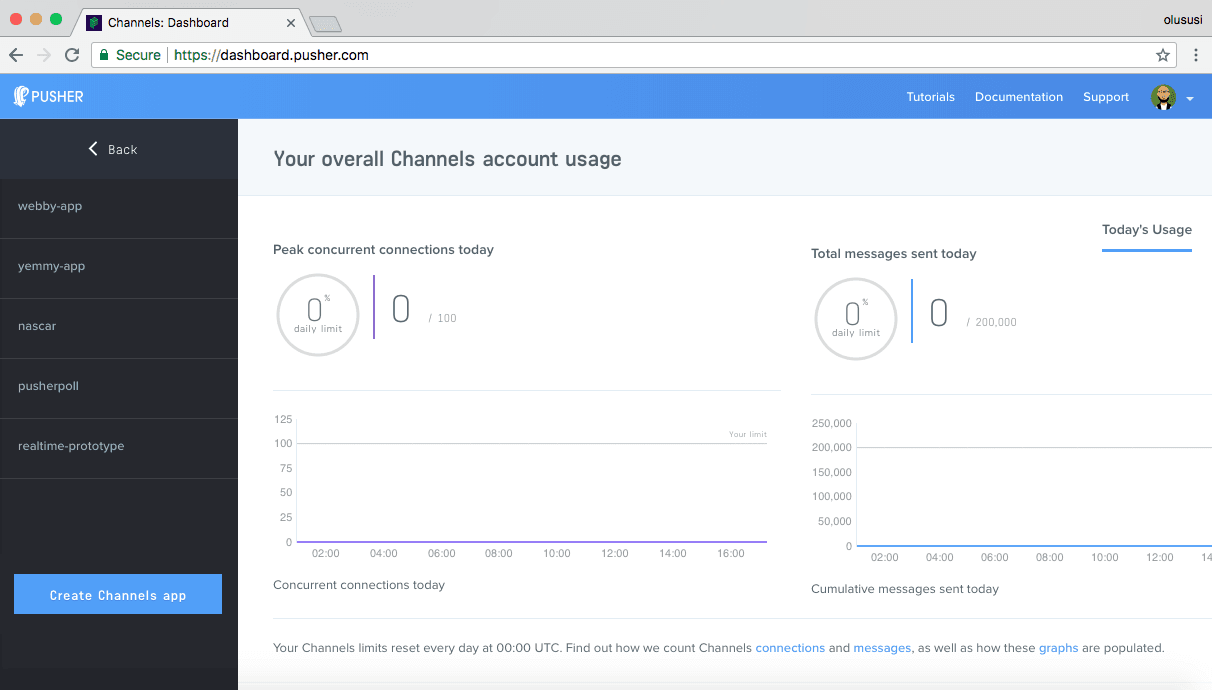
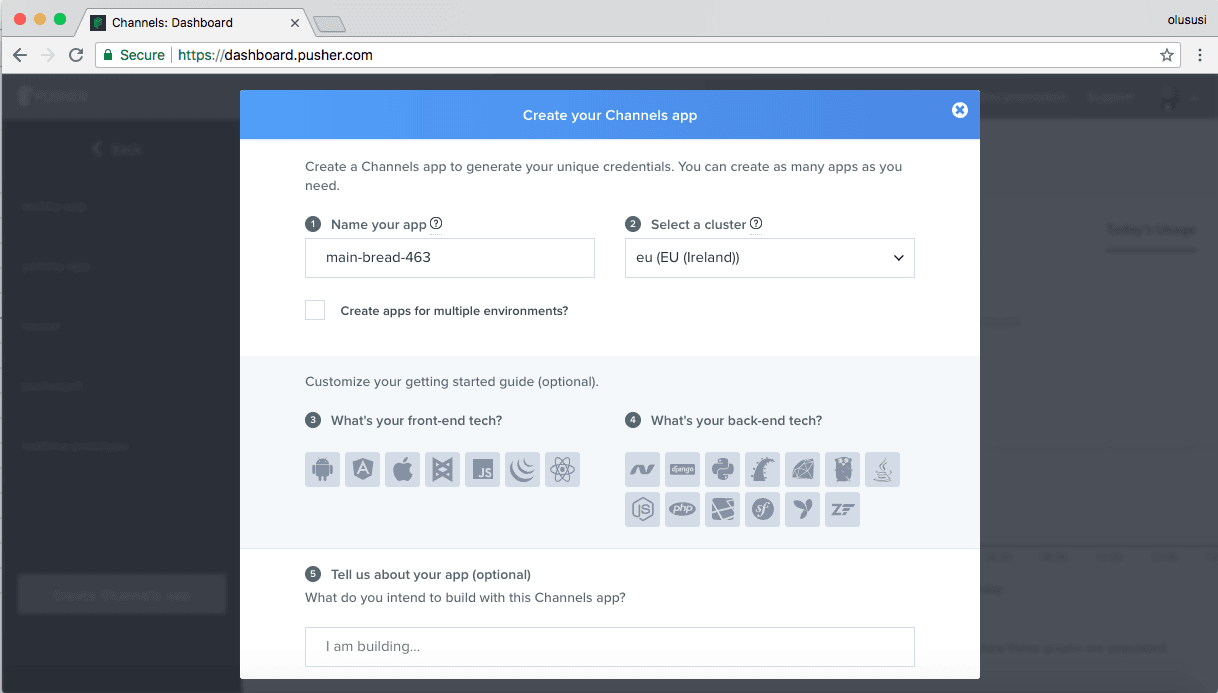
Create a new app by selecting Channels apps on the sidebar and clicking Create Channels app button on the bottom of the sidebar:
Configure an app by providing basic information requested in the form presented. You can also choose the environment you intend to integrate Pusher to be provided with some boilerplate code:
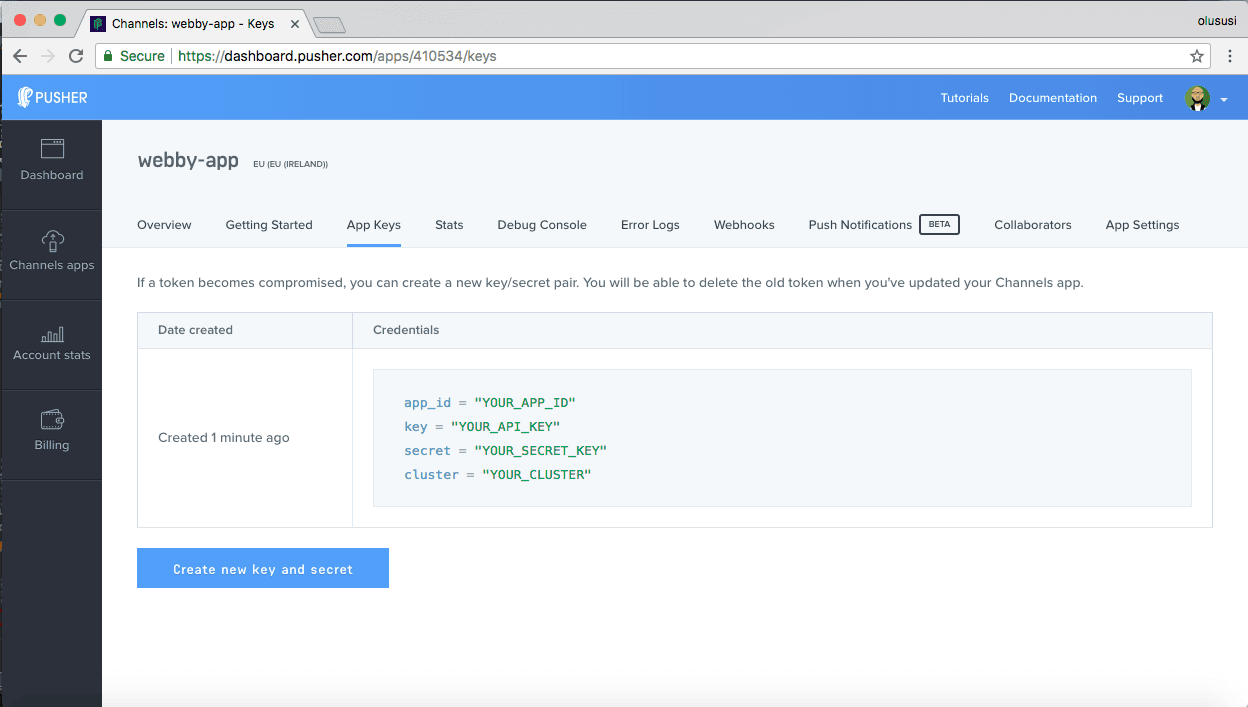
You can retrieve your keys from the App Keys tab:
Google Maps setup
To use the Maps JavaScript API, you must register your app on the Google API Console and get a Google API key, which will be loaded in the app. Follow this quick guide to register your Maps app and get your API credentials.
Application setup
Now that we have our Pusher and Google Maps app keys, let’s install some dependencies and addons. Run the following commands in your terminal:
1$ ember install ember-bootstrap ember-auto-import 2 $ npm install pusher pusher-js express body-parser dotenv uuid --save
Add the following styles to your app.css file:
1// app/styles/app.css 2 3 #map { 4 height: 42rem; 5 } 6 .jumbotron { 7 height: 100vh; 8 } 9 .available-user { 10 border-radius: 3px; 11 padding: 0 0 0 0.3rem; 12 background-color: #28a745; 13 margin-top: 0.3rem; 14 }
Let’s configure our Bootstrap addon to use Bootstrap 4. Run the following command in your terminal:
$ ember generate ember-bootstrap --bootstrap-version=4
With Bootstrap now set up, let’s replace the code in our application template with the following:
1{{!-- app/templates/application.hbs --}} 2 3 <div class="container-fluid p-0"> 4 {{outlet}} 5 </div>
Lastly, let’s add our Google Maps script to the index.html file. Ensure you replace YOUR_API_KEY with your Google Maps API key:
1<!-- app/index.html --> 2 3 <head> 4 ... 5 <script src="https://maps.googleapis.com/maps/api/js?key=YOUR_API_KEY&libraries=geometry"></script> 6 </head>
Building our server
Usually, your server should live separately from your Ember app, but for convenience sake, we are going to build our server as part of our Ember app.
In your root directory, create a node-server folder and create a server.js and .env file in that folder. Add the following code to each file:
1// node-server/server.js 2 3 const express = require('express'); 4 const bodyParser = require('body-parser'); 5 const Pusher = require('pusher'); 6 const uuid = require('uuid').v4; 7 require('dotenv').config() 8 9 const app = express(); 10 app.use(bodyParser.json()); 11 app.use(bodyParser.urlencoded({ extended: false })); 12 13 // enable cross-origin resource sharing 14 app.use(function (req, res, next) { 15 res.header("Access-Control-Allow-Origin", "*"); 16 res.header("Access-Control-Allow-Headers", "Origin, X-Requested-With, Content-Type, Accept"); 17 next(); 18 }); 19 20 const pusher = new Pusher({ // connect to Pusher 21 appId: process.env.PUSHER_APP_ID, 22 key: process.env.PUSHER_APP_KEY, 23 secret: process.env.PUSHER_APP_SECRET, 24 cluster: process.env.PUSHER_APP_CLUSTER, 25 }); 26 27 app.get('/', function (req, res) { // to test if the server is running 28 res.send({ success: true, message: 'server is online' }); 29 }); 30 31 app.post('/check-in', function (req, res) { // route to send user information to Pusher 32 let { lat, lng, name, userId } = req.body; 33 if (lat && lng && name) { 34 if (userId.length == 0) { 35 userId = uuid(); 36 } 37 const location = { lat, lng, name, userId }; 38 pusher.trigger('location', 'checkin', { location }); 39 res.send({ success: true, userId }) 40 } else { 41 res.status(400).send({ success: false, message: 'text not broadcasted' }) 42 } 43 }); 44 45 const port = process.env.PORT || 5000; 46 app.listen(port, () => { 47 console.log(`server running on port ${port}`); 48 });
1// node-server/.env 2 3 // add your Pusher credentials here 4 PUSHER_APP_ID="YOUR APP ID" 5 PUSHER_APP_KEY="YOUR APP KEY" 6 PUSHER_APP_SECRET="YOUR APP SECRET" 7 PUSHER_APP_CLUSTER="YOUR APP CLUSTER"
In the server.js file, we created a simple server with a /check-in route which sends user location data via a location channel to Pusher.
To run this server, open the root directory of the project in a new terminal window, and run the following command:
1$ cd node-server 2 $ node server.js
If you’re using version control, remember to ignore your .env file.
Creating the home view
Our geofencing app will have two basic pages: one for users to check in and the other for the admin to view users within range.
In Ember, when we want to make a new page that can be visited using a URL, we generate a "route" using Ember CLI. To generate an index route, run the following command in your terminal:
$ ember g route index
The above command generates three files:
- A route handler, located in
app/routes/index.js, which sets up what should happen when that route is loaded. - A route template, located in
app/``templates``/index.hbs, which is where we display the actual content for the page. - Lastly, a route test file located in
tests/unit/routes/about-test.js, which is used to test the route.
In the index template, add the following code:
1{{!-- app/templates/index.hbs --}} 2 3 {{index-view}}
In the index template, we’re simply rendering the index-view component which we’ll create next. The index-view component will contain the code for the home view. Go ahead and run the following command in your terminal to create the index-view component:
$ ember g component index-view
As with generating a route, the command above generates a template file, a JavaScript component source file and a file for testing the component. Note that every Ember controller name must be separated by a hyphen.
Add the following code the component’s template file:
1{{!-- app/templates/components/index-view.hbs --}} 2 3 <div class="jumbotron jumbotron-fluid text-center align-middle"> 4 {{#if isCheckedIn}}{{!-- run this block if the user is checked in --}} 5 <h4>You're checked in</h4> 6 {{else}} {{!-- run this block if the user is not checked in --}} 7 <h4>Welcome to Pusher Geofencer</h4> 8 <div class="col-4 mt-5 offset-4"> 9 {{input value=name class="form-control" placeholder="Enter your name" autofocus=true}} 10 <button{{action "checkin"}} class="btn btn-success mt-5">Check in</button> 11 </div> 12 {{/if}} 13 </div>
In the code we added above, we have a handlebars conditional statement. If the user isCheckedInwe display some text. When they’re not checked in, we display an input field and a button that triggers the checkin action in the component JavaScript source file when clicked.
Let’s add the functionality in the component’s JavaScript source file:
1// app/components/index-view.js 2 3 import Component from '@ember/component'; 4 import { run } from '@ember/runloop'; 5 import $ from 'jquery'; 6 7 export default Component.extend({ 8 name: '', // user's name 9 isCheckedIn: false, // check if the user is checked in 10 userId: '', // user's userId 11 // component actions 12 actions: { 13 // action that is run when the button is clicked 14 checkin() { 15 if (this.name.length > 0) { // if there is a name 16 if ('geolocation' in navigator) { 17 navigator.geolocation.watchPosition((position) => { // get user location 18 const { latitude, longitude } = position.coords; 19 const userDetail = { lat: latitude, lng: longitude, name: this.name, userId: this.userId }; 20 $.ajax({ // send user data via an AJAX call 21 url: 'http://localhost:5000/check-in', 22 type: 'post', 23 data: userDetail 24 }).then(response => { 25 run(() => { 26 this.set('userId', response.userId); 27 }); 28 }) 29 }, null, { enableHighAccuracy: true }); 30 this.set('isCheckedIn', true); // set isCheckedIn to true 31 } 32 } else { 33 alert('Enter a name') // if there's no name show this alert 34 } 35 } 36 } 37 });
In the code above, we have a checkin action which is called when the check in button is clicked. The action gets the user’s location using the Geolocation API’s watchPosition method and sends it together with the user’s name to the server.
If you visit the app in the browser, you should be able to enter a name and check in after granting location permission.
Creating the admin view
Now that our users can check in and their location is being broadcast by Pusher on the server, it’s time for us to render our map and display the users that are within our range.
Let’s create our admin route and a display-maps component. Run the following code in your terminal:
1$ ember g route admin 2 $ ember g component display-maps
Let’s render the display-maps component in the admin template file:
1{{!-- app/templates/admin.hbs --}} 2 3 {{display-maps}}
We’ll also add our admin view markup to the display-maps component
1{{!-- app/templates/components/display-maps.hbs --}} 2 3 <div class="row"> 4 <div class="col-10 p-0"> 5 <div id="map"></div> 6 </div> 7 <div class="col-2 bg-dark"> 8 <h5 class="text-center py-3 text-white">Users within range</h5> 9 <div class="users"></div> 10 </div> 11 </div>
Next, we’ll generate a service for implementing our map. A service is an Ember object that lives for the duration of the application and can be made available in different parts of your application. It helps us abstract the logic for creating and updating our map and is a singleton, which means there is only one instance of the service object in the browser. To create a maps service, run the following command in your terminal:
$ ember g service maps
Add the following code to the generated maps.js file:
1// app/services/maps.js 2 3 import Service from '@ember/service'; 4 import $ from 'jquery'; 5 6 const google = window.google; 7 let targetLocation; 8 const rangeRadius = 500; 9 10 export default Service.extend({ 11 12 // function to create admin's map 13 createAdminMap(adminLocation) { 14 targetLocation = adminLocation; 15 this.createMapElement([]) // call the create map function passing empty user locations 16 }, 17 18 // function to create our map 19 createMapElement(usersLocation) { 20 const element = document.querySelector('#map'); 21 let map = new google.maps.Map(element, { zoom: 16, center: targetLocation }); // generate a map 22 // The marker, positioned at center 23 this.addMarker(targetLocation, map) // add marker fot the target location 24 usersLocation.forEach(location => { // loop through the location of available users 25 // add markers for other available users to the map 26 this.addMarker(location, map, true) 27 }) 28 29 new google.maps.Circle({ // add the circle on the map 30 strokeColor: '#FF0000', 31 strokeOpacity: 0.2, 32 strokeWeight: 1, 33 fillColor: '#FF0000', 34 fillOpacity: 0.1, 35 map: map, 36 center: targetLocation, 37 radius: rangeRadius 38 }); 39 }, 40 41 // function to add a marker on the map 42 addMarker(userLocation, map, icon = false) { 43 if (icon) { 44 icon = 'http://maps.google.com/mapfiles/ms/icons/green-dot.png' 45 } else { 46 icon = "" 47 } 48 49 let parsedUserLocation = { 50 lat: parseFloat(userLocation.lat), // parse the location string to a float 51 lng: parseFloat(userLocation.lng), 52 name: userLocation.name, 53 userId: userLocation.userId 54 } 55 56 new google.maps.Marker({ position: parsedUserLocation, map, icon }); 57 this.addUserWithinRange(parsedUserLocation); // add users to the sidebar 58 }, 59 60 // function to add/remove users within range 61 addUserWithinRange(userLocation) { 62 if (userLocation.name) { 63 let userDistance = this.locationDistance(userLocation); // check the distance between the user and the target location 64 let existingUser = $('div').find(`[data-id="${userLocation.userId}"]`); // find the user on the page via the data-id attribute 65 if (userDistance < rangeRadius) { // if the user is within the range 66 if (!existingUser[0]) { // if the user is not already displayed on the page 67 let div = document.createElement('div'); // create a div element 68 div.className = 'available-user'; 69 div.dataset.id = userLocation.userId; 70 let span = document.createElement('span'); // create a span element 71 span.className = 'text-white'; 72 let username = `@${userLocation.name}` 73 span.append(username); 74 div.append(span); 75 const usersDiv = document.querySelector('.users'); 76 usersDiv.append(div); // add the user to the page 77 } 78 } else { 79 existingUser.remove(); // remove the user from the page is they're out of range 80 } 81 } 82 }, 83 84 // function to calculate the distance between our target location and the user's location 85 locationDistance(userLocation) { 86 const point1 = new google.maps.LatLng(targetLocation.lat, targetLocation.lng); 87 const point2 = new google.maps.LatLng(userLocation.lat, userLocation.lng); 88 const distance = google.maps.geometry.spherical.computeDistanceBetween(point1, point2); 89 return distance; 90 } 91 });
In our maps service, we have four functions:
- The
createAdminMapfunction for creating the map showing the target location - The
createMapElementfunction for creating our map. - The
addMarkerfunction for adding markers to our map. - The
addUserWithinRangefunction for adding and removing users from the sidebar on the admin page. - The
locationDistancefunction for calculating if the user is within our target range.
In the createAdminMap function, we accept our admin’s location and call the createMapElement function. The createMapElement function generates a map using the Google Maps Map object and insert it to the div with the ID of map on our page. The function also accepts an array of users location and for each user, we add a marker for their location on the map.
The locationDistance function calculates the difference between the user’s location and the target location and passes the data to the adUserWithinRange function which either adds or removes the user’s name from the page based on whether or not they’re within range.
Now that we’ve written the code for building with our map, let’s use it in the display-maps component:
1// app/components/display-maps.js 2 3 import Component from '@ember/component'; 4 import { inject as service } from '@ember/service'; 5 import Pusher from 'pusher-js'; 6 7 export default Component.extend({ 8 allUsers: [].map(user => { // all users array 9 return user; 10 }), 11 maps: service('maps'), 12 13 init() { 14 this._super(...arguments); 15 let pusher = new Pusher('YOUR_APP_KEY', { // instantiate new Pusher client 16 cluster: 'CLUSTER', 17 encrypted: true 18 }); 19 let users = this.get('allUsers'); // save the allUsers array to a variable 20 const channel = pusher.subscribe('location'); // subscribe Pusher client to location channel 21 channel.bind('checkin', data => { 22 if (users.length == 0) { // if the allUsers array is empty 23 users.pushObject(data.location) // add new data to users array 24 } else { // if the allUsers array is not empty 25 // check if user already exists before pushing 26 const userIndex = this.userExists(users, data.location, 0) 27 if (userIndex === false) { // if user was not found, means its a new user 28 users.pushObject(data.location) // push the users info to the allUsers array 29 } else { 30 // replace the users previous object with new one if they exists 31 users[userIndex] = data.location; 32 } 33 } 34 this.get('maps').createMapElement(users); // create the map 35 }); 36 }, 37 38 // Ember's didInsertElement life cycle hook 39 didInsertElement() { 40 this._super(...arguments); 41 this.getAdminLocation(); // get the admins location 42 }, 43 44 // recursive function to check if a user already exixts 45 userExists(users, user, index) { 46 if (index == users.length) { 47 return false; 48 } 49 if (users[index].userId === user.userId) { 50 return index; 51 } else { 52 return this.userExists(users, user, index + 1); 53 } 54 }, 55 56 // function to get admin's location 57 getAdminLocation() { 58 if ('geolocation' in navigator) { 59 navigator.geolocation.getCurrentPosition((position) => { // get admin's location 60 const { latitude, longitude } = position.coords; 61 const adminLocation = { lat: latitude, lng: longitude }; 62 this.get('maps').createAdminMap(adminLocation); // call the createAdmin map from our service 63 }, null, { enableHighAccuracy: true }); 64 } 65 } 66 });
In the code snippet above, we have an array of allUsers and we inject our maps service into the component by calling maps: service('maps'). In the didInsertElement lifecycle hook, we call the getAdminLocation function which gets the admin’s location and calls the createAdminMap from our map service to create the admin’s map showing the target location.
In the init function which is called when the component is initialized, we create our Pusher client and subscribe it to the location channel.
When there is a new checkin event, we call the userExists function to see if the user already exists in our allUsers array. We then add or update the user’s info based on whether or not they exist in the allUsers array. After all this is done, we call the createMapElement from our maps service and pass it our array of users to be rendered on the page. Remember to add your Pusher key and cluster.
Bringing it all together
At this point, restart your development server, ensure your Node server is running and open the admin view(http://localhost:4200/admin) in a second tab. Enter a name in the home view then check in, you should see your name popup with your location showing on the map.
Conclusion
In this post, we have successfully created a realtime geofencing application in Ember. I hope you found this tutorial helpful and would love to apply the knowledge gained here to easily set up your own application using Pusher in an Ember application. You can find the source code for the demo app on GitHub.


© 2024 Pusher Ltd. All rights reserved.
Pusher Limited is a company registered in England and Wales (No. 07489873) whose registered office is at MessageBird UK Limited, 3 More London Riverside, 4th Floor, London, United Kingdom, SE1 2AQ.