- Products

- Developers
- User stories
- Blog
- Pricing

Build a group chat app using Laravel
- Introduction
- Setup an app on Pusher
- Install Laravel, Pusher SDK and Echo
- Configuration
- Our application
- Migrations
- Creating a new group
- Broadcasting the new group
- broadcastOn method
- Authorization
- Listening for new group chats
- Recording new messages
- Broadcasting messages
- broadcastOn method
- Authorization
- Listening to new messages
- Conclusion
Introduction
Socializing with other users has been a trend for past few years and it is definitely not going away. Having a public chat feature where users can communicate within a group or among their friends is a great add-on to many applications.
Today, we will create a realtime Group Chat Application using Laravel and Pusher. With the release of Echo, Laravel has provided an out of the box solution for implementing a realtime chat application using event broadcasting. It is quite simple to get started in a matter of few minutes.
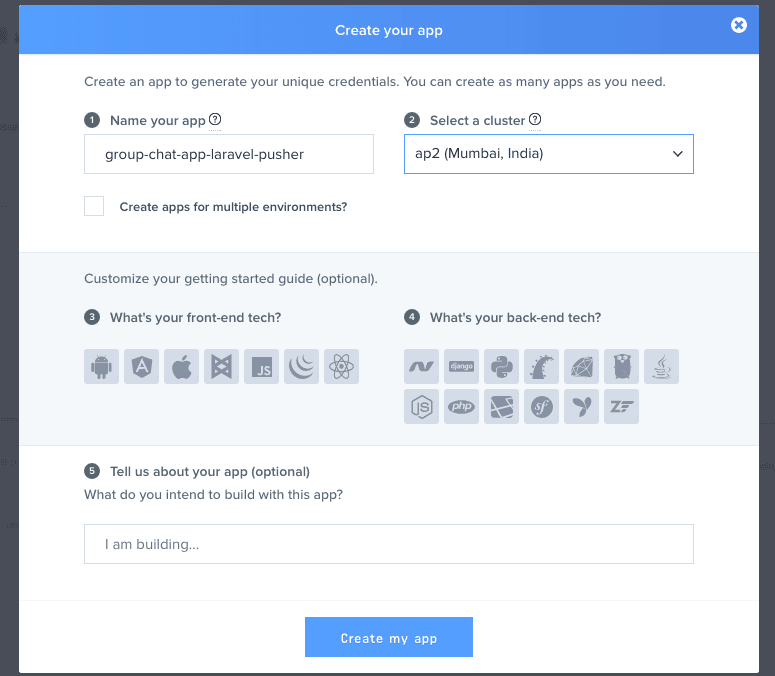
Setup an app on Pusher
We need to sign up on Pusher and create a new app.
Install Laravel, Pusher SDK and Echo
First, we will grab a fresh copy of Laravel:
laravel new group-chat-app-pusher-laravel
This will install the latest version of the Laravel framework and download the necessary dependencies. Next, we will install the Pusher PHP SDK using Composer:
composer require pusher/pusher-php-server
Next, we will install the JavaScript dependencies:
npm install
Now, we need to install two JavaScript libraries necessary for realtime event broadcasting: Laravel Echo and Pusher JS:
npm install --save laravel-echo pusher-js
Configuration
First, we need to set the APP_ID, APP_KEY, APP_SECRET and APP_CLUSTER in the environment file. We can get these details in our Pusher app dashboard:
1# .env 2 3 BROADCAST_DRIVER=pusher 4 5 PUSHER_APP_ID=your-pusher-app-id 6 PUSHER_APP_KEY=your-pusher-app-key 7 PUSHER_APP_SECRET=your-pusher-app-secret 8 PUSHER_APP_CLUSTER=your-pusher-app-cluster
Next, we need to create a fresh Echo instance in our application's JavaScript. We can do this at the bottom of our resources/assets/js/bootstrap.js file:
1import Echo from "laravel-echo" 2 window.Pusher = require('pusher-js'); 3 4 window.Echo = new Echo({ 5 broadcaster: 'pusher', 6 key: 'your-pusher-app-key', 7 cluster: 'your-pusher-app-cluster', 8 encrypted: true 9 });
Our application
We will implement a feature where multiple users can chat with each other in a single chat box. The code is available on a Github repository for cloning and understanding purposes.
Migrations
Next, we need a conversations, groups and group_users table to record all the messages sent by a user in a particular group. Let us create the models and migrations:
1php artisan make:model Conversation -m 2 php artisan make:model Group -m 3 php artisan make:migration create_group_user_table --create=group_user
The groups table will require the following field:
- A field to store the name of the group
Below is our migration file for the groups table:
1use Illuminate\Support\Facades\Schema; 2 use Illuminate\Database\Schema\Blueprint; 3 use Illuminate\Database\Migrations\Migration; 4 5 class CreateGroupsTable extends Migration 6 { 7 /** 8 * Run the migrations. 9 * 10 * @return void 11 */ 12 public function up() 13 { 14 Schema::create('groups', function (Blueprint $table) { 15 $table->increments('id'); 16 $table->string('name'); 17 $table->timestamps(); 18 }); 19 } 20 21 /** 22 * Reverse the migrations. 23 * 24 * @return void 25 */ 26 public function down() 27 { 28 Schema::dropIfExists('groups'); 29 } 30 }
Next, the migration file for group_user table will be as follows:
1use Illuminate\Support\Facades\Schema; 2 use Illuminate\Database\Schema\Blueprint; 3 use Illuminate\Database\Migrations\Migration; 4 5 class CreateGroupUserTable extends Migration 6 { 7 /** 8 * Run the migrations. 9 * 10 * @return void 11 */ 12 public function up() 13 { 14 Schema::create('group_user', function (Blueprint $table) { 15 $table->increments('id'); 16 $table->unsignedInteger('group_id'); 17 $table->unsignedInteger('user_id'); 18 $table->timestamps(); 19 }); 20 } 21 22 /** 23 * Reverse the migrations. 24 * 25 * @return void 26 */ 27 public function down() 28 { 29 Schema::dropIfExists('group_user'); 30 } 31 }
Lastly, the conversations table will require the following fields:
- A field to store the body of each message
- A field to store the ID of the user who sent the message
- A field to store the ID of the group where the message is being sent
Below is our migration file for the conversations table:
1use Illuminate\Support\Facades\Schema; 2 use Illuminate\Database\Schema\Blueprint; 3 use Illuminate\Database\Migrations\Migration; 4 5 class CreateConversationsTable extends Migration 6 { 7 /** 8 * Run the migrations. 9 * 10 * @return void 11 */ 12 public function up() 13 { 14 Schema::create('conversations', function (Blueprint $table) { 15 $table->increments('id'); 16 $table->text('message')->nullable(); 17 $table->unsignedInteger('user_id'); 18 $table->unsignedInteger('group_id'); 19 $table->timestamps(); 20 }); 21 } 22 23 /** 24 * Reverse the migrations. 25 * 26 * @return void 27 */ 28 public function down() 29 { 30 Schema::dropIfExists('conversations'); 31 } 32 }
Creating a new group
Before a user can start chatting with their friends, they need to create a group and add users to it.
First, we will create a GroupController:
php artisan make:controller GroupController
Next, we will record the group entry into the groups table and attach the users belonging to that group in the group_user table:
1# routes/web.php 2 3 Route::resource('groups', 'GroupController'); 4 5 # GroupController.php 6 7 public function store() 8 { 9 $group = Group::create(['name' => request('name')]); 10 11 $users = collect(request('users')); 12 $users->push(auth()->user()->id); 13 14 $group->users()->attach($users); 15 16 return $group; 17 }
Broadcasting the new group
Whenever a new group is created, the users in the group should get the chat popup in realtime.
We need to fire an event which will be broadcast over Pusher to the users belonging to the group. For broadcasting an event, it should implement the ShouldBroadcast interface. Let us first create the GroupCreated event:
php artisan make:event GroupCreated
broadcastOn method
The event should implement a broadcastOn method. This method should return the channels to which the event will be broadcast.
We created a closed group specific to some particular users. Thus, the event should be broadcast only to those users who are present in the group. We can achieve this as follows:
1public function broadcastOn() 2 { 3 $channels = []; 4 5 foreach ($this->group->users as $user) { 6 array_push($channels, new PrivateChannel('users.' . $user->id)); 7 } 8 9 return $channels; 10 }
Now, we need to start our queue to actually listen for jobs and broadcast any events that are recorded. We can use the database queue listener on our local environment:
php artisan queue:listen
Next, we need to broadcast this event to other users in the same group. Let us use the broadcast helper provided by Laravel to fire the event whenever a new group is created:
1public function store() 2 { 3 $group = Group::create(['name' => request('name')]); 4 5 $users = collect(request('users')); 6 $users->push(auth()->user()->id); 7 8 $group->users()->attach($users); 9 10 broadcast(new GroupCreated($group))->toOthers(); 11 12 return $group; 13 }
Authorization
As we are listening on a private channel, we need to authenticate that the currently logged in user is able to listen on this private channel. Laravel Echo will automatically call the necessary authorization routes if we are listening to a private channel. But, we need to write the authentication logic which will actually authorize the user.
Authorization logic is written in the routes/channels.php
1Broadcast::channel('users.{id}', function ($user, $id) { 2 return (int) $user->id === (int) $id; 3 });
Listening for new group chats
Installation and configuration of Laravel Echo is a must before we can start listening to new events. We have covered the process in detail in the above section of this article. Please go through it if you might have skipped it.
We can listen to new messages on a private channel using Echo.private(channel):
1# Groups.vue 2 3 listenForNewGroups() { 4 Echo.private('users.' + this.user.id) 5 .listen('GroupCreated', (e) => { 6 this.groups.push(e.group); 7 }); 8 }
Now, whenever a new group is created, it is broadcast over Pusher only to the specific group members. Next, we listen to the private channel and push the new groups to our group’s array in our Vue component.
Recording new messages
Once a user has access to the group, they can communicate with the other users in the same group by exchanging messages in a single chat window.
First, we will create a ConversationController:
php artisan make:controller ConversationController
Next, we will record each message entry into the database.
1# routes/web.php 2 3 Route::resource('conversations', 'ConversationController'); 4 5 # ConversationController.php 6 7 public function store() 8 { 9 $conversation = Conversation::create([ 10 'message' => request('message'), 11 'group_id' => request('group_id'), 12 'user_id' => auth()->user()->id, 13 ]); 14 15 return $conversation->load('user'); 16 }
Broadcasting messages
Whenever a new message is recorded, we need to fire an event which will be broadcast over Pusher. For broadcasting an event, it should implement the ShouldBroadcast interface. Let us first create the NewMessage event:
php artisan make:event NewMessage
broadcastOn method
The event should implement a broadcastOn method. This method should return the channels to which the event will be broadcast.
Our chat is not public and hence, we will broadcast the messages only to the group’s private channel:
1public function broadcastOn() 2 { 3 return new PrivateChannel('groups.' . $this->conversation->group->id); 4 }
Now, we need to start our queue to actually listen for jobs and broadcast any events that are recorded. We can use the database queue listener on our local environment:
php artisan queue:listen
Next, we need to broadcast this event to other users on the same group channel. Let us use the broadcast helper provided by Laravel to fire the event whenever a new message is recorded:
1public function store() 2 { 3 $conversation = Conversation::create([ 4 'message' => request('message'), 5 'group_id' => request('group_id'), 6 'user_id' => auth()->user()->id, 7 ]); 8 9 $conversation->load('user'); 10 11 broadcast(new NewMessage($conversation))->toOthers(); 12 13 return $conversation->load('user'); 14 }
Authorization
Authorization logic for chat channels is written in the routes/channels.php
1Broadcast::channel('groups.{group}', function ($user, Group $group) { 2 return $group->hasUser($user->id); 3 });
Listening to new messages
Being a private group chat application, we can listen to new messages on a private channel using Echo.private(channel):
1listenForNewMessage() { 2 Echo.private('groups.' + this.group.id) 3 .listen('NewMessage', (e) => { 4 this.conversations.push(e); 5 }); 6 }
Now, whenever a new message is recorded, it is broadcast over Pusher. Next, we listen to that channel and push the new conversations to our conversations array in our Vue component.
Below is the JavaScript part of our component written using Vue.js
1<script> 2 export default { 3 props: ['group'], 4 5 data() { 6 return { 7 conversations: [], 8 message: '', 9 group_id: this.group.id 10 } 11 }, 12 13 mounted() { 14 this.listenForNewMessage(); 15 }, 16 17 methods: { 18 store() { 19 axios.post('/conversations', {message: this.message, group_id: this.group.id}) 20 .then((response) => { 21 this.message = ''; 22 this.conversations.push(response.data); 23 }); 24 }, 25 26 listenForNewMessage() { 27 Echo.private('groups.' + this.group.id) 28 .listen('NewMessage', (e) => { 29 // console.log(e); 30 this.conversations.push(e); 31 }); 32 } 33 } 34 } 35 </script>
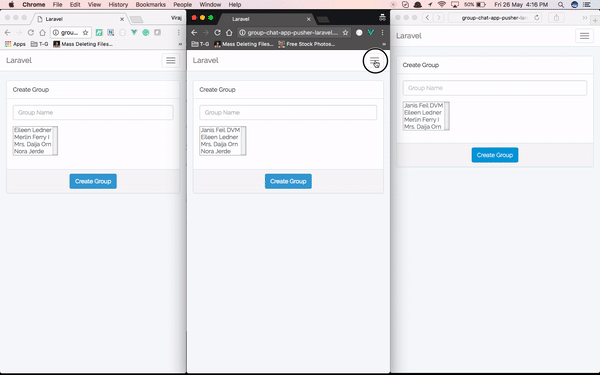
Below is the demonstration of our whole functionality of creating new groups and chatting with the members.
Conclusion
In this article, we have demonstrated how to create a group chat application. We have covered the configuration options necessary to get started, and the examples above should help you fill in the gaps and give an overview of some of the other configuration options available to you.
The code is hosted on a public Github repository. You can download it for educational purposes. How do you use Laravel and Pusher for chat applications? Can you think of any advanced use cases for this library? What are they? Let us know in the comments!


© 2024 Pusher Ltd. All rights reserved.
Pusher Limited is a company registered in England and Wales (No. 07489873) whose registered office is at MessageBird UK Limited, 3 More London Riverside, 4th Floor, London, United Kingdom, SE1 2AQ.