- Products

- Developers
- User stories
- Blog
- Pricing

Build an iOS chat app using Swift and Chatkit - Part 1: Architecture and prototyping
Introduction
IMPORTANT: ChatKit has been retired from the Pusher product stack as of April, 2020. This tutorial will no longer be functional in its current version. Explore our other Pusher tutorials to find out how Channels and Beams can help you build.
Chat applications are an integral part of many applications. They let users send instant messages and have conversations on the fly. They are sometimes integrated into existing services as a way to provide live support like Zendesk, and other times they are standalone apps like Messenger.
In this article, we will explore how we can create a chatroom for iOS using Swift and Chatkit. Chatkit helps developers integrate chat into any application and offer realtime engagement with users. With Chatkit, you can set up your own realtime chat system with a simple SDK.
The article will be split in four parts. Each part focuses on an aspect of building the chat application. After completing all four parts, we will have a functioning chat application built from scratch using Swift.
To give you an idea of what to expect, here are the four parts:
- Architecture and prototyping (current). In this part, we will focus heavily on architecture. We will be explaining the Clean Swift Architecture and how it fits into our current application. We will talk about how to modularize various parts of our application. We will also do some prototyping using Marvel which will give us an idea of what we want to build before coding.
- Creating our Chat API backend. In this part, we will create the application’s backend using Laravel. We will be using Laravel Passport to implement an OAuth server and authentication. We will also directly test the endpoints using Postman to make sure they work.
- Creating the iOS chat application. In this part, we will create the application using the Clean Swift architecture to create our chat room. We will see some ways we can use Workers, Interactors, Presenters, Protocols and more in our application.
- Adding message delivery, user presence and typing indicators. In this part, we will focus on how to add support for who’s typing, message delivery, and user presence functionality. This will make the experience of our chat application realtime.
When we are done, we will have an application that works like this:
Let us begin with the first part: Architecture and prototyping.
Requirements
To follow along in all parts of this article, you will need the following:
- Xcode installed on your machine.
- Cocoapods installed on your machine.
- Some knowledge of using Xcode and the Swift programming language.
- Clean Swift Xcode templates. Get them here.
- Knowledge of PHP and Laravel.
- PHP >= 7.0.0 installed locally.
- The latest version of Laravel CLI installed locally.
- A Chatkit instance.
If you have all the requirements above then let’s proceed.
Introduction to Clean Swift Architecture
When developing applications in Xcode, it is very easy to just create Storyboards, Controllers, and Views. However, as the project gets bigger, it can get really messy. With the traditional method of development, once you have a lot of files, it will get increasingly tedious maintaining the project.
There are many architectural practices like MVC that were created to solve the problem of organizing large projects, however, they can sometimes break down and be difficult to maintain.
The problems usually start with having very bulky controllers. When writing controllers, we often add many layers of logic that perhaps should not have been included in the controller. Now with bigger projects come bigger controllers. Debugging becomes a nightmare instantly.
Clean Swift Architecture solves this problem by splitting our project into smaller bits and pieces. Each piece has a single responsibility. We will be explaining the architecture in the context of this application so it might be best if you read this article for a better understanding of the pattern.
For now, we will prototype the application and come back to the architecture later.
Prototyping our chat application
Before we start anything, let us create a prototype of our application. We will design a simple layout for our application. This will help us visualise and plan the application long before we write the code to manage it.
There are many tools out there that help you create prototypes for your application. We will be using Marvel. You may also wish to go the traditional route using just paper and a pen. Either way, prototyping is essential to your development process.
Go to Marvel and create a new account. Then click on create a new project:
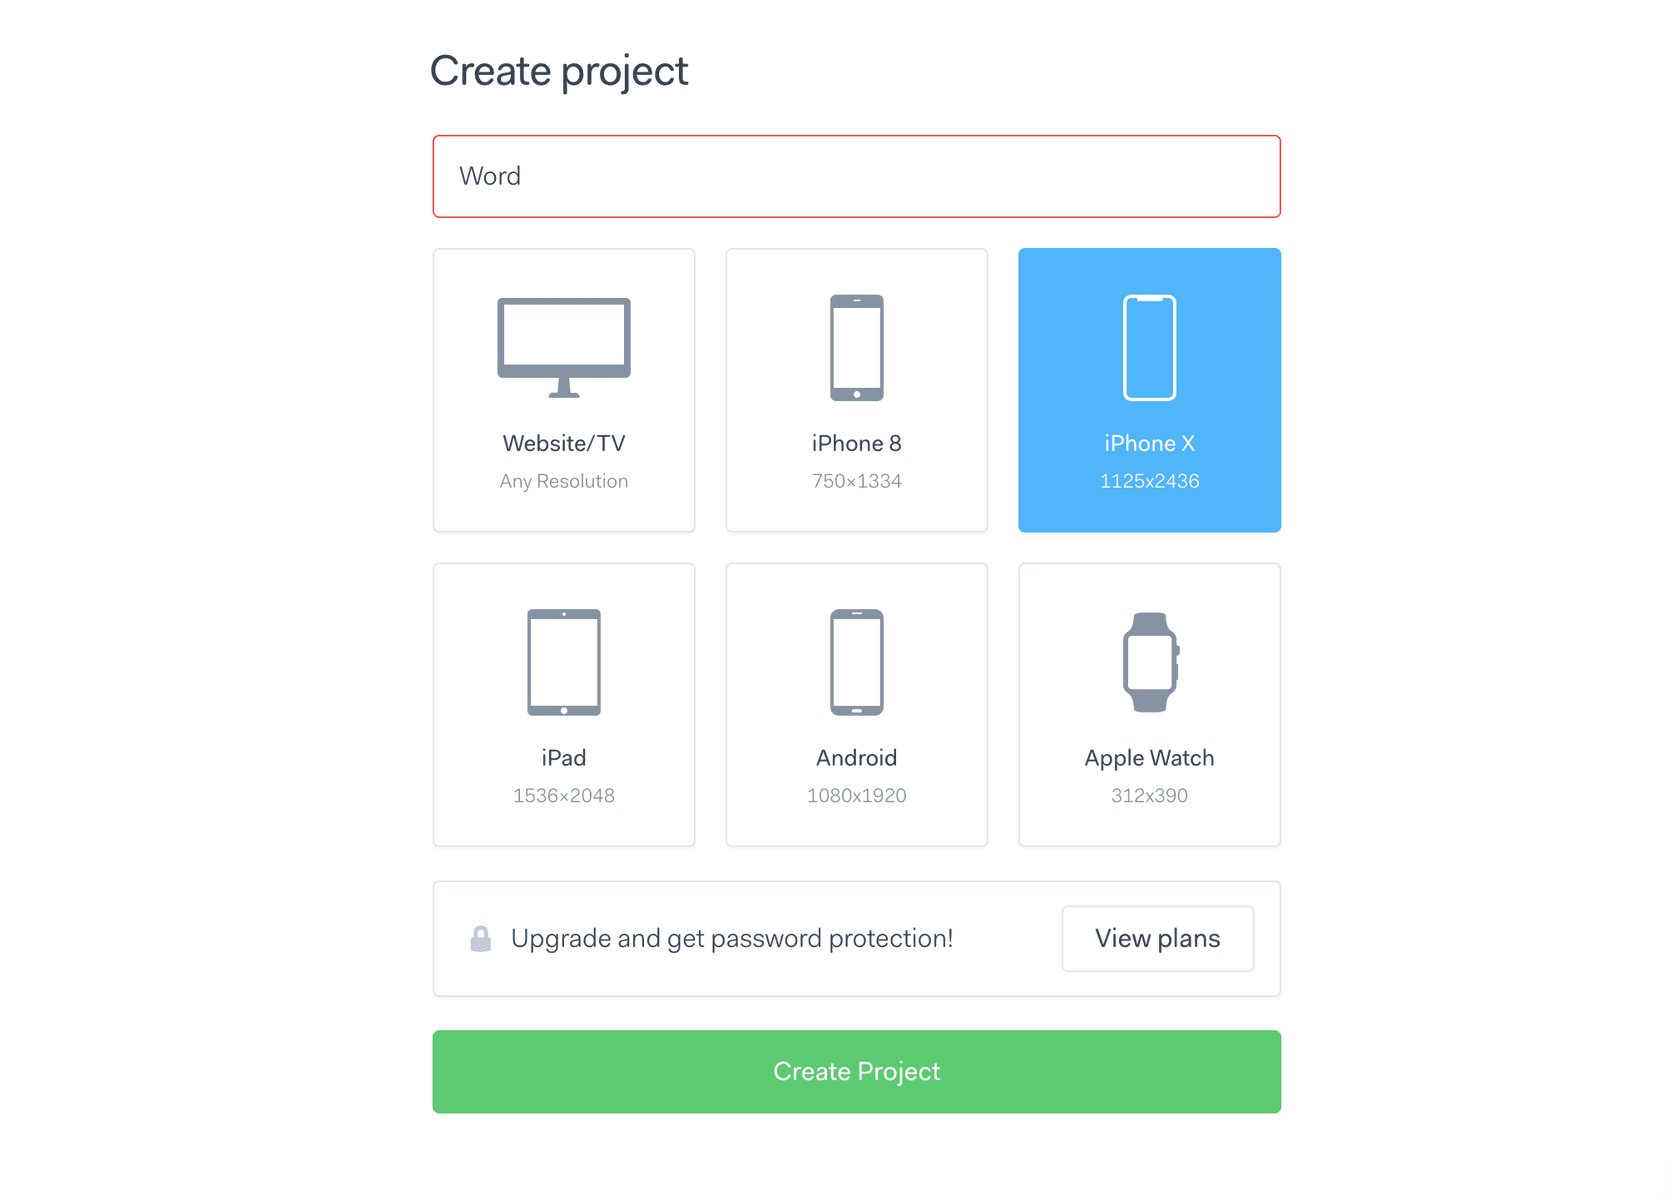
Enter the name of the project, select the device to prototype for, in our case, “iPhone 8” or the “iPhone X”, then click on Create Project.
On the project dashboard, click on Design:
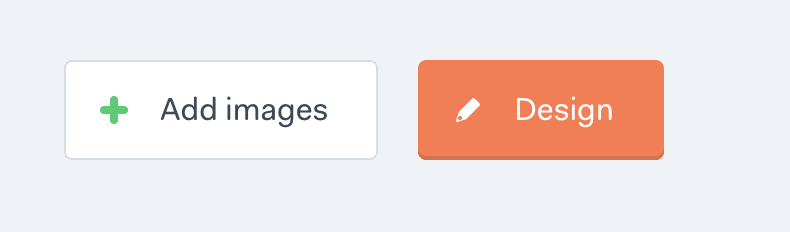
This will bring up an empty canvas that we will use to design the first screen. For each screen, we will follow the same process of clicking Design from the dashboard.
On the screen you will have many tools to design with. These tools will help you generally get what you want to design for your application. We won’t go overly in depth on how to use the tool in this article, however, you can view all the pages designed here.
After playing around with the Marvel app, we have been able to come up with a prototype for our application:
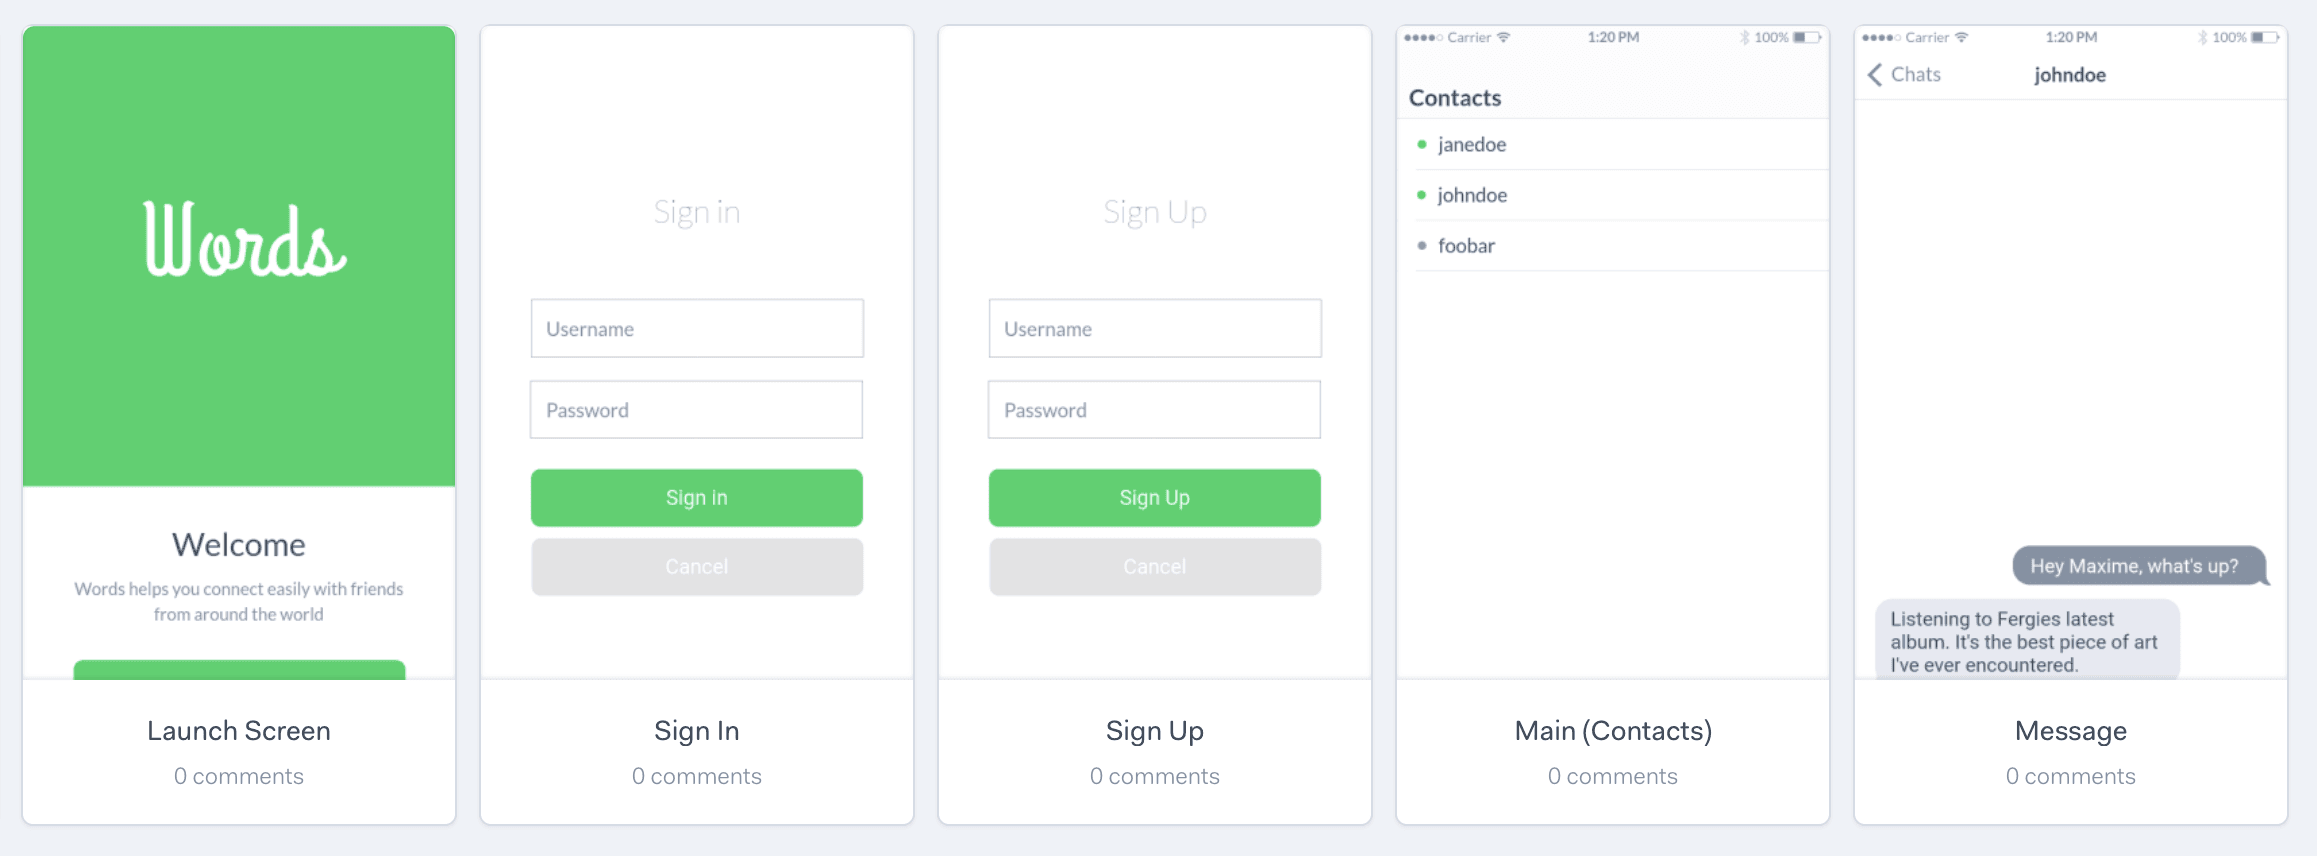
We have our various screens in the screenshot above. Each screen (or scene as we will refer to them henceforth) will represent one view of our application. The scenes available are:
- Welcome Screen - This is the scene that shows when the app is launched and the user is not logged in.
- Log in Screen - This is the scene where the user enters their credentials to log in.
- Sign up Screen - This is the scene where the user signs up for an account.
- Contacts Screen - A list of people on the platform that you can chat with.
- Messages Screen - This is the list of messages in a particular room.
We will be creating each scene using the Clean Swift Architecture to ensure modularity and singular responsibility.
Adding our clean Swift templates to Xcode
If you have downloaded the Clean Swift Xcode templates, extract the contents of the zip file and then open your terminal. cd to the root directory of your downloaded content and run the command below:
$ make
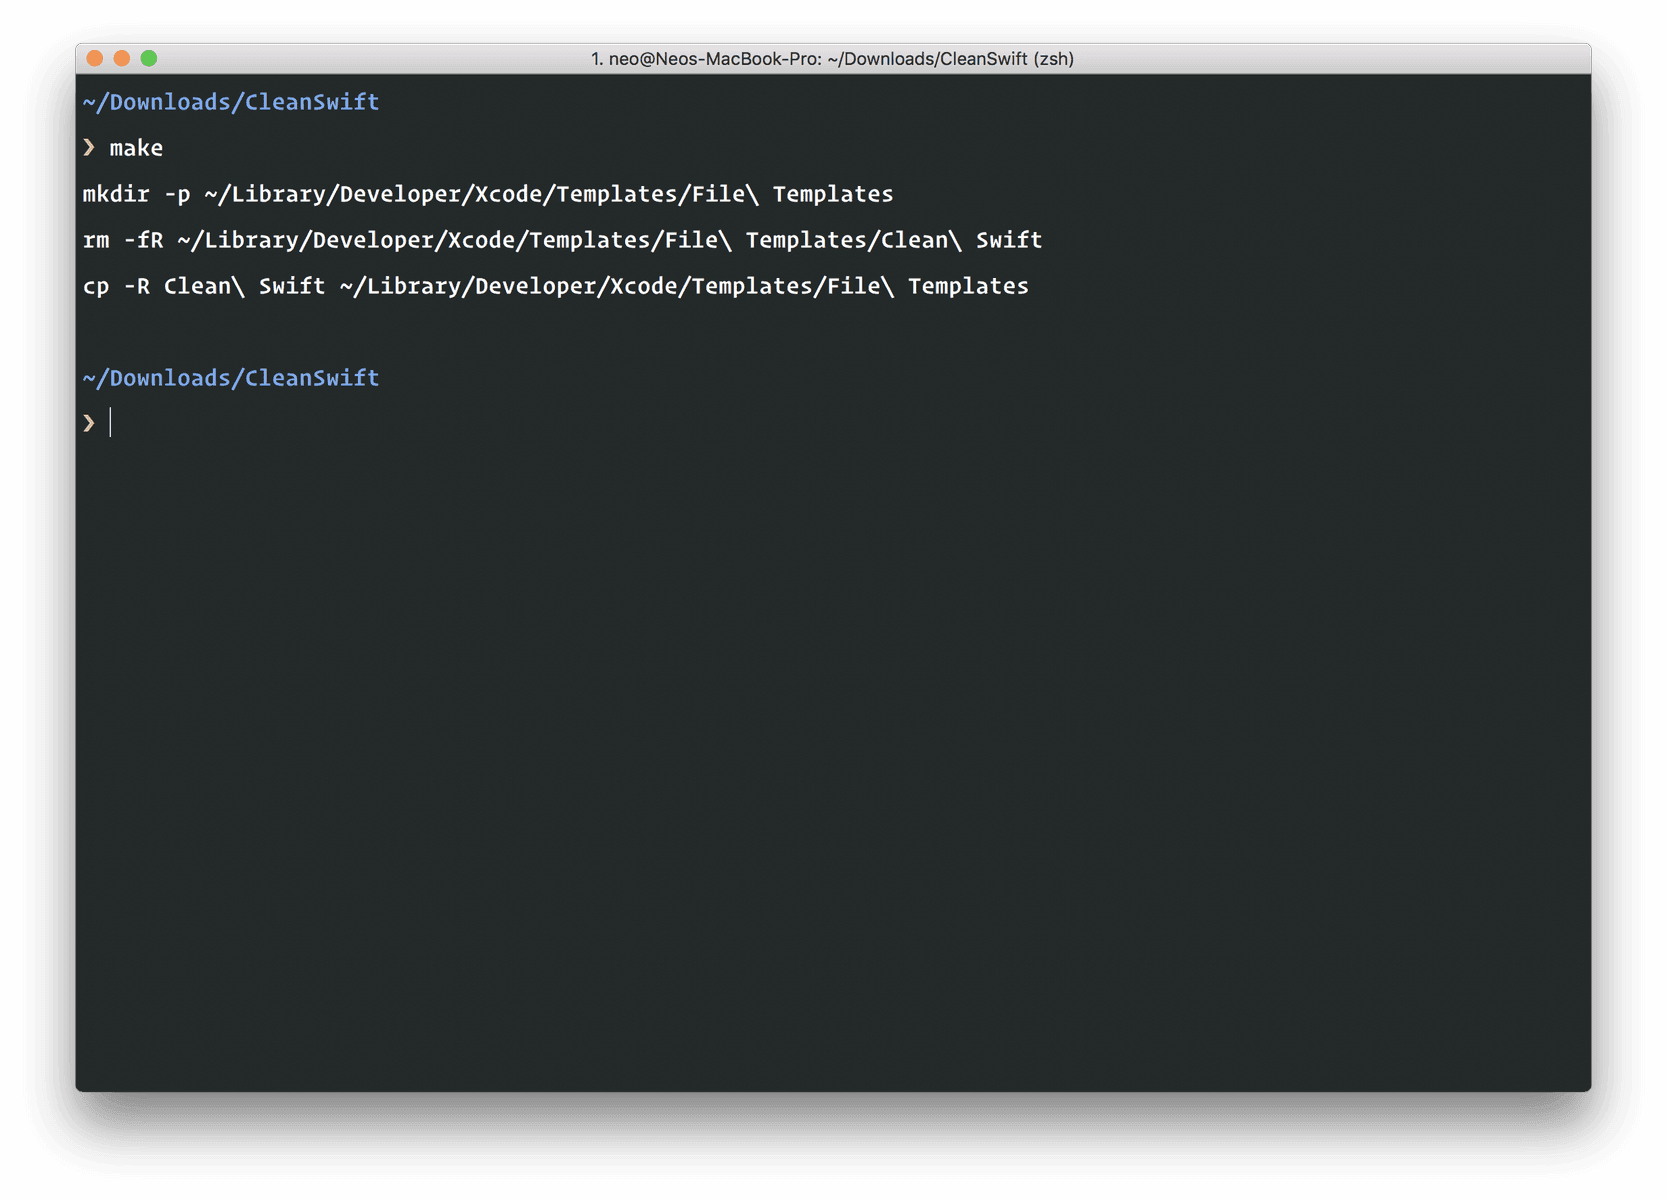
This command will run the contents of the Makefile and make the Xcode template available to Xcode. Now when you go to File > New > File… **you should see the Clean Swift templates as seen below:
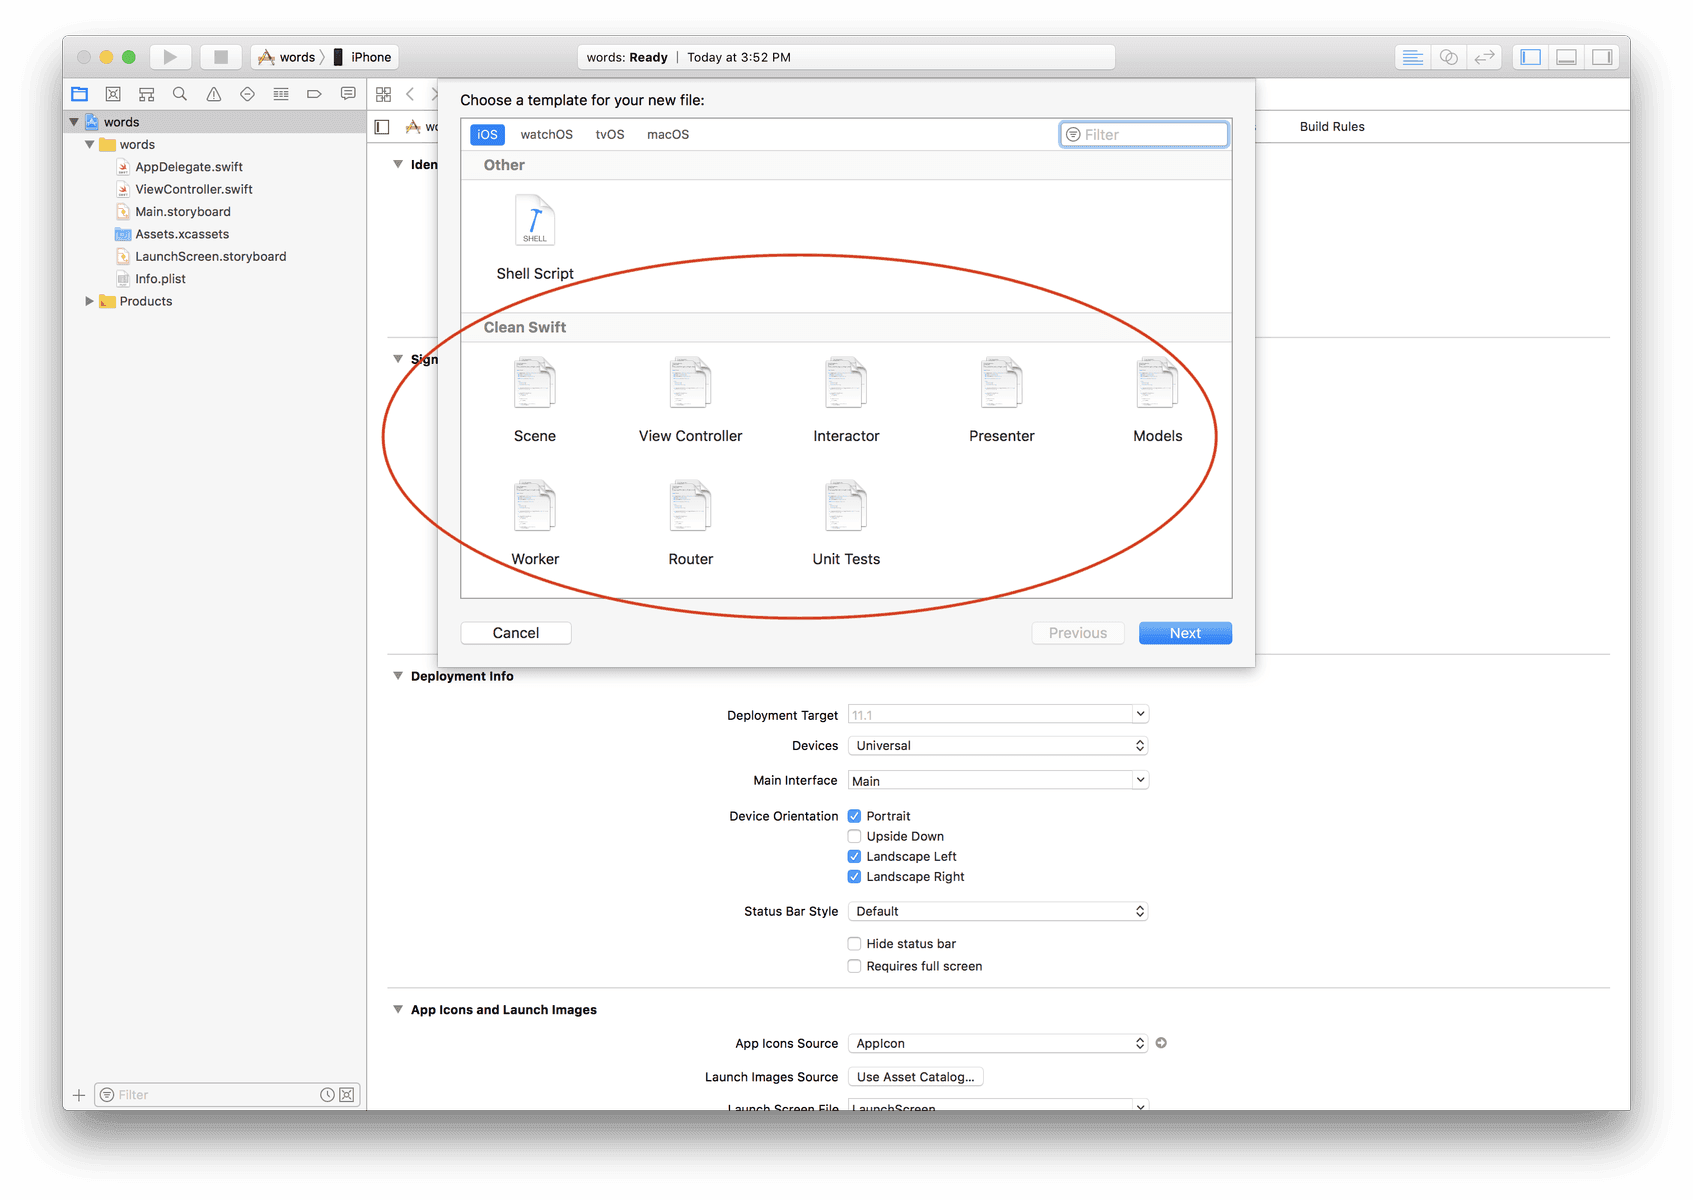
We have successfully installed the Clean Swift templates now. Let’s create the skeleton for our application using the templates.
Installing other Swift dependencies
Now that we have installed the Clean Swift templates, we can start creating the scenes for our application.
Launch Xcode and create a new project. We will call ours Words. Now after the project has been created, go to the root of the project and create a new file Podfile. In this file paste the following:
1source 'https://github.com/CocoaPods/Specs.git' 2 platform :ios, '11.0' 3 use_frameworks! 4 5 # Replace `<Your Target Name>` with your app's target name. 6 target '<Your Target Name>' do 7 pod 'PusherChatkit' 8 pod 'Alamofire' 9 end
Replace <Your Target Name> with the name of the project. In our case it’s Words**.** Now launch your terminal, cd to the root directory of the application and run the following code:
$ pod install
Now close Xcode and go to the project directory in Finder. From there click the *.xcworkspace file that is in the root. This will relaunch Xcode with a workspace that loads our external libraries/pods.
Creating our application scenes
To create our first scene, press cmd+N on your Mac. Then scroll until you see the Clean Swift section in the iOS templates tab. Next select the Scene option from the list of templates. Now enter the name of the scene you want to create:
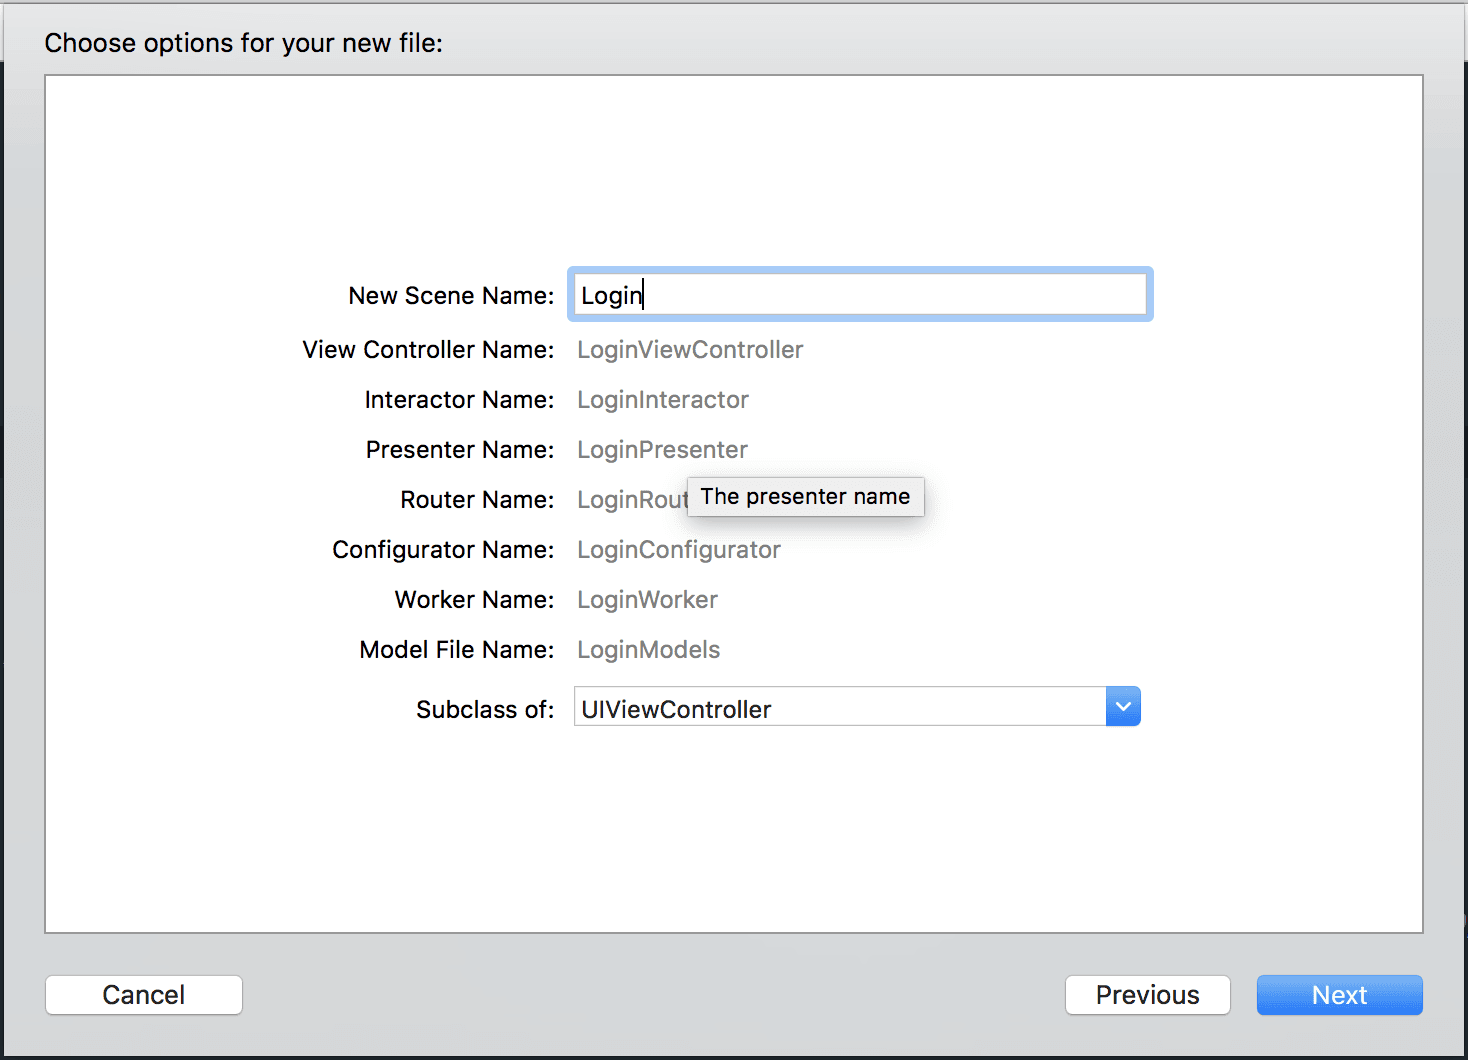
This will create a handful of classes in the file directory.
The main classes are the Controller, Interactor and Presenter. They are the input and output for every scene that is navigated to. Three of these classes are intertwined and need each other most times as seen in the illustration below.
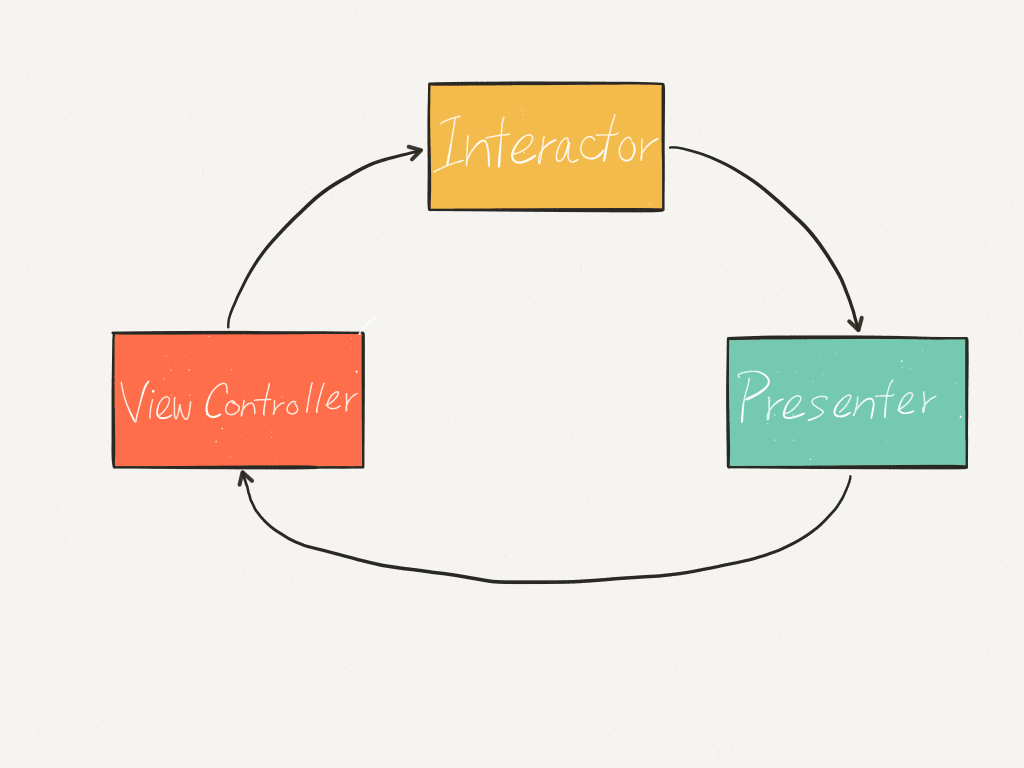
Each of these classes or components has an input and an output. This is how they communicate with each other.
💡 The View Controller’s output connects to the Interactor’s input, the Interactor’s Output connects to the Presenter’s input, and the Presenter’s output connects to the View Controller’s input.
Let us break down the process in a little more detail:
The View Controller
Look at the generated controller, in the setup method:
1private func setup()
2 {
3 let viewController = self
4 let router = LoginRouter()
5 let presenter = LoginPresenter()
6 let interactor = LoginInteractor()
7
8 viewController.interactor = interactor
9 viewController.router = router
10
11 interactor.presenter = presenter
12
13 presenter.viewController = viewController
14
15 router.viewController = viewController
16 router.dataStore = interactor
17 }
You can see that this is where the connections are made for the View Controller. In there we set the viewController.router to the LoginRouter class and set the router.viewController to the viewController.
We also set the viewController.presenter to LoginPresenter class and set the presenter.viewController to the viewController. Then we set the viewController.interactor to the LoginInteractor and then set the interactor.presenter to the LoginPresenter instance.
These connections serve to keep an instance of applicable classes in each class. This helps communication between themselves and helps us decongest the controllers and decouple them.
Let’s take a look at some of the other methods in the View Controller:
1override func prepare(for segue: UIStoryboardSegue, sender: Any?)
2 {
3 if let scene = segue.identifier {
4 let selector = NSSelectorFromString("routeTo\(scene)WithSegue:")
5 if let router = router, router.responds(to: selector) {
6 router.perform(selector, with: segue)
7 }
8 }
9 }
10
11 override func viewDidLoad()
12 {
13 super.viewDidLoad()
14 doSomething()
15 }
16
17 func doSomething()
18 {
19 interactor?.doSomething(request: Login.Something.Request())
20 }
In the prepare method, it uses self.router to navigate to the next scene. If you take a look at LoginRouter you will see the commented out implementation. This effectively extracts the role of routing from the View Controller.
The Interactor
In the viewDidLoad method above, we called doSomething which fired the interactor.doSomething method. This method takes a Login.Something.Request struct available in the LoginModel enum (this is available in the LoginModel.swift file).
💡 Enums are a common type for a group of related values and enables you to work with those values in a type-safe way within your code. - Swift Documentation
💡 Classes and Structs are general-purpose, flexible constructs that become the building blocks of your program’s code. You define properties and methods to add functionality to your classes and structures by using exactly the same syntax as for constants, variables, and functions. - Swift Documentation
Looking into the interactor.doSomething method we see:
1func doSomething(request: Login.Something.Request)
2 {
3 worker = LoginWorker()
4 worker?.doSomeWork()
5
6 let response = Login.Something.Response()
7 presenter?.presentSomething(response: response)
8 }
The above calls a LoginWorker class to ‘do some work’ which is optional and depends on the scene. The Login worker can handle requests and thus take away that role from the View Controller.
💡 Workers are useful for chores you need to do in the background also. Using workers to send requests to the server and get responses makes a lot of sense, and as long as you return the right
Login.Something.Responseyou can pass that to thepresenter.
Next, the method calls the presenter.presentSomething method. This method takes a Login.Something.Response struct.
The Presenter
In the presentSomething method, we pass the response from whatever request was done, and then the handling of the presentation looks like this:
1func presentSomething(response: Login.Something.Response)
2 {
3 let viewModel = Login.Something.ViewModel()
4 viewController?.displaySomething(viewModel: viewModel)
5 }
As seen, the method then calls the displaySomething method on the view controller passing the Login.Something.ViewModel struct. The displaySomething method in the View Controller looks like this:
1@IBOutlet weak var nameTextField: UITextField!
2
3 func displaySomething(viewModel: Login.Something.ViewModel)
4 {
5 nameTextField.text = viewModel.name
6 }
So effectively, the presenter gets the data from the response and prepares it for presentation and adds it to the Login.Something.ViewModel struct. This will effectively remove that role of handling presentation of data from the View Controller.
Let’s move on to creating scenes for the entire application.
Creating scenes based on the prototypes
Now that we have created the first scene, let us go ahead to create the other scenes using the Clean Swift templates.
The scenes we have to create are:
- Launch
- Welcome
- Login
- Signup
- ListContacts
- Chatroom
Go through the same steps to create each scene using the list above. First cmd+N and then select Scene from the list of templates on the iOS tab.
💡 It would be helpful to group all your scenes and also add them to their own directories when creating them. It will make it easier to find them when looking at the file listing in Xcode or in any IDE.
Once you’re done your scenes should be in their respective directories like this:
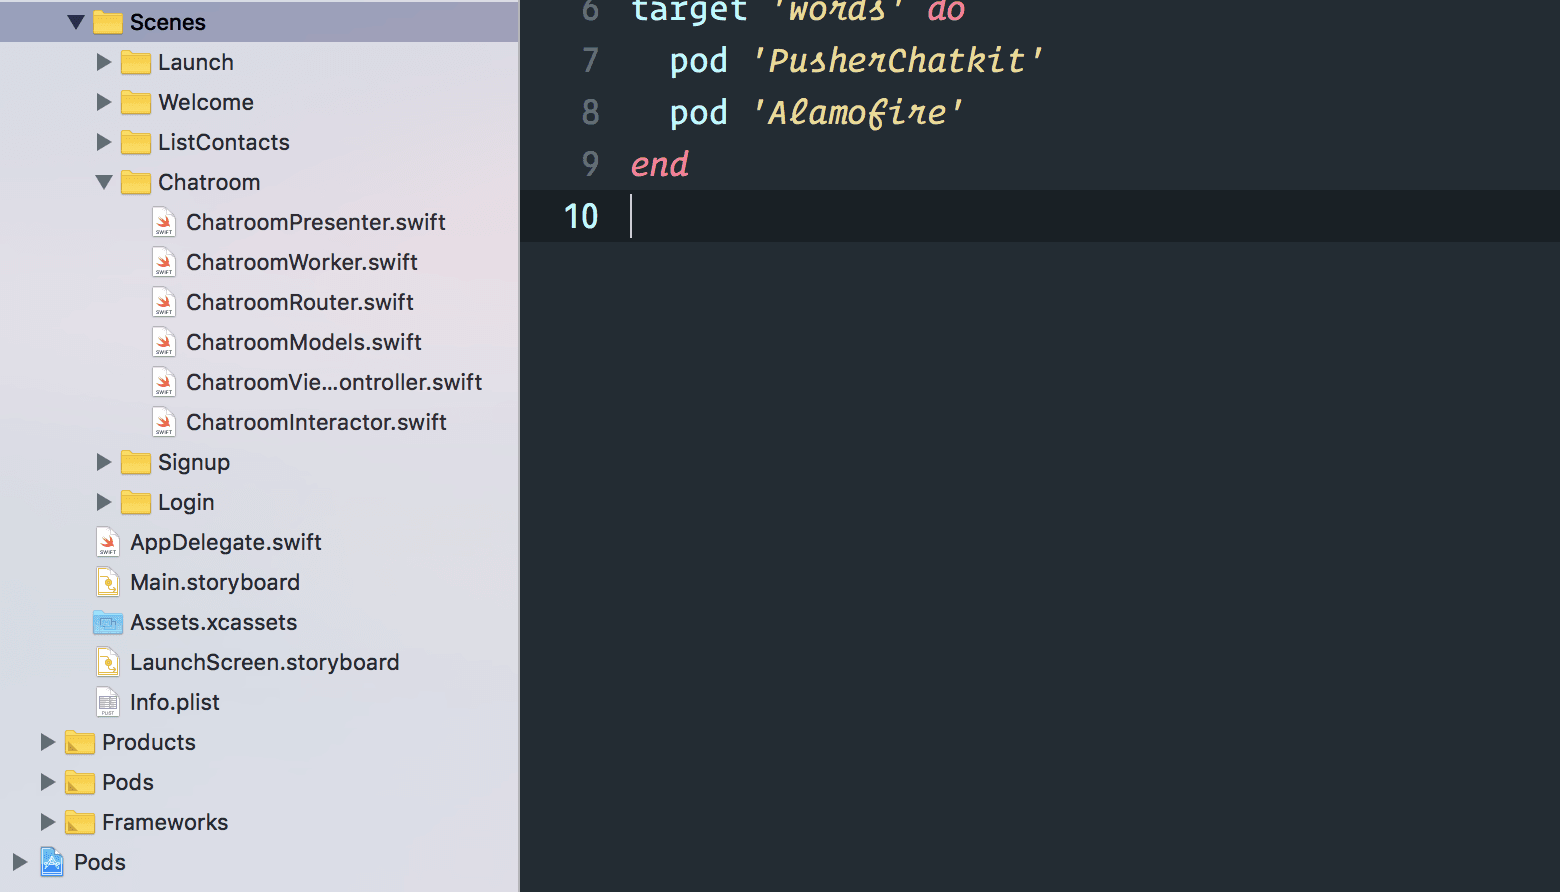
That’s it! We have added our first few scenes and though they do not do anything at the moment, we will add functionality in future parts of the series. For now, you can just look through the scenes and see how all the classes interact with each other.
Conclusion
In this article, we have been able to prototype and structure our application using Clean Swift Architecture. We have not added any functionality yet but it is essential to understand this workflow of building iOS applications.
In the next part of this series, we will focus on creating the API for our iOS application. The source code for the application built in this series is available on GitHub, check it out!
IMPORTANT: ChatKit has been retired from the Pusher product stack as of April, 2020. This tutorial will no longer be functional in its current version. Explore our other Pusher tutorials to find out how Channels and Beams can help you build.


© 2024 Pusher Ltd. All rights reserved.
Pusher Limited is a company registered in England and Wales (No. 07489873) whose registered office is at MessageBird UK Limited, 3 More London Riverside, 4th Floor, London, United Kingdom, SE1 2AQ.