- Products

- Developers
- User stories
- Blog
- Pricing

Creating a Laravel Logger - Part 3: Integrating our Pusher logger package
Introduction
In this part, we’ll see how we can connect our app and the Laravel package so that when a log form is submitted using the dispatch button, it is triggered to Pusher Channels and if the log level is of type error, it is also published through Pusher Beams too.
In the first two parts of this series, we built a simple Laravel app with a form to collect a log message and level and we also built a Laravel package to interact with the Pusher API.
Requirements
To follow along with this series you need the following things:
- Completed previous parts of the series. Part 1, Part 2
- Laravel installed on your local machine. Installation guide.
- Knowledge of PHP and the Laravel framework.
- Composer installed on your local machine. Installation guide.
- Android Studio >= 3.x installed on your machine (If you are building for Android).
- Knowledge of Kotlin and the Android Studio IDE.
- Xcode >= 10.x installed on your machine (If you are building for iOS).
- Knowledge of the Swift programming language and the Xcode IDE.
- Pusher account. Create a free sandbox Pusher account or sign in.
- Pusher Channels and Beams apps.
Connecting our Laravel app with the logger package
To get started, you need the code from the first part of the article, which is available in the GitHub repository. When you have the code, cd to the directory of the code and copy the .env.example to your.env file if you don’t already have it and update the following keys:
1# File: ./.env 2 # [...] 3 4 PUSHER_APP_ID="PUSHER_APP_ID" 5 PUSHER_APP_KEY="PUSHER_APP_KEY" 6 PUSHER_APP_SECRET="PUSHER_APP_SECRET" 7 PUSHER_APP_CLUSTER="PUSHER_APP_CLUSTER" 8 PUSHER_BEAMS_SECRET_KEY="PUSHER_BEAMS_SECRET_KEY" 9 PUSHER_BEAMS_INSTANCE_ID="PUSHER_BEAMS_INSTANCE_ID"
Update with the keys from your Pusher Channels and Pusher Beams dashboard.
Next, open the config/broadcasting.php file and scroll until you see the connections key. In there, you’ll have the pusher object. Add the beams object to it and make sure it looks like this:
1// File: ./config/broadcasting.php 2 3 'connections' => [ 4 5 // [...] 6 7 'pusher' => [ 8 'driver' => 'pusher', 9 'key' => env('PUSHER_APP_KEY'), 10 'secret' => env('PUSHER_APP_SECRET'), 11 'app_id' => env('PUSHER_APP_ID'), 12 'options' => [ 13 'cluster' => env('PUSHER_APP_CLUSTER'), 14 'encrypted' => true, 15 ], 16 'beams' => [ 17 'secret_key' => env('PUSHER_BEAMS_SECRET_KEY'), 18 'instance_id' => env('PUSHER_BEAMS_INSTANCE_ID'), 19 ], 20 ], 21 22 ],
You see that this file instructs Laravel to get the keys from the .env file. Inside our Laravel app, we need to add a new repository definition. Open composer.json in the root directory of the Laravel app and add this there:
1// File: ./composer.json 2 // [...] 3 4 "repositories": [ 5 { 6 "type": "path", 7 "url": "./packages/*", 8 "options": { 9 "symlink": true 10 } 11 } 12 ], 13 14 // [...]
By setting the "type": "path", the Composer knows that you would like to reference a local repository and the url defines the package location which can be relative or absolute to the package code.
Composer will copy the package code into the vendor folder of our app and anytime there is an update change on the package there is a need to run composer update. To prevent Composer from doing so you need to specify the symlink option and composer will create a symlink to the package folder.
Run this in the root directory of the app to install the package:
$ composer require packagename/pusher-logger
If you used a different package name than this in the previous part, then use that package name.
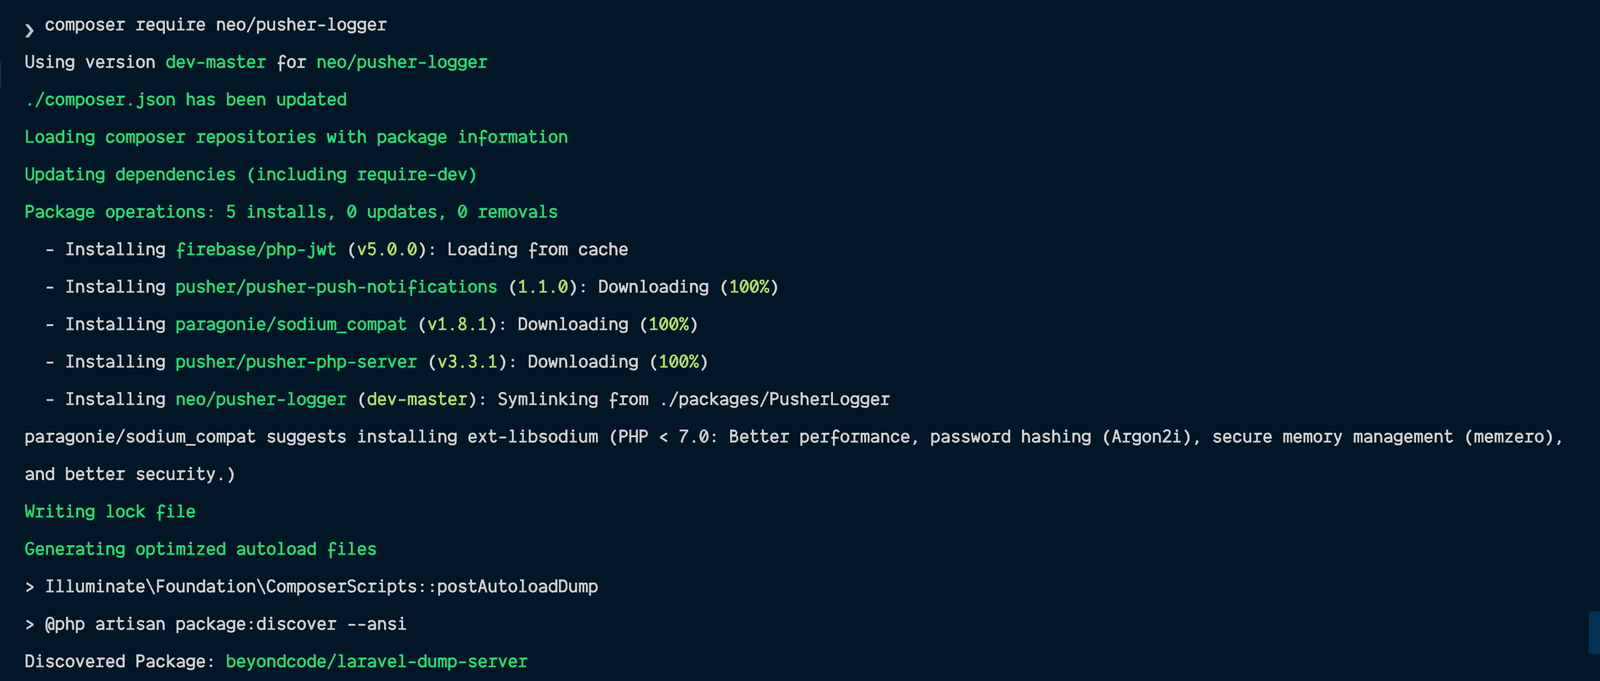
When your package installation is complete you’ll see the “Package manifest generated successfully” message.
Now that our package is installed, let us create the logic to use the package. Open a new terminal tab, inside the root directory of the project folder and run:
$ php artisan make:controller LogController
This command will create a LogController class inside the LogController.php file found at the app/Http/Controllers directory.
Open the LogController.php and add the method below:
1<?php // File: ./app/Http/Controllers/LogController.php 2 3 // [...] 4 5 use Illuminate\Http\Request; 6 7 class LogController extends Controller { 8 9 public function __invoke(Request $request) 10 { 11 // Logic Here 12 } 13 14 // [...] 15 }
The __invoke method is a magic method in PHP which gets called when the object is called as a function. $request is an instance of the Illuminate\Http\Request class via dependency injection and it returns the current HTTP request.
Now, we will introduce the Laravel package into our LogController class, so at the top of the class after the namespace declaration add this:
use PackageNamespace\PusherLogger\PusherLogger;
If you used a different namespace, replace the namespace above with whatever you used.
Remember that when we’re building our package, we could log a message and the level with the syntax below:
1PusherLogger::log('Winter is Coming', PusherLogger::LEVEL_WARNING) 2 ->setEvent('log-event') 3 ->setChannel('log-channel') 4 ->setInterests(['log-interest']) 5 ->send()
So let’s update our logic in the __invoke method like so:
1// File: ./app/Http/Controllers/LogController.php 2 // [...] 3 4 public function __invoke(Request $request) 5 { 6 $data = $request->validate([ 7 'message' => 'required|string', 8 'level' => 'required|string' 9 ]); 10 11 $dispatched = PusherLogger::log($data['message'], $data['level']) 12 ->setChannel('log-channel') 13 ->setEvent('log-event') 14 ->setInterests(['log-interest']) 15 ->send(); 16 17 return response()->json(['status' => $dispatched]); 18 } 19 20 // [...]
From this snippet above, we first validate the request to make sure the message and level values are being sent to the server. Next, we set the log message, level, channel and event name. In a case where the log is an error, we set the interests to be sent to the Pusher Beam API using the setInterests method which accepts an array of interests.
Finally, we triggered the send method that dispatches the log to both the Pusher Channels and Pusher Beams.
Now open api.php located in the routes folder in the app directory and declare this route like so:
Route::post('/push', 'LogController')->name('log-message');
This route can be accessed as api/push via a POST request. A name log-message has been set on this route which allows us to use the Laravel URL helper function route() to generate the endpoint anywhere inside the Laravel app. We will use this route shortly.
Next, open the welcome.blade.php file located at resources/views directory and update it as instructed below:
Just before the closing head tag add this link:
1<!-- File: ./resources/views/welcome.blade.php --> 2 <link rel="stylesheet" href="https://cdnjs.cloudflare.com/ajax/libs/toastr.js/latest/css/toastr.min.css" />
Just before the end of the body tag add these scripts:
1<!-- File: ./resources/views/welcome.blade.php --> 2 <script src="https://cdnjs.cloudflare.com/ajax/libs/toastr.js/latest/js/toastr.min.js"></script> 3 <script src="https://cdnjs.cloudflare.com/ajax/libs/axios/0.18.0/axios.min.js"></script>
Here, we added Toastr and Axios to the frontend of the application. Toastr is a simple notification library and Axios is HTTP client for the browser that makes network requests.
Next, add the following code below the code we just added:
1<!-- File: ./resources/views/welcome.blade.php --> 2 <script> 3 function dispatchLog() { 4 let level = document.getElementById('level').value; 5 let message = document.getElementById('message').value; 6 let errToastr = () => toastr.error("Oops! An error encountered"); 7 8 axios.post('{{ route('log-message') }}', { message, level }) 9 .then(r => r.data.status ? toastr.success('Log dispatch successful') : errToastr()) 10 .catch(errToastr); 11 } 12 </script>
The function above is to help dispatch our log inputs (message and level).
Axios is used to send both variables to our earlier declared route. When we get a response, we display a notification to the user.
Now let us attach the function in the script above to the dispatch button in our modal.
Look for this line of code in your ./resources/views/partials/modal.blade.php file:
<button type="button" class="btn btn-danger">Dispatch</button>
Then replace it with the following:
<button type="button" class="btn btn-danger" onclick="dispatchLog()">Dispatch</button>
So, whenever the dispatch button is clicked, the dispatchLog function is triggered.
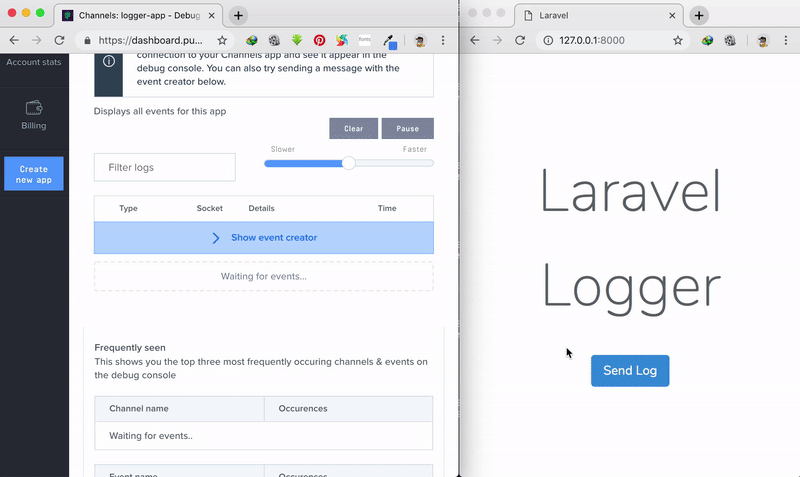
If you run your app, it should work like this (the view on the left is the Pusher Channels debug console):
Pushing log messages without the trigger
When creating actual applications, you won’t have a trigger and you’ll want the logged messages to automatically get pushed to the Pusher Channels. This is why we created the Monolog handler in the previous part.
To use this handler, open the config/logging.php file and add a new channel to the channels array:
1'channels' => [ 2 3 // [...] 4 5 'pusher' => [ 6 'driver' => 'monolog', 7 'level' => 'debug', 8 'handler' => PackageNamespace\PusherLogger\PusherLoggerHandler::class, 9 ], 10 11 // [...] 12 13 ],
If you changed your packages namespace, don’t forget to change it above.
Finally, in your stack channel in the same channels array, add the pusher channel to the list of channels as seen below:
1'channels' => [ 2 'stack' => [ 3 'driver' => 'stack', 4 'channels' => ['daily', 'pusher'], 5 'ignore_exceptions' => false, 6 ], 7 8 // [...] 9 10 ],
To test, you can go to the routes/web.php and add this to the file:
info('Testing');
This should push the message to Pusher Channels.
Conclusion
In this part of the series, we have been able to set up the logic we need to be able to push logs to Pusher. In the next part of the series, we will create the Android application for our logging monitor.
The source code is available on GitHub.


© 2024 Pusher Ltd. All rights reserved.
Pusher Limited is a company registered in England and Wales (No. 07489873) whose registered office is at MessageBird UK Limited, 3 More London Riverside, 4th Floor, London, United Kingdom, SE1 2AQ.