- Products

- Developers
- User stories
- Blog
- Pricing

Create a live blog using Go and Vue.js
- Introduction
- Prerequisites
- Getting a Pusher Channels application
- Creating our Go application
- Importing the external Go packages
- Creating our database management functions
- Creating our data structures
- Creating our route handler functions
- Adding realtime support to our Go application
- Building our frontend
- Conclusion
Introduction
Live reporting is nothing new and can take different forms. It can be live video streaming, live audio streaming or live blogging. Live blogging while being the most basic of the group, is also the one that saves the most data.
Sports websites like Goal.com implement live blogging as a way of showing live commentary on their platform. This technique is also being used in the current (at the time of writing this article) FIFA World Cup going on in Russia.
In this article, we will see how we can build a live blogging platform using Go, Vue and Pusher Channels.
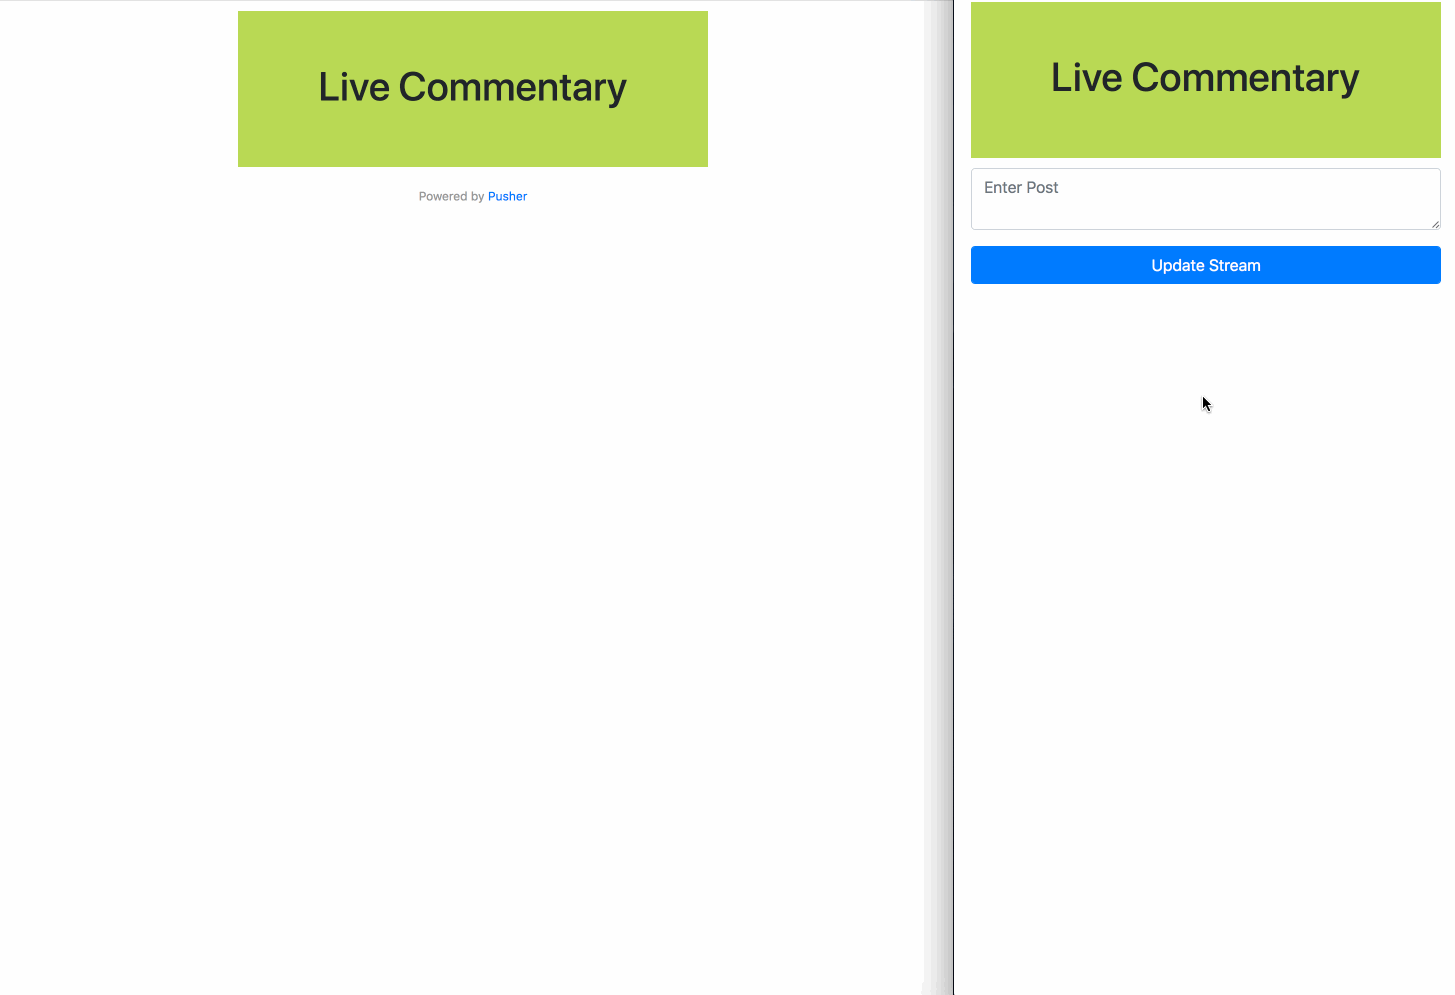
This is a preview of what we will be building:
Prerequisites
To follow along you need to have the following requirements:
- Basic knowledge of the Go programming language.
- Basic JavaScript (Vue.js) knowledge.
- Go (version >= 0.10.x) installed on your machine. Check out the installation guide.
- SQLite (version >= 3.x) installed on your machine.
Let’s get started.
Getting a Pusher Channels application
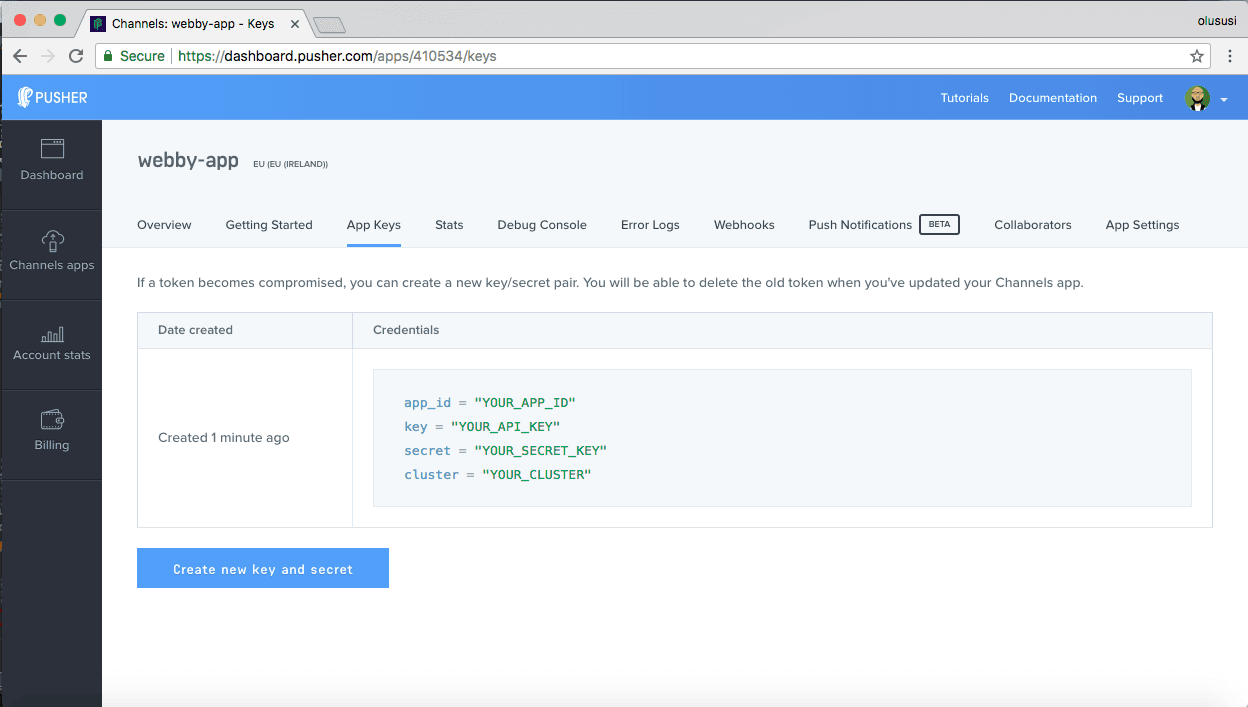
The first step will be to get a Pusher Channels application. We will need the application credentials for our realtime features to work.
Go to the Pusher website and create an account. After creating an account, you should create a new application. Follow the application creation wizard and then you should be given your application credentials, we will use this later in the article.
Now that we have our application, let’s move on to the next step
Creating our Go application
The next thing we want to do is create the Go application. In your terminal, cd to your $GOPATH and create a new directory there.
1$ cd $GOPATH/src 2 $ mkdir liveblog 3 $ cd liveblog
💡 It is recommended that you place the source code for your project in the
srcsubdirectory (e.g.,$GOPATH/src/your_projector$GOPATH/src/github.com/your_github_username/your_project.
Next, we will create some directories to organize our application:
1$ mkdir database 2 $ mkdir public 3 $ mkdir public/uploads
The commands above will create a database and public directory, and also an uploads directory inside the public directory. We will store our database file inside the database directory. We will keep our public files, HTML and images, inside the public and uploads directory. Create a new index.html file in the public directory that was created.
Now let’s create our main Go file. We will try to keep everything simple by placing all our source code in a single file. Create a main.go file in the project root.
In the file paste the following:
1package main 2 3 import ( 4 "database/sql" 5 "net/http" 6 7 "github.com/labstack/echo" 8 "github.com/labstack/echo/middleware" 9 _ "github.com/mattn/go-sqlite3" 10 pusher "github.com/pusher/pusher-http-go" 11 )
Above we have imported some packages we will be needing to work on our live blog. We need the database/sql for working with SQL, and the net/http will be used for our HTTP status codes.
Above we also have some external packages imported. The labstack/echo package is the Echo framework that we will be using. We also have the mattn/go-sqlite3 package for working with SQLite. And finally, we imported the pusher/pusher-http-go package which we will use to trigger events to Pusher Channels.
Importing the external Go packages
Before we continue, let’s pull in these packages using our terminal. Run the following commands below to pull the packages in:
1$ go get github.com/labstack/echo 2 $ go get github.com/labstack/echo/middleware 3 $ go get github.com/mattn/go-sqlite3 4 $ go get github.com/pusher/pusher-http-go
Note that the commands above will not return any confirmation output when it finishes installing the packages. If you want to confirm the packages were indeed installed you can just check the
$GOPATH/src/github.comdirectory.
When the packages have been pulled in successfully, we can go ahead and create our main function. This will be the entry point of our application. In this function, we will set up our applications database, middleware, and routes.
Open the main,go file and paste the following code:
1func main() { 2 e := echo.New() 3 4 e.Use(middleware.Logger()) 5 e.Use(middleware.Recover()) 6 7 db := initialiseDatabase("./database/storage.db") 8 migrateDatabase(db) 9 10 e.File("/", "public/index.html") 11 e.File("/admin", "public/admin.html") 12 e.GET("/posts", getPosts(db)) 13 e.POST("/posts", savePost(db)) 14 15 e.Logger.Fatal(e.Start(":9000")) 16 }
In the code above, we instantiated our database using the file path to the database file and passing that to the initialiseDatabase function. This will create the SQLite file if it did not already exist. We then run the migrateDatabase function which migrates the database.
Next, we instantiate Echo and register some middlewares and routes. The routes will handle client requests and return responses. The first handler is the File handler. We use this to serve the index.html and admin.html file. The index.html will be the entry point to the application from the frontend while the admin.html will be the place where the admin can update the posts.
We also have the /posts route which accepts a POST and GET request. We need these routes to act like API endpoints that are used for creating new posts and viewing all the available posts.
Finally, we use e.Start to instruct the Go web server to run on port 9000 when it is started.
At this point, we have not created most of the functions we referenced in the main function so let’s do so now.
Creating our database management functions
In the main function we referenced initialiseDatabase and migrateDatabase functions. Let’s create them now. In the main.go file, paste the following functions above the main function:
1func initialiseDatabase(filepath string) *sql.DB { 2 db, err := sql.Open("sqlite3", filepath) 3 4 if err != nil { 5 panic(err) 6 } 7 8 if db == nil { 9 panic("db nil") 10 } 11 12 return db 13 } 14 15 func migrateDatabase(db *sql.DB) { 16 sql := ` 17 CREATE TABLE IF NOT EXISTS posts( 18 id INTEGER NOT NULL PRIMARY KEY AUTOINCREMENT, 19 content TEXT 20 ); 21 ` 22 _, err := db.Exec(sql) 23 if err != nil { 24 panic(err) 25 } 26 }
In the initialiseDatabase function, we create an instance of the SQLite database using the database file and return that instance. In the migrateDatabase function, we use the instance of the database returned in the previous function to execute the migration SQL.
Let’s create the data structure for our post and post collection.
Creating our data structures
Next, let's create the data structure for our object types. We will create a Post structure and a PostCollection structure. The Post struct will define how a typical post will be represented while the PostCollection will define how a collection of posts will be represented.
Open the main.go file and paste the following code above the initialiseDatabase function:
1// Post type 2 type Post struct { 3 ID int64 `json:"id"` 4 Content string `json:"content"` 5 } 6 7 // PostCollection type 8 type PostCollection struct { 9 Posts []Post `json:"items"` 10 }
Creating our route handler functions
Next, let’s create the functions for our routes. Open the main.go file and paste the following file inside it:
1func getPosts(db *sql.DB) echo.HandlerFunc { 2 return func(c echo.Context) error { 3 rows, err := db.Query("SELECT * FROM posts ORDER BY id DESC") 4 if err != nil { 5 panic(err) 6 } 7 8 defer rows.Close() 9 10 result := PostCollection{} 11 12 for rows.Next() { 13 post := Post{} 14 err2 := rows.Scan(&post.ID, &post.Content) 15 if err2 != nil { 16 panic(err2) 17 } 18 19 result.Posts = append(result.Posts, post) 20 } 21 22 return c.JSON(http.StatusOK, result) 23 } 24 } 25 26 func savePost(db *sql.DB) echo.HandlerFunc { 27 return func(c echo.Context) error { 28 postContent := c.FormValue("content") 29 stmt, err := db.Prepare("INSERT INTO posts (content) VALUES(?)") 30 if err != nil { 31 panic(err) 32 } 33 34 defer stmt.Close() 35 36 result, err := stmt.Exec(postContent) 37 if err != nil { 38 panic(err) 39 } 40 41 insertedID, err := result.LastInsertId() 42 if err != nil { 43 panic(err) 44 } 45 46 post := Post{ 47 ID: insertedID, 48 Content: postContent, 49 } 50 51 return c.JSON(http.StatusOK, post) 52 } 53 }
In the getPosts method above, we ran a query to fetch all the latest posts from the database and return them as a JSON response to the client. In the savePost method we run the query to insert a new record in the posts table and return a JSON response to the client.
Adding realtime support to our Go application
The next thing we want to do is trigger an event when a new post is added to the posts table. For this, we will be using the Pusher Go HTTP library.
In the main.go file paste the following above the type definitions for the Post and PostCollection:
1var client = pusher.Client{ 2 AppId: "PUSHER_APP_ID", 3 Key: "PUSHER_APP_KEY", 4 Secret: "PUSHER_APP_SECRET", 5 Cluster: "PUSHER_APP_CLUSTER", 6 Secure: true, 7 }
This will create a new Pusher client instance. We can then use this instance to trigger notifications to different channels we want. Remember to replace the PUSHER_APP_* keys with the keys on your Pusher app dashboard.
Next, in the savePost function in the main.go file and right before the return statement at the bottom of the function, paste the following code:
client.Trigger("live-blog-stream", "new-post", post)
This is the code that triggers a new event when a new post is added to the live blog.
That will be all for our Go application.
You can build your application and compile it into a binary using the go build command. However, for this tutorial we will just run the binary temporarily:
$ go run main.go
This command will temporarily build and run our Go application.
Building our frontend
We have built the Go backend of our application and now it's time to build the frontend. We will be using the Vue.js framework and the Axios library to send HTTP requests.
Open the index.html file and in there paste the following code:
1<!DOCTYPE html> 2 <html lang="en"> 3 <head> 4 <meta charset="UTF-8"> 5 <meta name="viewport" content="width=device-width, initial-scale=1.0"> 6 <meta http-equiv="X-UA-Compatible" content="ie=edge"> 7 <link rel="stylesheet" href="https://stackpath.bootstrapcdn.com/bootstrap/4.1.1/css/bootstrap.min.css"> 8 <title>Live Blog</title> 9 <style> 10 .container { 11 max-width: 500px; 12 } 13 .logo-space { 14 text-align: center; 15 padding: 50px 0; 16 background-color: #bada55; 17 margin: 10px 0; 18 } 19 .live-posts { 20 margin: 0; 21 padding: 0; 22 list-style: none; 23 } 24 .live-posts > li { 25 padding: 10px; 26 background-color: #d8d8d8; 27 margin-bottom: 10px; 28 } 29 .power { 30 text-align: center; 31 margin-top: 20px; 32 font-size: 12px; 33 color: #999; 34 } 35 </style> 36 </head> 37 <body> 38 <div id="app"> 39 <div class="container"> 40 <div class="logo-space"> 41 <h1>Live Commentary</h1> 42 </div> 43 <ul class="live-posts"> 44 <li v-for="post in posts">{{ post.content }}</li> 45 </ul> 46 <div class="power"> 47 Powered by <a href="https://pusher.com">Pusher</a> 48 </div> 49 </div> 50 </div> 51 <script src="https://js.pusher.com/4.0/pusher.min.js"></script> 52 <script src="https://cdn.jsdelivr.net/npm/vue@2.5.16/dist/vue.js"></script> 53 <script src="https://cdnjs.cloudflare.com/ajax/libs/axios/0.18.0/axios.min.js"></script> 54 </body> 55 </html>
The HTML above defines the visual elements of our application. Let's add some Vue code. In the same file, paste the following code before the closing body tag:
1<script> 2 new Vue({ 3 el: '#app', 4 data: { 5 posts: [] 6 }, 7 created() { 8 const pusher = new Pusher('PUSHER_APP_KEY', { 9 cluster: 'PUSHER_APP_CLUSTER', 10 encrypted: true 11 }); 12 13 let channel = pusher.subscribe('live-blog-stream') 14 15 channel.bind('new-post', post => this.posts.unshift(post)); 16 17 axios.get("/posts").then(res => { 18 if (res.data.items) { 19 this.posts = res.data.items 20 } 21 }) 22 } 23 }) 24 </script>
Above we created a Vue instance and stored the properties posts. The posts property stores the post list.
In the created method we create an instance of our Pusher library. We then listen on the live-blog-stream channel for the new-post event. When this event is triggered we append the new post from the event to the posts list.
Replace the
PUSHER_APP_*keys with the one from your Pusher dashboard.
Finally, let’s create the admin panel where we can update the commentaries from. Create an admin.html file in the public directory and paste the following into the file:
1<!DOCTYPE html> 2 <html lang="en"> 3 <head> 4 <meta charset="UTF-8"> 5 <meta name="viewport" content="width=device-width, initial-scale=1.0"> 6 <meta http-equiv="X-UA-Compatible" content="ie=edge"> 7 <title>Admin Panel</title> 8 <link rel="stylesheet" href="https://stackpath.bootstrapcdn.com/bootstrap/4.1.1/css/bootstrap.min.css"> 9 <style> 10 .container { 11 max-width: 500px; 12 } 13 .logo-space { 14 text-align: center; 15 padding: 50px 0; 16 background-color: #bada55; 17 margin: 10px 0; 18 } 19 </style> 20 </head> 21 <body> 22 <div id="app"> 23 24 <div class="container"> 25 <div class="logo-space"> 26 <h1>Live Commentary</h1> 27 </div> 28 <div class="alert alert-success" role="alert" v-show="successfulPost"> 29 Post added successfully! 30 </div> 31 <form action="/posts" method="POST" id="post-stuff" v-on:submit.prevent="submitForm"> 32 <div class="form-group"> 33 <textarea class="form-control" v-model="content" placeholder="Enter Post"></textarea> 34 </div> 35 <input type="submit" class="form-control btn btn-primary" name="submit" value="Update Stream"> 36 </form> 37 </div> 38 </div> 39 <script src="https://cdn.jsdelivr.net/npm/vue@2.5.16/dist/vue.js"></script> 40 <script src="https://cdnjs.cloudflare.com/ajax/libs/axios/0.18.0/axios.min.js"></script> 41 <script> 42 new Vue({ 43 el: "#app", 44 data: { 45 content: "", 46 successfulPost: false 47 }, 48 methods: { 49 submitForm() { 50 if (this.content.length > 0 && this.content !== "") { 51 let data = new FormData() 52 data.append("content", this.content) 53 axios.post("/posts", data).then(res => { 54 this.content = "" 55 this.successfulPost = true 56 setTimeout(() => this.successfulPost = false, 3000) 57 }) 58 } 59 } 60 } 61 }) 62 </script> 63 </body> 64 </html>
Above we have a simple admin panel with an input to update the blog. It uses Axios to make a POST request to the API to update the blog.
That’s all for the frontend, you can save the file and head over to your web browser. Visit http://127.0.0.1:9000 to see your application in action.
Here’s how it will look again:
Conclusion
In this article, we have considered how we can create a live blogging platform using Go, Pusher Channels and Vue. As seen from the code samples above, it is very easy to get started with Pusher Channels.
Check the documentation to see other ways you can use Pusher Channels to provide realtime features to your users.
The source code for this application is available on GitHub.


© 2024 Pusher Ltd. All rights reserved.
Pusher Limited is a company registered in England and Wales (No. 07489873) whose registered office is at MessageBird UK Limited, 3 More London Riverside, 4th Floor, London, United Kingdom, SE1 2AQ.