- Products

- Developers
- User stories
- Blog
- Pricing

Build a login approval system - Part 3: Building the approval app
Introduction
In the previous part, we implemented the login logic and triggered events to the Pusher Channels and Pusher Beams API when login was completed and authorized. We will, however, need a client to consume the events. This is where the iOS application comes in.
In this final part, we will be creating an iOS application that will we will use to approve login requests to our dashboard.
Here’s a screen recording to show how it will work:
Requirements
To build this system, we need the following requirements:
- Xcode 10.x installed on your local machine.
- Knowledge of the Xcode IDE.
- Laravel v5.x installed on your local machine.
- Knowledge of the Laravel PHP framework.
- Knowledge of the Swift programming language.
- A Pusher Beams application. Create one here.
- A Pusher Channels application. Create one here.
- CocoaPods installed on your local machine.
If you have these requirements, let��’s get started.
Creating the iOS application
Create a new single project in Xcode and name it whatever you wish, for example, dashboard. Open the terminal and cd to the location of your iOS project and then run the following command:
$ pod init
Open the created Podfile and add a new pod to the list of pods:
1pod 'PushNotifications', '~> 1.2.0' 2 pod 'PusherSwift', '~> 6.1' 3 pod 'Alamofire', '~> 4.8.2'
Next, in the terminal, run the following command to install the dependencies we just added to the Podfile:
$ pod install --repo-update
When the installation is complete, close Xcode and open the newly generated .xcworkspace file in the project root. This will relaunch Xcode.
Designing the application
The application will be a simple one with two scenes. The first scene will be the default state when there are no approvals pending and the second state will be the approval pending state.
This is what the scenes will look like:
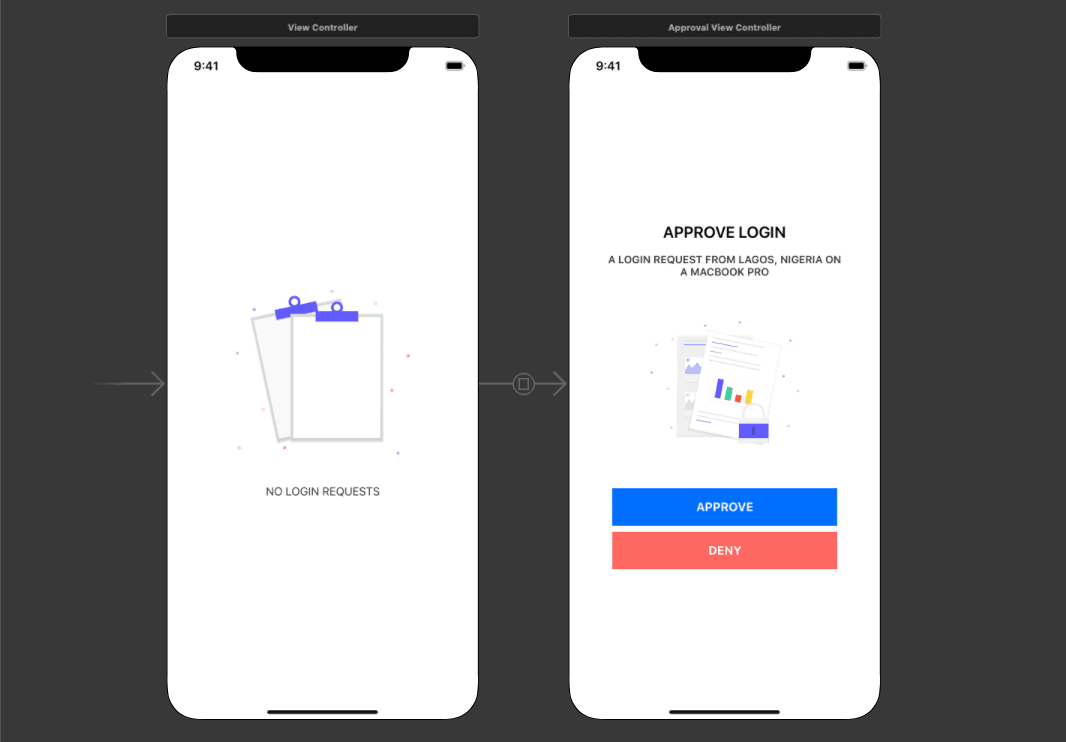
The scenes are designed with images from undraw.co. Few things to note about the storyboard are:
- There is a manual segue with identifier
approval_windowthat is presented modally. - The first scene is connected to a
ViewControllerclass. - The second scene is connected to a
ApproveViewControllerclass. You will need to create one. - The APPROVE and DENY buttons have an
@IBActioneach for touch inside events.
When you are done designing the storyboard, we can move into the logic of the code.
If you want to copy the exact design of this storyboard, you can copy the XML source for the storyboard from the GitHub repository and paste it in your own file.
Adding a realtime approval request
The first thing we want to add to the application is a realtime request while the application is open. This will mean that while the application is open, when an approval request comes in, the approval window will pop up and the user can then click on the approve button.
Open the ViewController class and replace the contents of the file with the following code:
1// File: ./dashboard/ViewController.swift
2 import UIKit
3 import Alamofire
4 import PusherSwift
5
6 class ViewController: UIViewController {
7
8 var pusher: Pusher!
9
10 var payload: [String: String] = [:]
11
12 override func viewDidLoad() {
13 super.viewDidLoad()
14
15 pusher = Pusher(
16 key: AppConstants.PUSHER_KEY,
17 options: PusherClientOptions(host: .cluster(AppConstants.PUSHER_CLUSTER))
18 )
19 pusher.connect()
20
21 let channel = pusher.subscribe("auth-request")
22
23 let _ = channel.bind(eventName: "key-dispatched", callback: { [unowned self] (data: Any?) -> Void in
24 guard let payload = data as? [String: String] else { return }
25 guard payload["hash"] != nil, payload["email"] != nil else { return }
26
27 self.showApprovalWindow(with: payload)
28 })
29 }
30
31 private func showApprovalWindow(with payload: [String: String]) {
32 self.payload = payload
33
34 performSegue(withIdentifier: "approval_window", sender: self)
35 }
36
37 override func prepare(for segue: UIStoryboardSegue, sender: Any?) {
38 if let vc = segue.destination as? ApprovalViewController {
39 vc.payload = self.payload
40 }
41 }
42 }
In the viewDidLoad method, we register the Pusher Channels instance and subscribe to the auth-request channel. In this channel, we listen for the key-dispatched event. Once this event is triggered, we then call the showApprovalWindow(with:) method.
In the showApprovalWindow method, we set the payload property and then perform the approval_window segue we registered in the storyboard earlier. This will display that scene. However, before that scene is shown, the prepare method will be triggered automatically.
In the prepare method we pass on the payload to the ApprovalViewController. The payload contains the hash of the login. This hash needs to be sent back to the server so it can be validated and authorized.
Next, open the ApprovalViewController you created and replace the code with the following code:
1// File: ./dashboard/ApprovalViewController.swift
2 import UIKit
3 import PusherSwift
4 import Alamofire
5
6 class ApprovalViewController: UIViewController {
7
8 var payload: [String: String]?
9
10 private var channel: PusherChannel!
11
12 override func viewDidAppear(_ animated: Bool) {
13 super.viewDidAppear(animated)
14
15 if payload?["hash"] == nil || payload?["email"] == nil {
16 return denyButtonWasPressed(nil)
17 }
18
19 // push notification
20 NotificationCenter.default.addObserver(
21 self,
22 selector: #selector(changeStatusFromPushNotification),
23 name: Notification.Name("status"),
24 object: nil
25 )
26 }
27
28 @objc private func changeStatusFromPushNotification(notification: Notification) {
29 guard let data = notification.userInfo as? [String: Any] else { return }
30 guard let status = data["status"] as? String else { return }
31 guard let payload = data["payload"] as? [String: String] else { return }
32
33 if status == "approved" {
34 self.payload = payload
35 self.approveButtonWasPressed(nil)
36 } else {
37 self.denyButtonWasPressed(self)
38 }
39 }
40
41 @IBAction func approveButtonWasPressed(_ sender: Any?) {
42 let url = AppConstants.API_URL + "/login/client-authorized"
43
44 Alamofire.request(url, method: .post, parameters: payload)
45 .validate()
46 .responseJSON { response in
47 self.dismiss(animated: true)
48 }
49 }
50
51 @IBAction func denyButtonWasPressed(_ sender: Any?) {
52 dismiss(animated: true)
53 }
54 }
In the controller above, we have just a few methods. In the viewDidAppear method, we check that there is a hash in the payload. If there is no hash, then we will just dismiss the modal.
The approveButtonWasPressed method is an @IBAction that is fired when the APPROVE button is pressed on the app. This method will fire an HTTP POST request with the hash to the /login/client-authorized endpoint on our backend server.
The denyButtonWasPressed method is connected to the DENY button on the app. When this button is pressed, the approval window is closed and thus that approval session will be forgotten and will eventually expire.
In both classes above, we tried to access properties of a nonexistent AppConstant class. Create a new Swift file named AppConstant and replace the contents with the following:
1// File: ./dashboard/AppConstants.swift
2 import Foundation
3
4 class AppConstants {
5 static let API_URL = "http://127.0.0.1:8000"
6 static let PUSHER_CLUSTER = "PUSHER_CLUSTER"
7 static let PUSHER_KEY = "PUSHER_KEY"
8 static let PUSHER_BEAMS_INSTANCE_ID = "PUSHER_BEAMS_INSTANCE_ID"
9 }
Replace the
PUSHER_*placeholders with values from your Pusher dashboard.
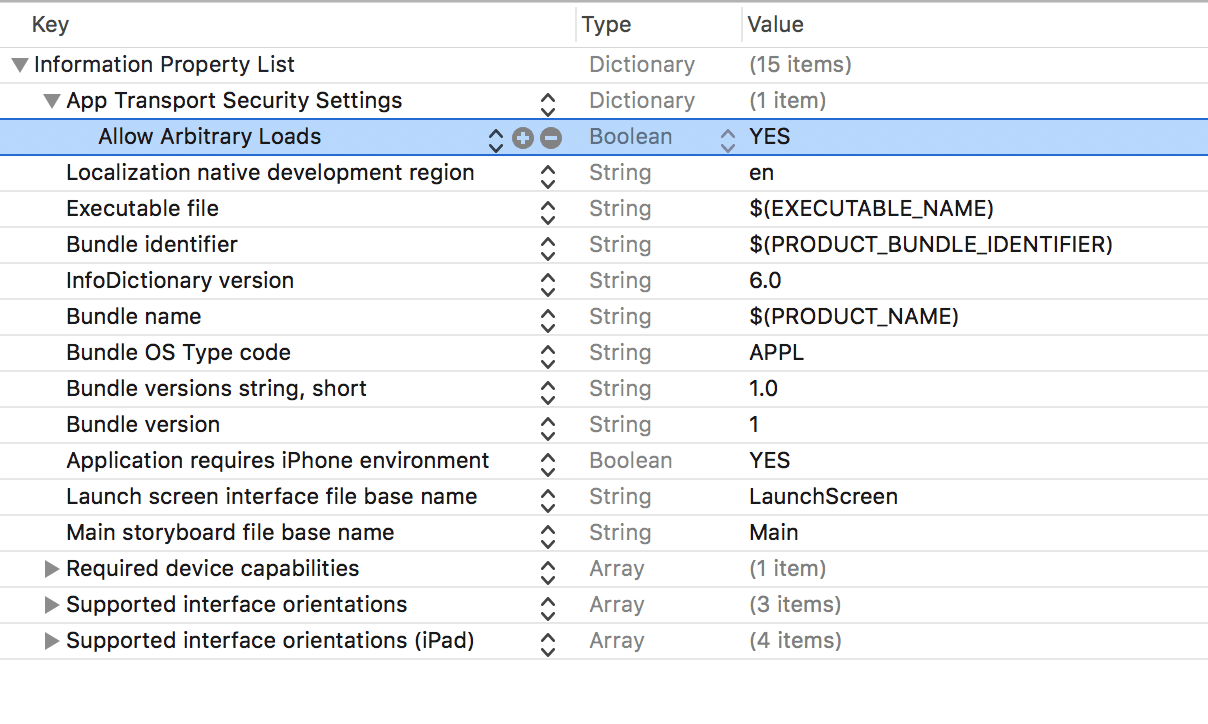
If you notice, the API_URL points to a localhost address. In iOS this is not allowed by default. To bypass this (and it is strongly recommended not to bypass this on production), update your info.plist file as seen below:
Adding push notifications support
The next thing to do is add push notifications support. When a new login approval request comes in and the application is in the background, we will get a push notification with notification actions to Approve or Deny the request straight from the notification.
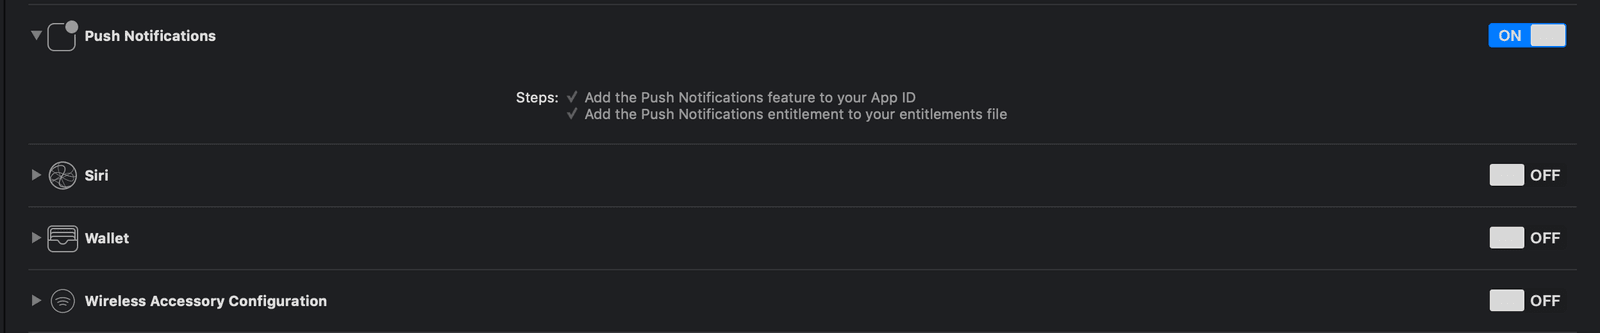
To get started, you need to provision your application for push notifications. You can do this by turning it on in the Capabilities tab of your projects settings.
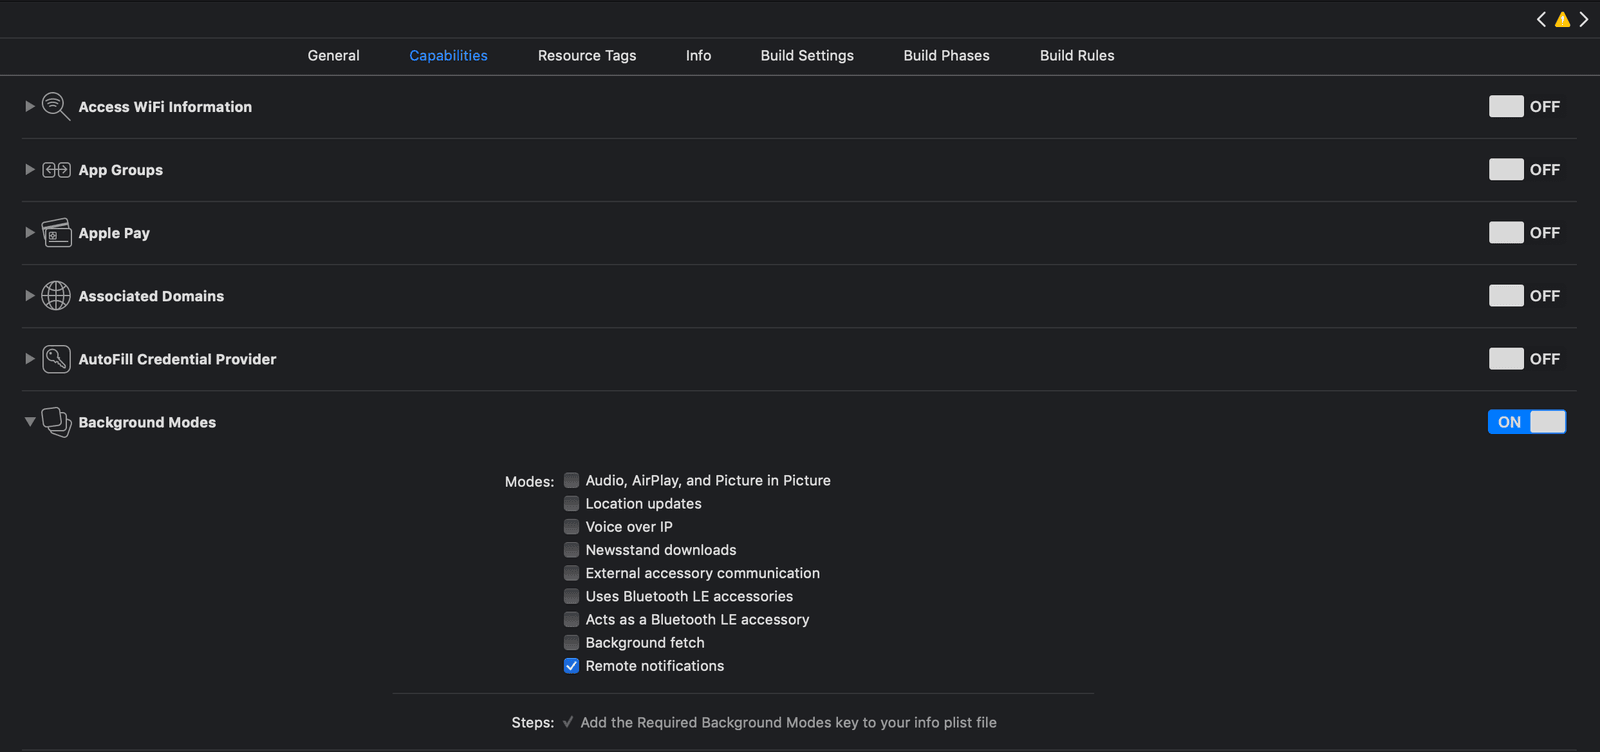
First, turn on the Remote notifications option in the Background Modes section as seen above. Then, turn on the Push Notifications toggle as seen below.
Next, open your AppDelegate file and replace the contents with the following:
1// File: ./dashboard/AppDelegate.swift
2 import UIKit
3 import PushNotifications
4 import UserNotifications
5
6 @UIApplicationMain
7 class AppDelegate: UIResponder, UIApplicationDelegate, UNUserNotificationCenterDelegate {
8 var window: UIWindow?
9 let pushNotifications = PushNotifications.shared
10
11 func application(_ application: UIApplication, didFinishLaunchingWithOptions launchOptions: [UIApplication.LaunchOptionsKey: Any]?) -> Bool {
12 pushNotifications.start(instanceId: AppConstants.PUSHER_BEAMS_INSTANCE_ID)
13 pushNotifications.registerForRemoteNotifications()
14
15 let center = UNUserNotificationCenter.current()
16 center.delegate = self
17
18 let deny = UNNotificationAction(identifier: "deny", title: "Deny", options: [.destructive])
19 let approve = UNNotificationAction(identifier: "approve", title: "Approve", options: [.foreground, .authenticationRequired])
20
21 center.setNotificationCategories([
22 UNNotificationCategory(identifier: "LoginActions", actions: [approve, deny], intentIdentifiers: [])
23 ])
24
25 return true
26 }
27
28 func application(_ application: UIApplication, didRegisterForRemoteNotificationsWithDeviceToken deviceToken: Data) {
29 pushNotifications.registerDeviceToken(deviceToken) {
30 let interest = "auth-janedoe-at-pushercom"
31 try? self.pushNotifications.addDeviceInterest(interest: interest)
32 }
33 }
34
35 func application(_ application: UIApplication, didReceiveRemoteNotification userInfo: [AnyHashable: Any], fetchCompletionHandler completionHandler: @escaping (UIBackgroundFetchResult) -> Void) {
36 pushNotifications.handleNotification(userInfo: userInfo)
37 completionHandler(.newData)
38 }
39
40 func userNotificationCenter(_ center: UNUserNotificationCenter, didReceive response: UNNotificationResponse, withCompletionHandler completionHandler: @escaping () -> Void) {
41 let name = Notification.Name("status")
42 let status = (response.actionIdentifier == "approve") ? "approved" : "denied"
43 let userInfo = response.notification.request.content.userInfo
44
45 if let aps = userInfo["aps"] as? [String: AnyObject], let payload = aps["payload"] as? [String: String] {
46 if status == "approved" {
47 NotificationCenter.default.post(
48 name: name,
49 object: nil,
50 userInfo: ["status": status, "payload": payload]
51 )
52 }
53 }
54
55 completionHandler()
56 }
57 }
Above, we first added the UNUserNotificationCenterDelegate to the class. This is so we can benefit from the UserNotifications framework. Next we register the device for push notifications using the Pusher Beams Swift library. We register the deny and approve UNNotificationActions and then register them both as notification categories.
We also register the interest for the device. When sending push notifications, interests are used to signify if the device should receive a notification or not.
In the last method, we try to parse the notification and then when we have parsed the remote push notification, we trigger a NotificationCenter message app wide. We can then use this notification inside our view controller to approve the request. Let’s do that.
Open the ViewController class and in the viewDidLoad method, add the following code:
1NotificationCenter.default.addObserver( 2 self, 3 selector: #selector(changeStatusFromPushNotification), 4 name: Notification.Name("status"), 5 object: nil 6 )
Also in the same file, add the following method to the class:
1@objc private func changeStatusFromPushNotification(notification: Notification) {
2 guard let data = notification.userInfo as? [String: Any] else { return }
3 guard let status = data["status"] as? String else { return }
4 guard let payload = data["payload"] as? [String: String] else { return }
5
6 if status == "approved" {
7 let url = AppConstants.API_URL + "/login/client-authorized"
8
9 Alamofire.request(url, method: .post, parameters: payload)
10 .validate()
11 .responseJSON { response in self.dismiss(animated: true) }
12 }
13 }
In this method, we check the notification we triggered from the AppDelegate and we extract the hash. If the status is approved, then we send an HTTP POST request similar to the one in the ApprovalViewController thus approving the login.
Sending and accepting requests from the app
Laravel by default requires a CSRF token for web requests. Disable this by opening the VerifyCsrfMiddleware class in the app/Http/Middleware directory. In this class, add the following to the except array:
1protected $except = [ 2 '/login/authorized', 3 '/login/client-authorized' 4 ];
Now, Laravel will allow requests without tokens to this route.
Tunnelling your Laravel application
Before building the iOS application, we need to update the AppConstant.API_URL. This is because we need to use a real server and not localhost if we want push notifications to work.
To do this, you need to download ngrok. This will be used to tunnel your localhost to a functioning and publicly accessible web address.
First, cd to the root of your Laravel application and run the following command:
$ php artisan serve
Next, while keeping that terminal window active, open another terminal window and run the command below:
$ ./ngrok http 8000
If your ngrok file is in a different path, you need to specify the path to it. For example:
/path/to/ngrok http 8000
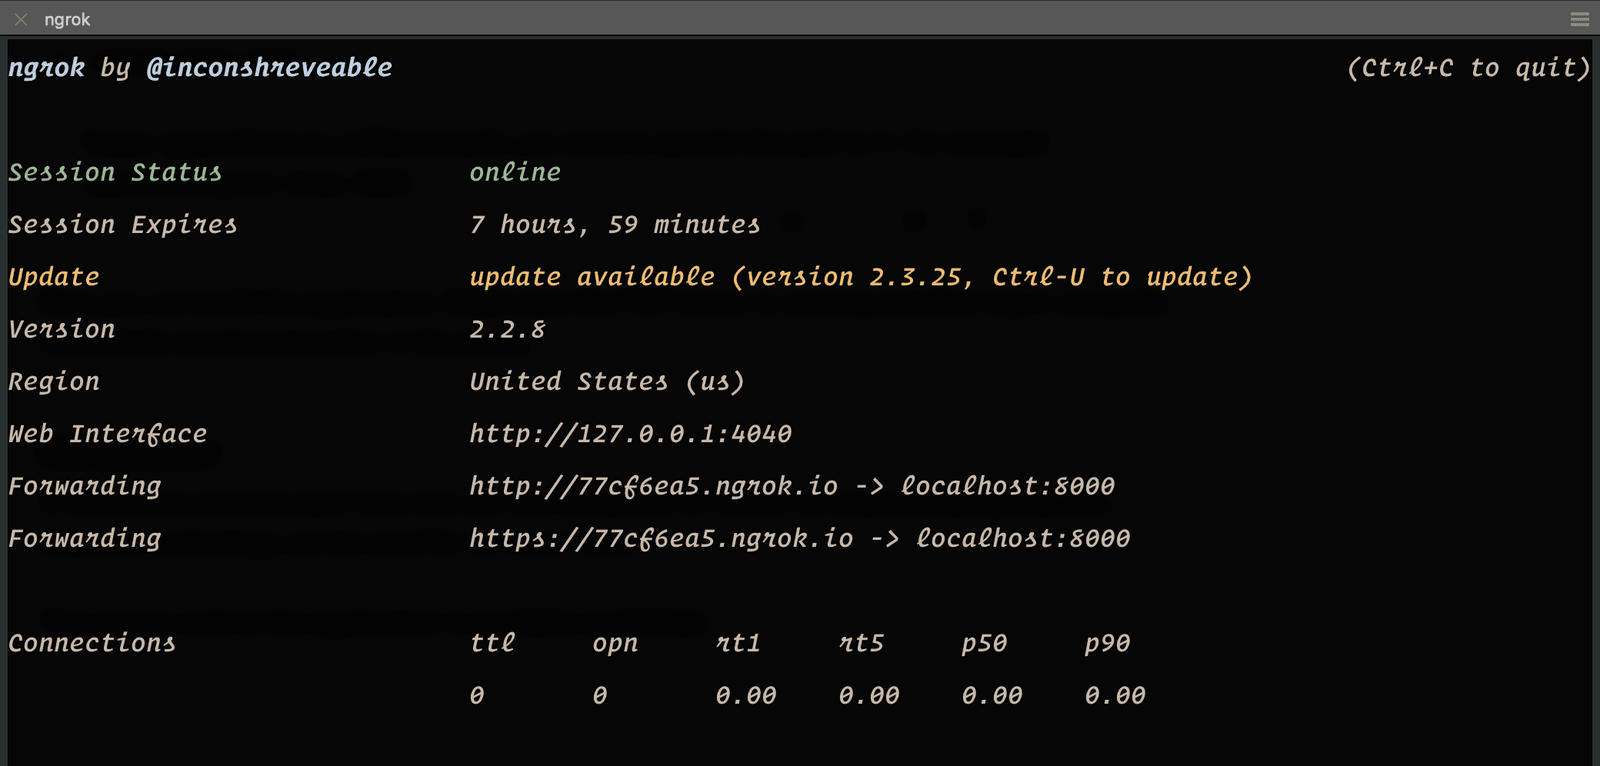
The tunnel will give you a web accessible URL. Assign the URL to the AppConstants.API_URL property.
Now you can build the application. Make sure the PHP server and ngrok are still running and then log in using the credentials mentioned earlier in the series.
Conclusion
In this series we have seen how one can use the power of Pusher to create amazing features. Realtime technology can be used for so much more.
The source code to the application is available on GitHub.


© 2024 Pusher Ltd. All rights reserved.
Pusher Limited is a company registered in England and Wales (No. 07489873) whose registered office is at MessageBird UK Limited, 3 More London Riverside, 4th Floor, London, United Kingdom, SE1 2AQ.