- Products

- Developers
- User stories
- Blog
- Pricing

Migrating from GCM to Pusher Beams
Introduction
Introduction
As most of you are aware, Google deprecated Google Cloud Messaging (GCM) on April 10, 2018, and completely removed support for it on May 29, 2019. And so, it is expected that by now you should have migrated to another messaging service or be on the verge of doing so.
Fortunately, Pusher has a solution called Beams that serves this purpose. In this tutorial, we will see how we can migrate an app built with GCM to Pusher Beams.
Understanding a GCM project
For this post, we will be looking at Google’s sample project using GCM here. Let us gain some understanding of what the major files and classes there do:
MyGcmListenerService: this is a service class that helps us detect when there is a new message. This service extends theGcmListenerServiceclass and overrides theonMessageReceivedmethod to give information about the new message.RegistrationIntentService: this service is where we fetch our device token and send to the server. As you know, with messaging services, each device will have a device token that you can send to your server in case you need to send messages to a specific device. This service helps us register the token.MyInstanceIDListenerService: this service is used to tell us then the device token has been updated.MainActivity: this is the main activity of the application where the receiver is registered and unregistered. Using GCM requires Google Play Services, in this class, checks like that are performed.
Having understood what these files do, let us see how we can migrate our app to use Pusher Beams instead.
Creating a Firebase project
Recent GCM apps were created with Firebase and if you fall into this category, you can skip this part. However, if your app was created from the Google developers console, follow along.
Go to your Firebase console, choose the Add a project card, then you select your former project from the dropdown and add Firebase to it like this.
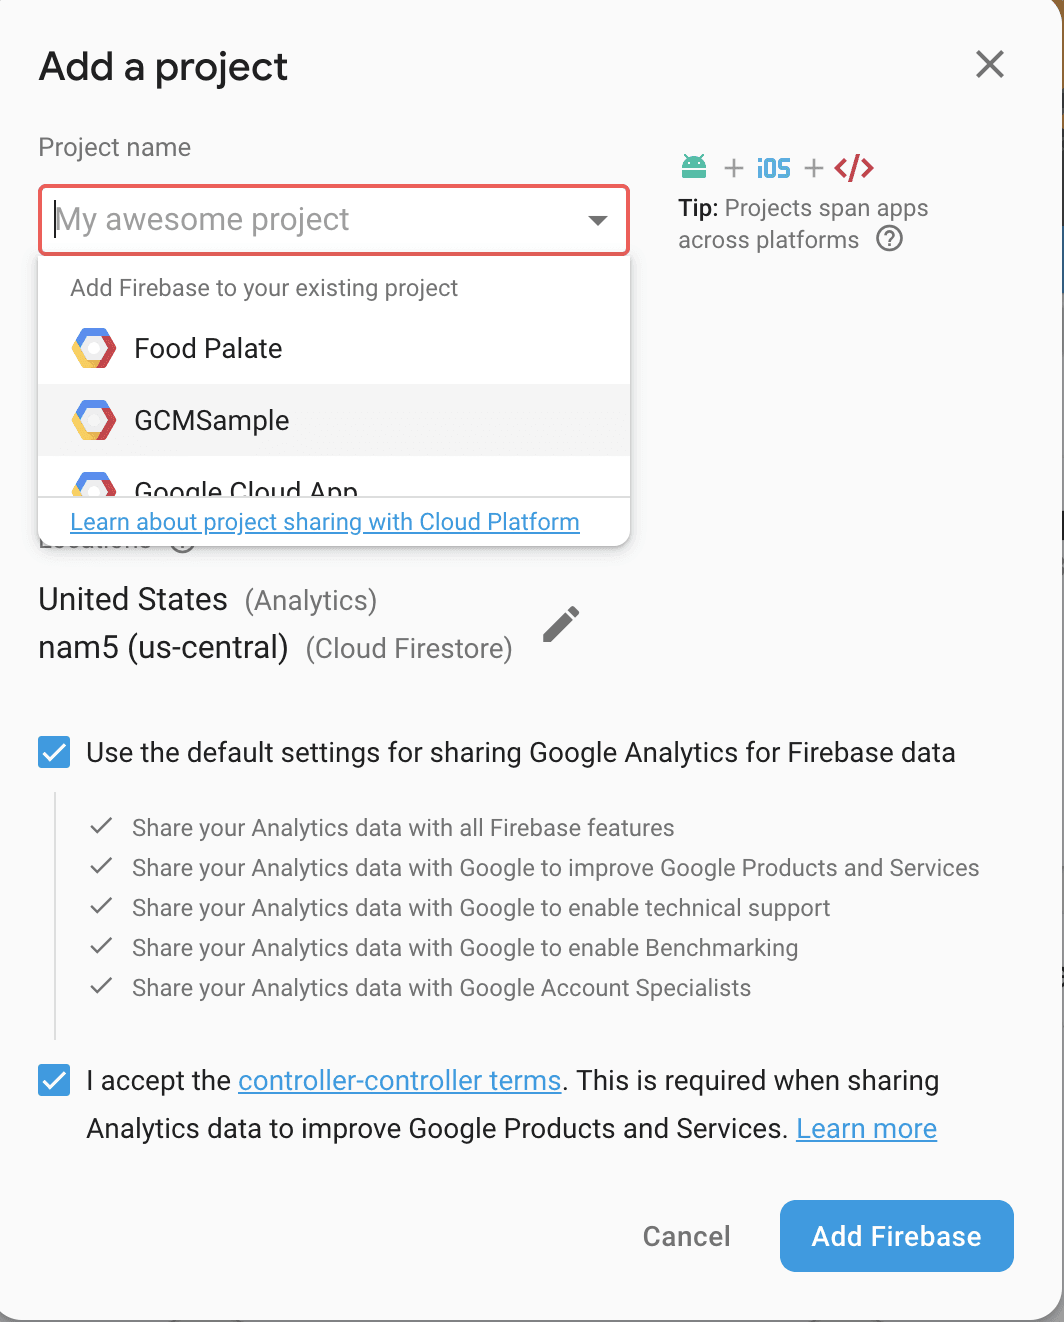
This will create a new project on Firebase with the same name. Now, select the Android icon to add an Android app to your Firebase project. Add your package name and register the app.
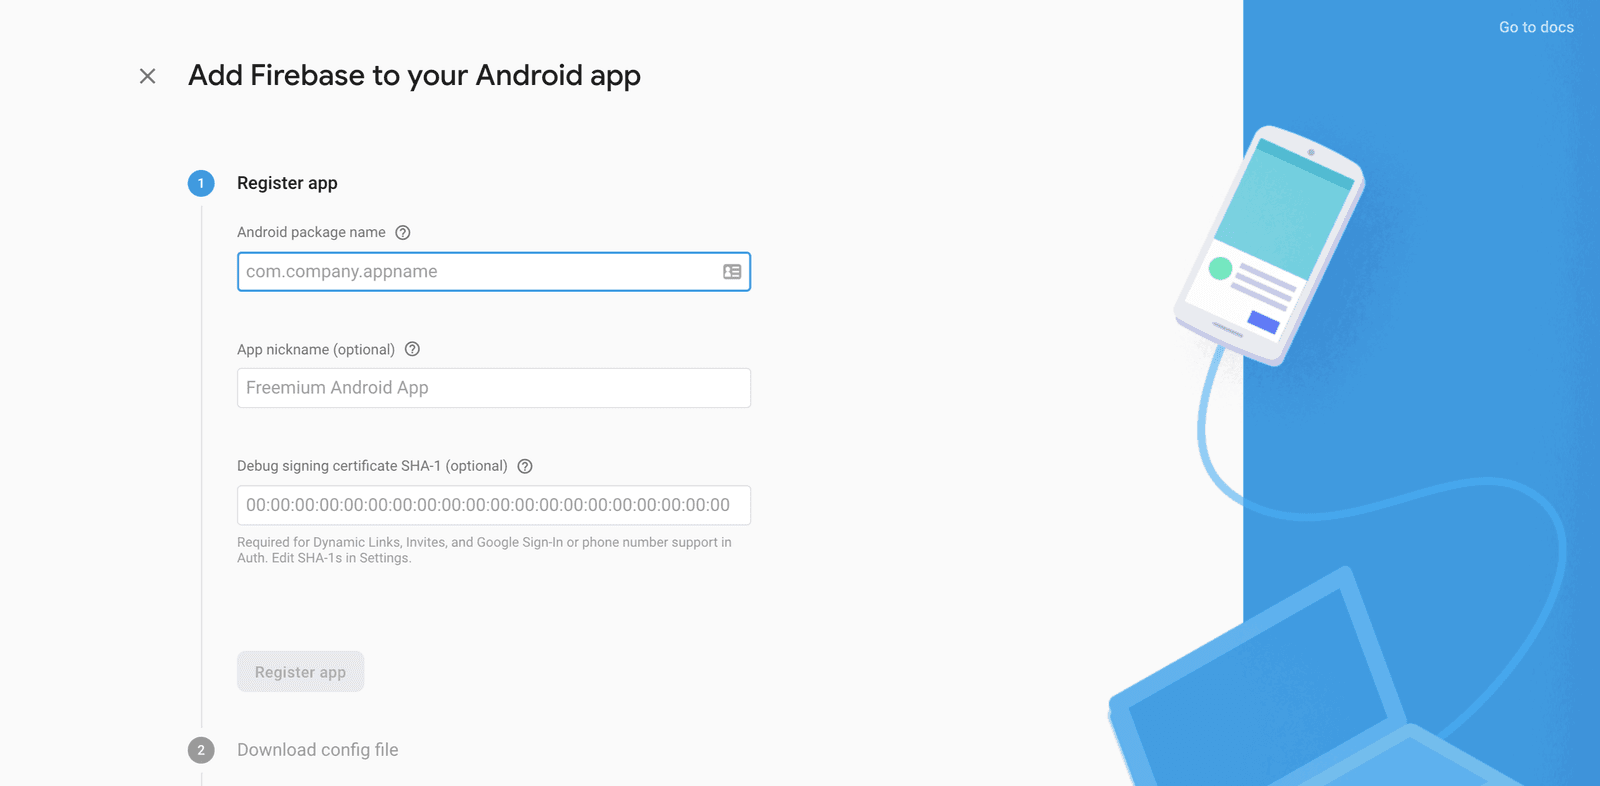
Thereafter, you download the google-services.json file. After downloading the file, skip the rest of the guide. Now, open your project and add the google-services.json file to your app directory (GCMSample/app/google-services.json).
Creating a Pusher Beams instance
Before creating a Pusher Beams instance, you need an FCM key. By now, you should have your Firebase project ready. Open the project, select the project settings and select the Cloud messaging tab. There, you will find the server key. Copy it out as you will need soon.
After that, create a free sandbox Pusher account or sign in. Then open the Pusher dashboard and create a new instance.
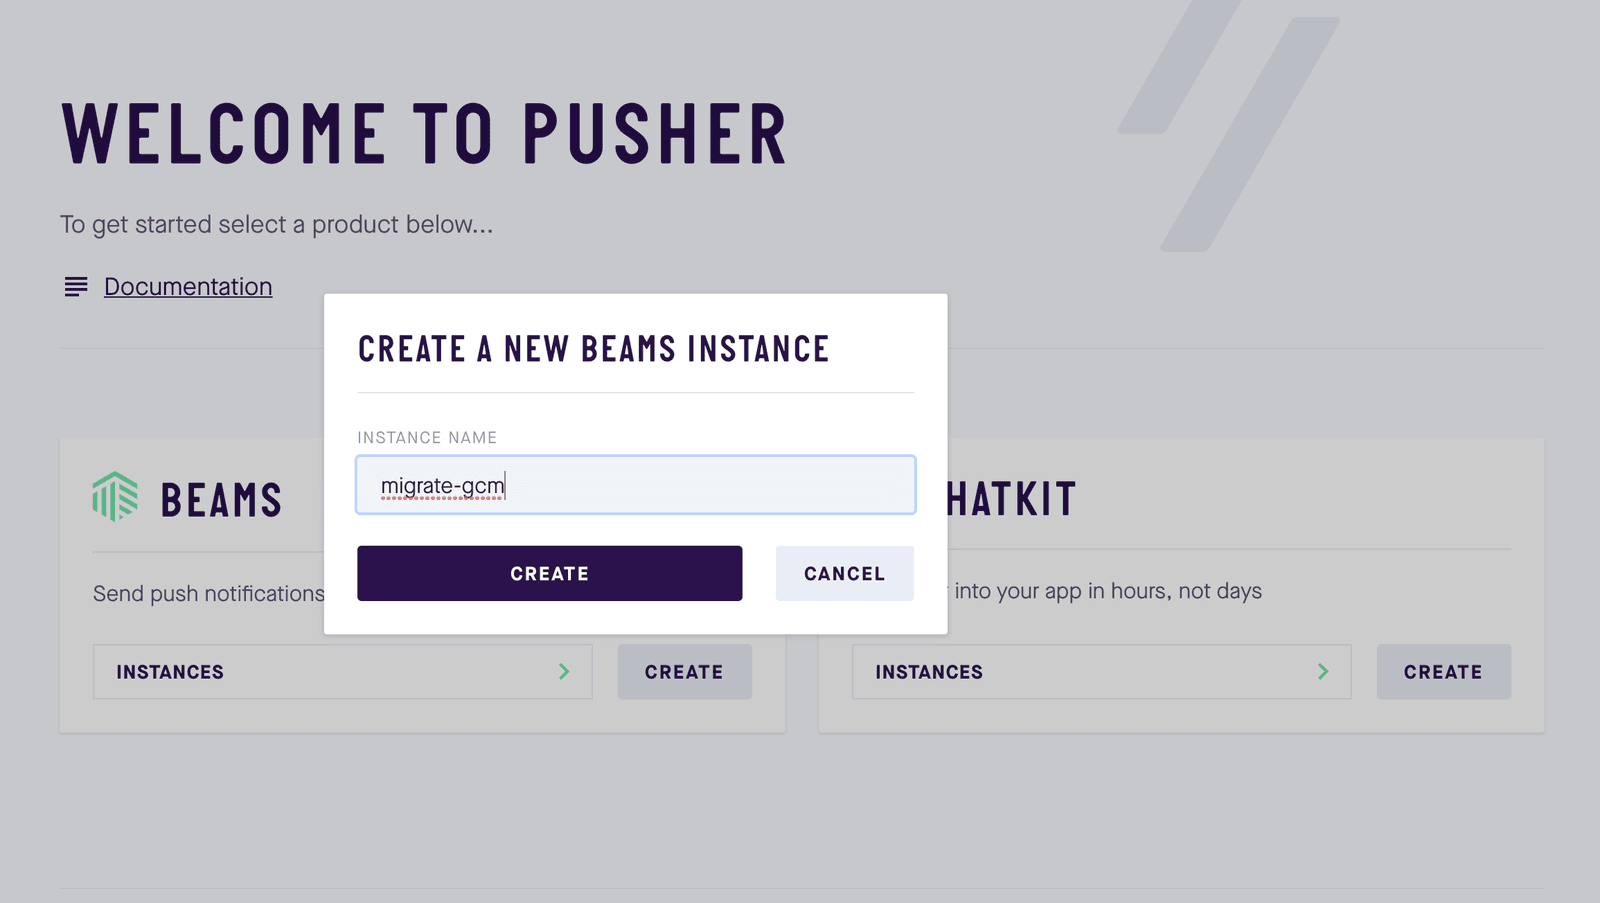
After creating the instance, select the Android quickstart. The first step is to enter your server key which you got from Firebase. After that, cancel the rest of the quickstart. Refer to the Beams Android quick start guide for more information.
Updating our dependencies
Open your project build.gradle file and make sure you have this dependency:
1dependencies { 2 // other dependencies 3 classpath 'com.google.gms:google-services:4.2.0' 4 }
Next, open your app build.gradle file, remove this dependency:
implementation "com.google.android.gms:play-services-gcm:15.0.1"
And add these dependencies:
1implementation 'com.google.firebase:firebase-messaging:17.6.0' 2 implementation 'com.pusher:push-notifications-android:1.4.0'
Also, make sure this plugin is applied at the end of the file:
apply plugin: 'com.google.gms.google-services'
After that, sync your gradle files so that the new dependencies will be downloaded for you.
Rewriting our services
Now, we will delete all the service classes from our project - MyGcmListenerService, MyInstanceIDListenerService and RegistrationIntentService. We will then replace all these services with a single service class.
Create a new class named NotificationsMessagingService and paste this:
1import android.app.NotificationChannel 2 import android.app.NotificationManager 3 import android.app.PendingIntent 4 import android.content.Intent 5 import android.os.Build 6 import androidx.core.app.NotificationCompat 7 import androidx.core.app.NotificationManagerCompat 8 import com.google.firebase.messaging.RemoteMessage 9 import com.pusher.pushnotifications.fcm.MessagingService 10 11 class NotificationsMessagingService : MessagingService() { 12 13 override fun onNewToken(token: String) { 14 super.onNewToken(token) 15 } 16 17 override fun onMessageReceived(remoteMessage: RemoteMessage) { 18 showNotification(remoteMessage) 19 } 20 21 }
This class extends the MessagingService class. And so, we can implement two methods essential to our migration:
onNewToken- This is called when the device token is updated.onMessageReceived- This is called when a new message is received.
Implementing the onMessageReceived method is compulsory, while the onNewToken method is not. In the onMessageReceived method, we called another function to display a notification. You can add the function like so:
1private fun showNotification(remoteMessage: RemoteMessage) { 2 3 val notificationId = 10 4 val channelId = "migration" 5 lateinit var channel:NotificationChannel 6 val intent = Intent(this, MainActivity::class.java) 7 intent.flags = Intent.FLAG_ACTIVITY_NEW_TASK or Intent.FLAG_ACTIVITY_CLEAR_TASK 8 val pendingIntent = PendingIntent.getActivity(this, 0, intent, 0) 9 val mBuilder = NotificationCompat.Builder(this, channelId) 10 .setSmallIcon(R.mipmap.ic_launcher) 11 .setContentTitle(remoteMessage.notification!!.title!!) 12 .setContentText(remoteMessage.notification!!.body!!) 13 .setContentIntent(pendingIntent) 14 .setPriority(NotificationCompat.PRIORITY_DEFAULT) 15 .setAutoCancel(true) 16 17 if (Build.VERSION.SDK_INT >= Build.VERSION_CODES.O) { 18 val notificationManager = applicationContext.getSystemService(NotificationManager::class.java) 19 val name = getString(R.string.channel_name) 20 val description = getString(R.string.channel_description) 21 val importance = NotificationManager.IMPORTANCE_DEFAULT 22 channel = NotificationChannel("migration-channel", name, importance) 23 channel.description = description 24 notificationManager!!.createNotificationChannel(channel) 25 notificationManager.notify(notificationId, mBuilder.build()) 26 27 } else { 28 val notificationManager = NotificationManagerCompat.from(this) 29 notificationManager.notify(notificationId, mBuilder.build()) 30 } 31 32 }
Since devices running Android O and above have a unique way of handling notifications, we have to cater to that in the method. You also need to add these resources in the strings.xml file as we used them in the snippet above:
1<string name="channel_name">beams</string> 2 <string name="channel_description">Display notifications with Pusher Beams</string>
After writing our service class, the next thing is to declare it in our AndroidManifest.xml file. Remove the previously declared services and add this new one:
1<service android:name=".NotificationsMessagingService"> 2 <intent-filter android:priority="1"> 3 <action android:name="com.google.firebase.MESSAGING_EVENT" /> 4 </intent-filter> 5 </service>
You should also remove these permissions as you do not need them any longer:
1<uses-permission android:name="android.permission.WAKE_LOCK" /> 2 <uses-permission android:name="com.google.android.c2dm.permission.RECEIVE" />
Also, remove the receiver from the manifest:
1<receiver 2 android:name="com.google.android.gms.gcm.GcmReceiver" 3 android:exported="true" 4 android:permission="com.google.android.c2dm.permission.SEND" > 5 <intent-filter> 6 <action android:name="com.google.android.c2dm.intent.RECEIVE" /> 7 <category android:name="com.neo.gcmsample" /> 8 </intent-filter> 9 </receiver>
Finishing up
Finally, we need to initialize Pusher Beams and subscribe for specific topics and we will do that in the MainActivity which is the starting activity.
In the class, replace everything with this:
1import androidx.appcompat.app.AppCompatActivity 2 import android.os.Bundle 3 import com.pusher.pushnotifications.PushNotifications 4 5 class MainActivity : AppCompatActivity() { 6 7 override fun onCreate(savedInstanceState: Bundle?) { 8 super.onCreate(savedInstanceState) 9 setContentView(R.layout.activity_main) 10 PushNotifications.start(applicationContext, "PUSHER_INSTANCE_ID") 11 PushNotifications.addDeviceInterest("hello") 12 } 13 }
Replace the
PUSHER_INSTANCE_IDplaceholder with your own key from your dashboard.
In this final snippet, we initialized Beams and subscribed to the hello topic. You can subscribe to as many topics as you want.
Conclusion
Great! You have successfully migrated your app from using GCM to Pusher Beams. You have nothing to fear as Google is about to remove support for GCM. Feel free to play around with the repository and comment if you encounter any hurdles.


© 2024 Pusher Ltd. All rights reserved.
Pusher Limited is a company registered in England and Wales (No. 07489873) whose registered office is at MessageBird UK Limited, 3 More London Riverside, 4th Floor, London, United Kingdom, SE1 2AQ.