- Products

- Developers
- User stories
- Blog
- Pricing

Implement OAuth in a Flask app using Flask-Dance
Introduction
In this tutorial, we are going to look at how Flask developers can make use of Flask-Dance to implement OAuth in a Flask-based application.
Flask-Dance makes it possible for developers to allow users to log into a web application via their GitHub account, Twitter account or even Dropbox account.
Although it does not guarantee complete protection from cyber attacks, making use of Flask-Dance to integrate OAuth in a web application makes it difficult for attackers to sniff users' credentials.
We will build a Flask-based news application that allows readers to log in via their GitHub account to read current news from BBC or CNN just to demonstrate OAuth via Flask-Dance
Prerequisites
You will need the following:
Python 2.7
This tutorial was developed on Linux Debian. Users of other systems should know how to configure their own environment.
What is OAuth?
OAuth (Open Authorization) is not an authentication framework as some developers perceive it to be. Rather it is an authorization framework which allows a third-party application to get access to users’ resource or data.
OAuth 2.0 is an open source protocol which allows users to share their resources with a third-party application without exposing users’ credential.
For instance, if a user wants to sign up or log in to a web application, the user can choose to do so via their Facebook or GitHub account(assuming developers have made it possible).
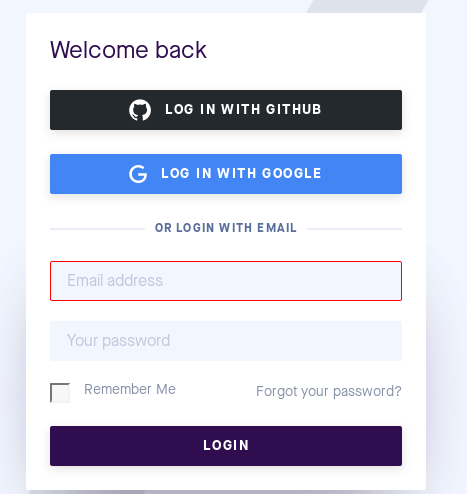
The screenshot below shows the login page of Pusher. In this case, the user can choose to log in with their GitHub or Google account.
Why is OAuth Important?
OAuth is important because it has reduced the risk of information disclosure.
Instead of users' handing their credentials over to third-party clients, OAuth allows users to give access right to third-party clients by providing tokens instead of password.
Introduction to Flask-Dance
Flask-Dance is an approved extension that allows developers to build Flask-based apps to allow users to authenticate via OAuth protocol.
Since Flask is micro-framework, extensions such as Flask-Dance allows developers to extend the functionality of Flask.
Without Flask-Dance and other extensions with similar function, it becomes difficult to integrate OAuth in Flask application.
We need to register an OAuth app with GitHub in order to allow users to access the newsroom application by connecting to their GitHub account.
First and foremost, we need to sign in to our GitHub account. Then click on your profile picture, navigate to settings and click on Developer settings.
To create a GitHub OAuth app, click on the button with the inscription New OAuth App.
In the application name section, type the name of the web application so that users can recognize it.
In the homepage URL section, type the full URL to your application homepage.
Describe the purpose of your application in the application description section.
Inside the application callback URL, type your application’s callback URL.
A callback URL directs the user back to the original site from an external service. In this context, when a user makes an attempt to access current news, the user is directed to sign in with GitHub account and redirected back to the homepage after successful authorization.
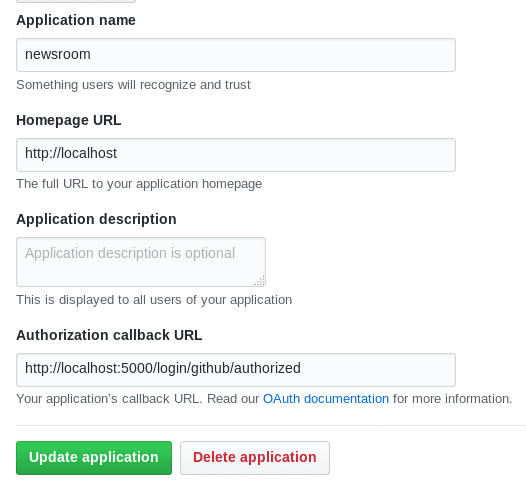
Click on the Update application button to save and update.
Create a virtual development environment for the OAuth project
Before we start to install Python and Flask packages as well as files and folders for our project, we need to create a virtual environment for our project.
We will use the Virtualenv tool to do so.
The main essence of creating a virtual environment is to work with specific packages that we need for our Flask project and the Python main directory from our Python-Flask project
Assuming you have already installed pip on your Debian machine, use the following command to install virtualenv:
pip install virtualenv
Next use the command mkdir to create a directory to store or hold our virtual environment
mkdir News
Initialize a virtualenv for our Flask project using the following command
virtualenv newsroom
The above command creates a newsroom directory where we will install packages such as feedparser for our Flask project.
As the primary purpose of virtualenv tool is to create a sandbox environment, we need to activate it to allow virtualenv to sandbox our Flask project. The following command activates our virtual environment as shown below:
source /bin/activate
We can also use the deactivate command to exit from our sandbox Python environment and return to the global or main directory.
Create files and folders for our project
Inside the virtual environment, we need to create the following files and folder for our project.
Use the touch command to create app.py file and mkdir command to create newsapp folder.
app.py: main application file
newsapp: main application folder
Inside or within the newsapp directory, create a sub-folder and name it templates. Create home.html in the templates sub-folder
Install packages using pip
Next, we will use pip or easy_install to install the following packages:
- Flask: micro framework for python developers
- feedparser: It parses Atom 0.3, and Atom 1.0 feeds and so on.
- Flask-Dance: a Flask extension to implement OAuth in web application.
You can choose to use pip install <package_name> or easy_install <package_name>.
1pip install Flask 2 3 pip install feedparser 4 5 pip install Flask-Dance[sqla]
The above commands install Feedparser, Flask and Flask-Dance alongside with SQLAlchemy
Import packages into app.py file
Inside the app.py file import the following packages
github
1from flask import Flask, render_template, redirect, url_for 2 import feedparser 3 from flask_dance.contrib.github import make_Github_blueprint, github
In Python, we can access functions in modules by using the import command. Modules are simply files ending with the .py extension.
Line 1: We imported render_template , redirect and url_for from flask.
Line 2: We imported feedparser.
Line 3: We imported make_github_blueprint and github from flask_dance
Now initialize and configure the Flask application with the GitHub app client and secret ID with the following code in the app.py file.
You can refer to GitHub settings if you can't remember or failed to save it in a file somewhere.
1app = Flask(__name__) 2 app.secret_key="this.is.my.secretkey" 3 blueprint = make_github_blueprint(client_id='your_client_id', client_secret='your_client_secret' 4 )
It is not advisable to set your secret key as this.is.my.secretkey. You can generate a random key using Python fernet.
The command below generates a cryptographic key via fernet
python -c "from cryptography.fernet import Fernet; print(Fernet.generate_key().decode())"
Or
1from cryptography.fernet importFernet 2 key = Fernet.generate_key() 3 key.decode()
The key.decode() function converts from utf-8 to Python string type. So if you want string , you can include it below generate_key() function
Before you generate a crypotgraphic key via fernet, you need to install cryptography package.
pip install cryptography
Don't place the above code inside app.py file. You can run it on the console and later assign it to secret_key inside the app.py file.
Now let's register our blueprint in the app. py file using the following code
app.register_blueprint(blueprint, url_prefix="/login")
Because we will use RSS feeds to retrieve recent articles, let’s create two keys and assign RSS feeds to them respectively in the app.py file
1RSS_feeds = {'BBC': 'http://feeds.bbci.co.uk/news/rss.xml', 2 'CNN': 'http://rss.cnn.com/rss/edition.rss'}
Afterwards create a view function in app.py file to authenticate users with GitHub
1@app.route('/') 2 def news(): 3 if not github.authorized: 4 return redirect(url_for("github.login") 5 account_info=github.get("/user") 6 if account_info.ok: 7 account_info_json = account_info.json() 8 return redirect(url_for("news", publication="bbc"))
The above code will prompt the user to connect with their GitHub account if they haven't.
After the user has connected with their GitHub account then the user can get access to news from BBC.
Let’s implement the code for a news web application based on Flask. Place the following code in the app.py file:
1@app.route("/<publication>") 2 def news(publication="bbc"): 3 feed=feedparser.parse(RSS_feeds[publication]) 4 current_article = feed\['entries'\][0] 5 return render_template("home.html", current_article=current_article)
Inside the templates sub-folder, place the following code in the home.html file.
1<html> 2 <head> 3 <title>Headlines</title> 4 </head> 5 <body> 6 7 <h1>Headlines</h1> 8 <b><a href="{{current_article.link}}">{{current_article.title}}</a></b><br /> 9 <i>{{current_article.published}}</i> <br /> 10 <p>{{current_article.summary}}</p> 11 12 </body> 13 </html>
The following content will be displayed to users after they have connected with their GitHub account.
Before you run the app, you need to set the environmental variable OAUTHLIB_INSECURE_TRANSPORT to 1 as shown below.
It is necessary to do so if you want run the app locally.
export OAUTHLIB_INSECURE_TRANSPORT=1
The above command disables HTTP requirement set by OAuthLib.
You can now run the app by typing the following on your console
python app.py
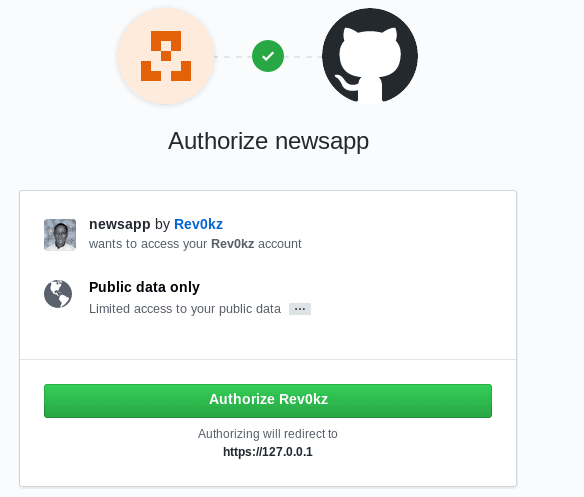
Afterwards navigate to http://localhost:5000/ or http://127.0.0.1:5000/ to authorize with GitHub.
Conclusion
This tutorial shows how we can use Flask-Dance to implement OAuth in web application. Apart from allowing users to connect with their GitHub, Flask-Dance makes it possible for developers to add Twitter, Slack, Facebook so that users without GitHub account can connect with their Facebook or Twitter account to access content .
The full source code for this can be seen on GitHub.


© 2024 Pusher Ltd. All rights reserved.
Pusher Limited is a company registered in England and Wales (No. 07489873) whose registered office is at MessageBird UK Limited, 3 More London Riverside, 4th Floor, London, United Kingdom, SE1 2AQ.