- Products

- Developers
- User stories
- Blog
- Pricing

Build a photo feed with Swift and Raspberry Pi
Introduction
The Camera Module is a great accessory for the Raspberry Pi, which itself is a great small device that can be easily hidden, making both ideal for a security camera.
In this tutorial, we're going to build the iOS photo feed with a Python script to take pictures at a certain interval with the Raspberry Pi camera, then save them to a web server and publish the URL to a Pusher channel so an iOS app can show them in a realtime photo feed.
You'll need:
- A Raspberry Pi 3 with the latest Raspbian
- A Raspberry Pi Camera Module
- ngrok
- Xcode 8
The complete source code of the Python script and the iOS app is on Github for reference. This is how the final app will look:
Let's get started!
Configuring Raspberry Pi
First, with the Pi switched off, you need to connect the Camera Module to the Raspberry Pi's camera port, then start up the Pi and ensure the software is enabled. Here's a great getting started guide that shows you how.
Next, make sure your OS is updated by executing the following commands:
1sudo apt-get update 2sudo apt-get upgrade
Next, you need to make sure all the development dependencies we're going to need are installed, by executing:
sudo apt-get install build-essential libssl-dev python-dev libffi-dev python3-dev python3-pip
It's a good practice to use virtualenv so multiple Python projects that have different (and conflicting) requirements can coexist on the same computer. If you don't have already, install it with:
sudo pip install virtualenv
Now install a web server. NGINX is a good option:
1sudo apt-get install nginx 2sudo /etc/init.d/nginx start
We'll need a directory on the web server to store the pictures. Let's create the directory photos under /var/www/html/ and give it permissions (by changing the owner to the user pi (or the user you'll use to run the Python script):
1sudo mkdir /var/www/html/photos 2sudo chown -R pi:pi /var/www/html/photos
Finally, we're going to use ngrok to make our web server publicly available. Download the Linux ARM version:
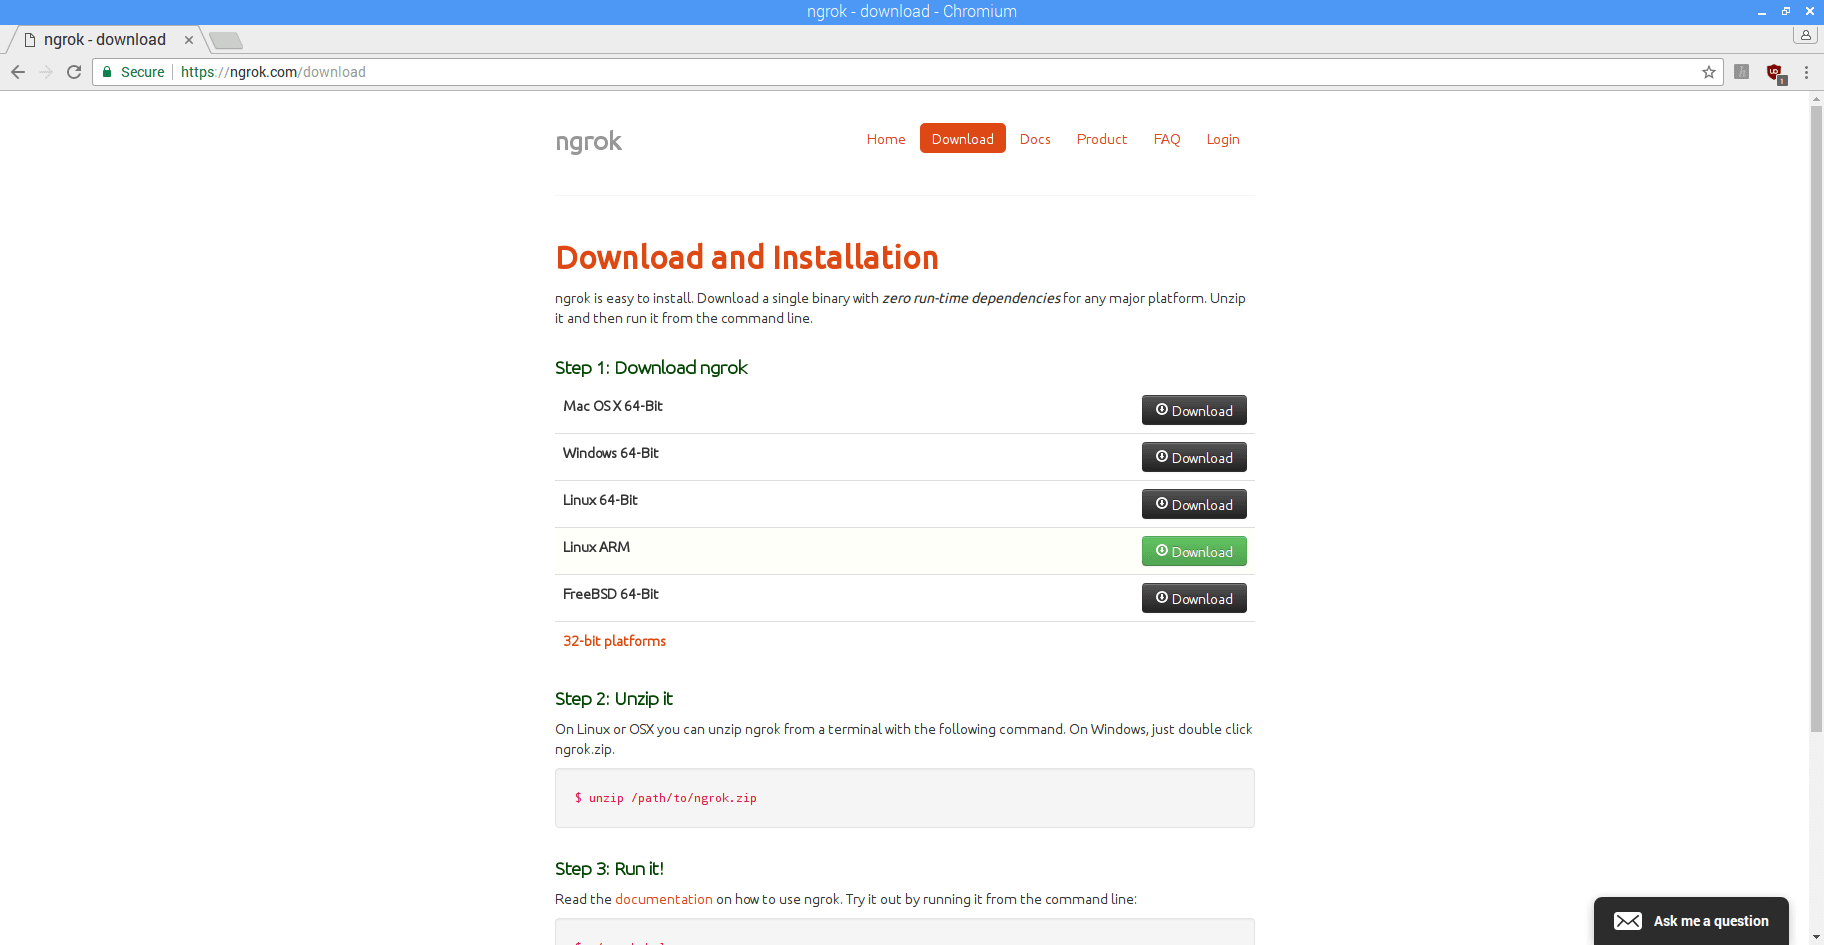
In another terminal window, unzip the file and run it with:
./ngrok http 80
This will create a secure tunnel to your Raspberry Pi's port 80 and a screen like the following will be shown:

Copy the URL with the HTTPS protocol (in this case https://5e34f8a7.ngrok.io). This is your public URL and we're going to use it later (we'll use HTTPS because iOS cannot load HTTP resources by default, only HTTPS resources, which is a good practice anyway).
Setting up a Pusher Channels app
Create a free account with Pusher.
When you first log in, you'll be asked to enter some configuration options to create your app:

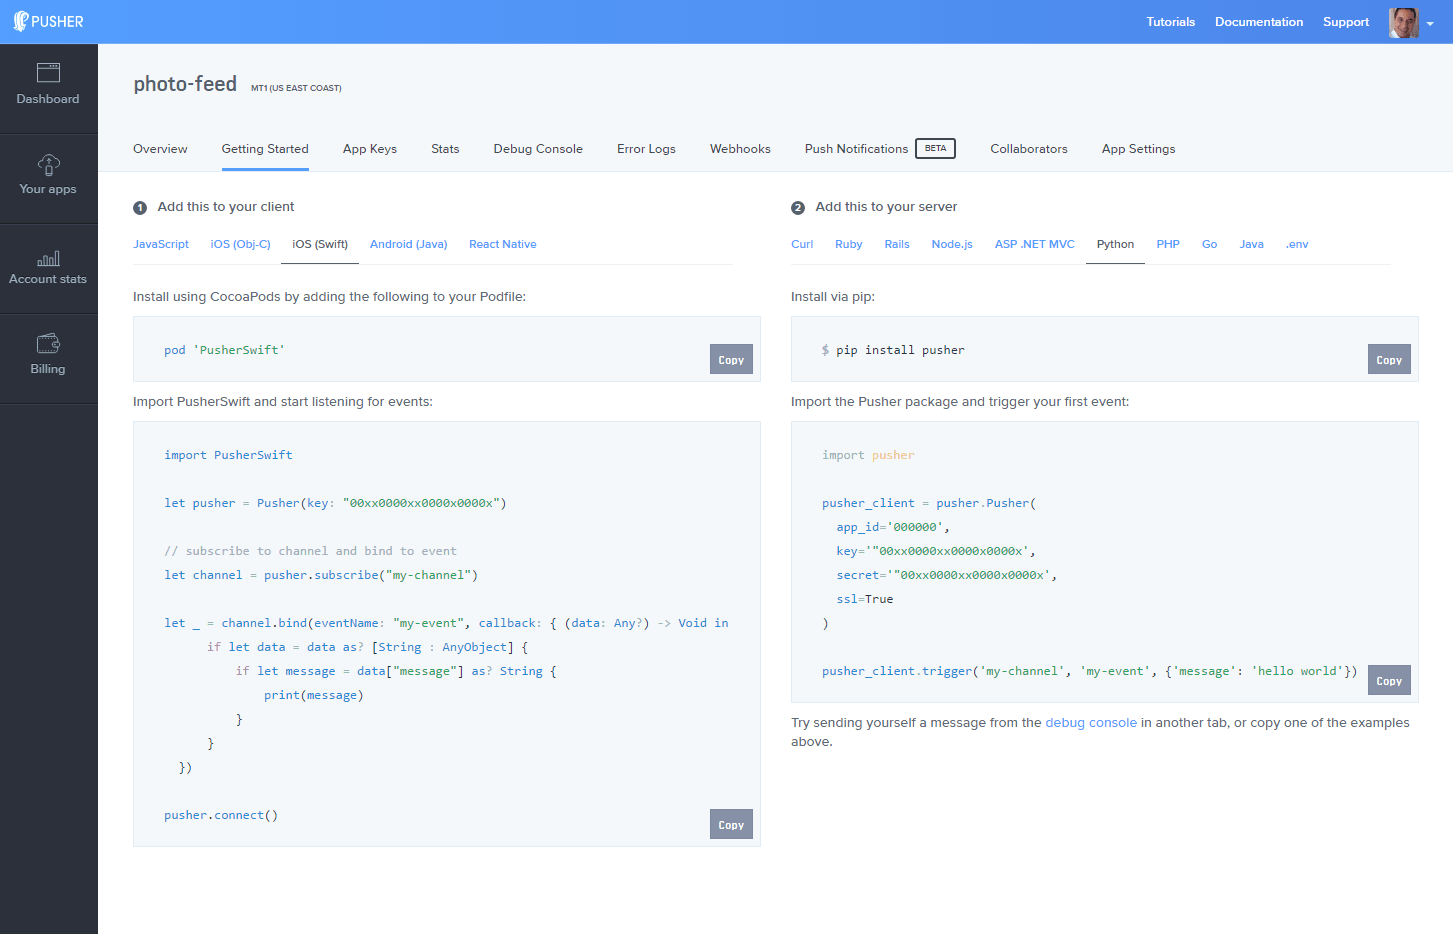
Enter a name, choose iOS as your frontend tech, and Python as your backend tech. This will give you some sample code to get you started:
But don't worry, this won't lock you into this specific set of technologies as you can always change them. With Pusher, you can use any combination of libraries.
Then go to the App Keys tab to copy your App ID, Key, and Secret credentials, we'll need them later.
The Python script
Create a new directory, cd into it, and create a virtual environment for the project with Python 3:
virtualenv -p python3 env
And activate it with:
source env/bin/activate
With this, you'll get the Python binary inside virtualenv instead of the global one. This way, install the dependencies of the script, Pusher and PiCamera:
1pip install pusher 2pip install picamera
Now, for the script, let's start with this version:
1from picamera import PiCamera 2from time import sleep 3 4camera = PiCamera() 5 6# If you need to rotate the camera 7# camera.rotation = 180 8camera.start_preview() 9sleep(30) 10camera.stop_preview()
Save the file as camera.py And run it with:
python camera.py
This will show the camera in preview mode (only when a monitor is connected to the Pi) for 30 seconds so you can position the camera the way you want it.
Now for the real script, let's import the dependencies:
1from picamera import PiCamera 2from time import sleep 3from datetime import datetime 4from pusher import Pusher 5 6...
Enter the time between photos in seconds (in this case 15), and your Pusher app information:
1... 2seconds_between_photos = 15 3pusher_app_id = '<INSERT_YOUR_PUSHER_APP_ID_HERE>' 4pusher_key = '<INSERT_YOUR_PUSHER_APP_KEY_HERE>' 5pusher_secret = '<INSERT_YOUR_PUSHER_APP_SECRET_HERE>' 6hostname = '<INSERT_YOUR_NGROK_HTTPS_URL_HERE>' 7 8camera = PiCamera() 9 10pusher = Pusher(pusher_app_id, pusher_key, pusher_secret)
Set the resolution of the camera (in this case 640x480 will do):
1... 2# If you need to rotate the camera 3# camera.rotation = 180 4camera.resolution = (640, 480)
And in an infinite loop, format the actual time as a string (like 03-23-2017-11:18:55) to annotate the picture and use it as the name of the image file so we can publish the URL to Pusher:
1... 2 3while True: 4 try: 5 sleep(seconds_between_photos) 6 date = datetime.now().strftime('%m-%d-%Y-%H:%M:%S') 7 camera.annotate_text = date 8 filename = '/photos/' + date + '.jpg' 9 camera.capture('/var/www/html' + filename) 10 url = hostname + filename 11 pusher.trigger('photos', 'new_photo', {'url': url}) 12 except Exception as e: 13 print ('Error:', e)
In this simple implementation, we'll catch any error (like timeouts if the Pi lost the network connectivity) so the script couldn't be stopped when one is thrown.
And that's it. If you run it, you should see images files being saved in the /var/www/html/photos directory.
Setting up the Xcode project
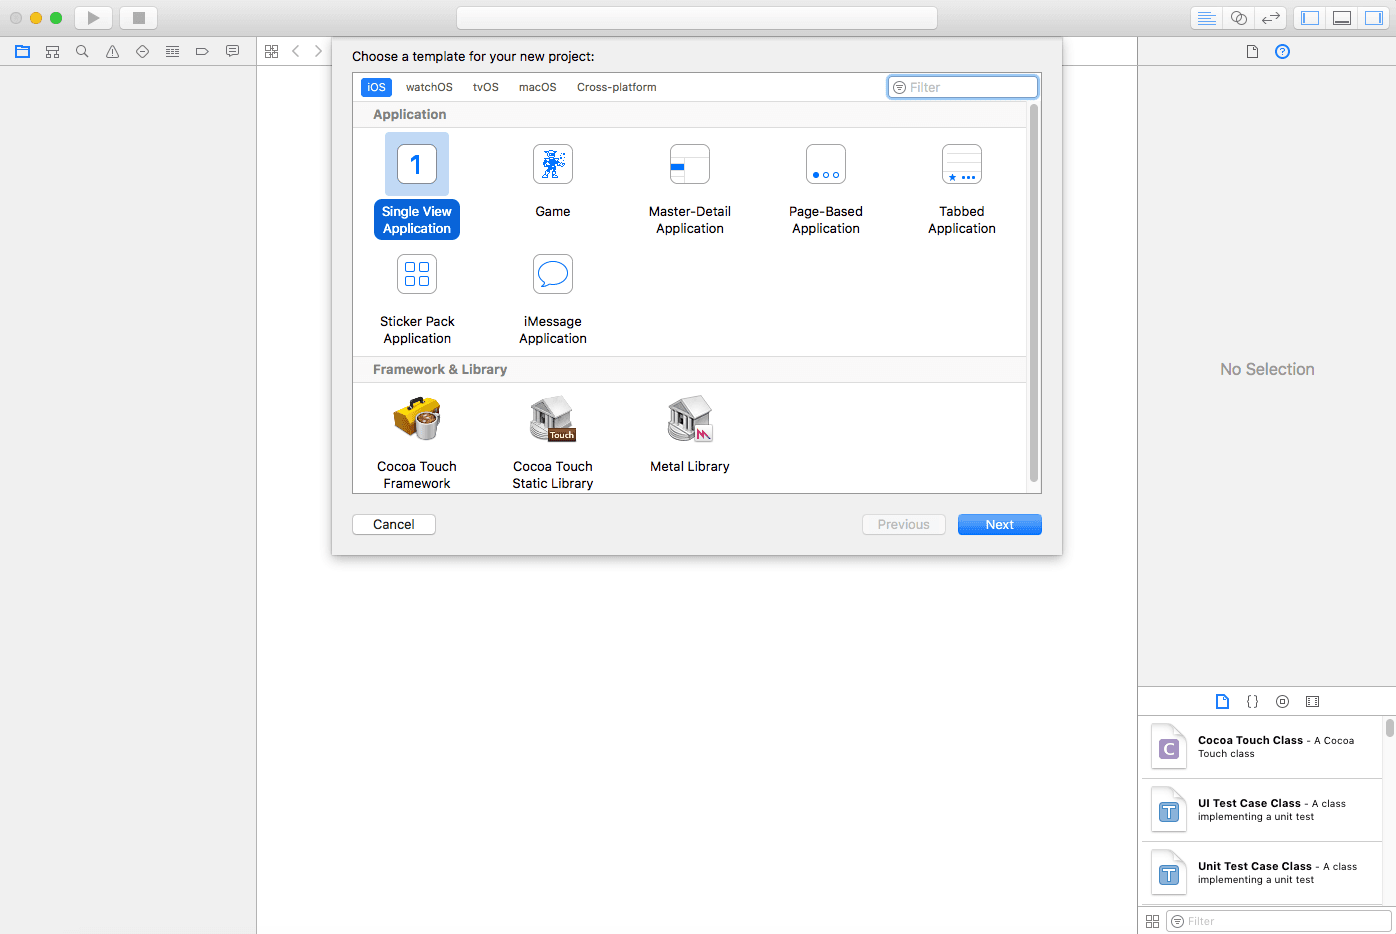
Open Xcode and create a Single View Application:
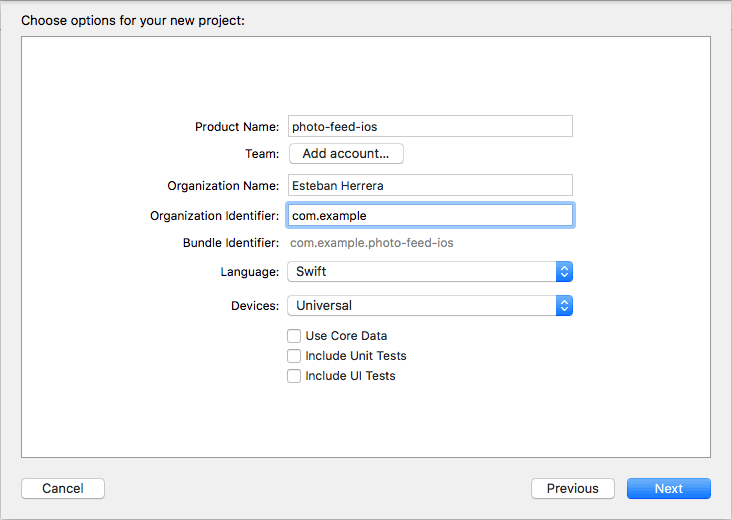
Give it a name, choose Swift as the language and Universal in the Devices option:
Now, we're going to install the project dependencies with CocoaPods. Close your Xcode project, and in a terminal window go to the top-level directory of your project and execute this command:
pod init
This will create a text file named Podfile with some defaults, open it and add as dependencies PusherSwift and Kingfisher (a library for downloading and caching images from the web). It should look like this:
1# Uncomment the next line to define a global platform for your project 2# platform :ios, '9.0' 3 4target 'photo-feed-ios' do 5 # Comment the next line if you're not using Swift and don't want to use dynamic frameworks 6 use_frameworks! 7 8 # Pods for twitter_feed_pusher 9 pod 'PusherSwift' 10 pod 'Kingfisher' 11 12end
Now you can install the dependencies in your project with:
pod install
And from now on, make sure to open the generated Xcode workspace instead of the project file:
open photo-feed-ios.xcworkspace
For apps like this, creating everything programmatically is easier, so we won't use the Interface Builder or the storyboard file that Xcode creates (Main.storyboard).
The iOS app
Let's start by opening the file ViewController.swift that Xcode created for us and change it so it extends from a UITableViewController:
1import UIKit 2 3class ViewController: UITableViewController { 4 ... 5}
Now open AppDelegate.swift to manually create the window in which our app is going to live and set an instance of the ViewController as the rootViewController of the window:
1import UIKit 2 3@UIApplicationMain 4class AppDelegate: UIResponder, UIApplicationDelegate { 5 6 var window: UIWindow? 7 8 func application(_ application: UIApplication, 9 didFinishLaunchingWithOptions launchOptions: 10 [UIApplicationLaunchOptionsKey: Any]?) -> Bool { 11 12 // Override point for customization after application launch. 13 window = UIWindow(frame: UIScreen.main.bounds) 14 window?.makeKeyAndVisible() 15 16 window?.rootViewController = 17 UINavigationController(rootViewController: ViewController()) 18 19 return true 20 } 21 22 ... 23}
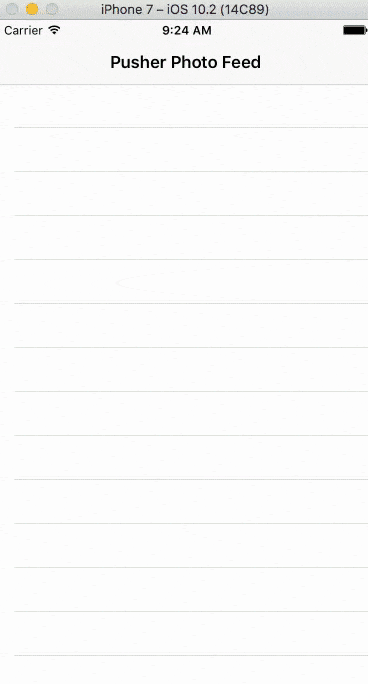
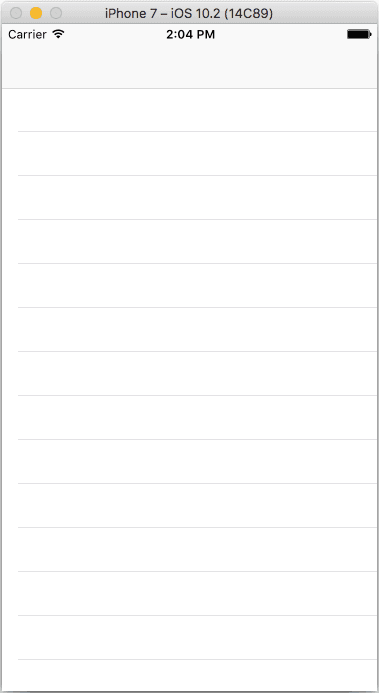
If you run the app at this point, you should see something like the following:
All right, let's create a new Swift file, Photo.swift, to create a structure that will hold the photo's information (right now just its URL):
1import Foundation 2 3struct Photo { 4 let url: String 5}
We're going to need a custom cell class for our UITableView. Once again, create a new Swift file, this time with the name PhotoCell.swift and the following content:
1import UIKit 2 3class PhotoCell : UITableViewCell { 4 5 override init(style: UITableViewCellStyle, reuseIdentifier: String?) { 6 super.init(style: style, reuseIdentifier: reuseIdentifier) 7 } 8 9 required init?(coder aDecoder: NSCoder) { 10 fatalError("init(coder:) has not been implemented") 11 } 12 13}
The layout for the cell is going to have only a UIImageView for the photo, which will be scaled to fill the entire cell:
1class PhotoCell : UITableViewCell { 2 3 let photoImage: UIImageView = { 4 let imageView = UIImageView() 5 imageView.clipsToBounds = true 6 imageView.contentMode = UIViewContentMode.scaleToFill 7 imageView.translatesAutoresizingMaskIntoConstraints = false 8 9 return imageView 10 }() 11 12 ... 13}
It's important to set translatesAutoresizingMaskIntoConstraints to false because we're going to use the NSLayoutAnchor API to position the view:
1class PhotoCell : UITableViewCell { 2 3 ... 4 5 override init(style: UITableViewCellStyle, reuseIdentifier: String?) { 6 super.init(style: style, reuseIdentifier: reuseIdentifier) 7 8 addSubview(photoImage) 9 10 photoImage.topAnchor.constraint(equalTo: self.topAnchor).isActive = true 11 photoImage.leftAnchor.constraint(equalTo: self.leftAnchor).isActive = true 12 photoImage.bottomAnchor.constraint(equalTo: self.bottomAnchor).isActive = true 13 photoImage.rightAnchor.constraint(equalTo: self.rightAnchor).isActive = true 14 15 selectionStyle = .none 16 } 17 18 ... 19}
The above code will add the UIImageView to the cell and make it fill the whole cell space and disable the selection of the cell.
Now let's add a property observer so when an object of type Photo is set on this cell, we can set the image (don't forget to import Kingfisher):
1import UIKit 2import Kingfisher 3 4class PhotoCell : UITableViewCell { 5 6 var photo: Any? { 7 didSet { 8 guard let p = photo as? Photo else { return } 9 10 // Create the image URL and set it with Kingfisher 11 let imageUrl = URL(string: p.url) 12 photoImage.kf.indicatorType = .activity 13 photoImage.kf.setImage( 14 with: imageUrl, 15 placeholder: #imageLiteral(resourceName: "placeholder"), 16 options: [.transition(.fade(0.5))] 17 ) 18 } 19 } 20 21 ... 22}
With the above code, Kingfisher will show an activity indicator while downloading the image, showing a placeholder image in the meantime, and adding a fade transition when it's time to show the image. In the GitHub app, you can find in Assets.xcassets the logo of Pusher as the placeholder image, but you can add your own image.
Now, in the ViewController class, let's create a cell identifier, an array to hold our photos and the Pusher object:
1import UIKit 2import PusherSwift 3 4class ViewController: UITableViewController { 5 6 let cellId = "cellId" 7 var photos= [Photo]() 8 var pusher: Pusher! = nil 9 10 ... 11}
Inside the viewDidLoad method, let's give our app a title and register our custom cell:
1class ViewController: UITableViewController { 2 3 ... 4 5 override func viewDidLoad() { 6 super.viewDidLoad() 7 8 navigationItem.title = "Pusher Photo Feed" 9 tableView.register(PhotoCell.self, 10 forCellReuseIdentifier: cellId) 11 } 12}
We will listen to new images by setting up Pusher passing our app key, subscribing to the channel photos and binding the event new_photo in the following way:
1class ViewController: UITableViewController { 2 3 ... 4 5 override func viewDidLoad() { 6 7 ... 8 9 pusher = Pusher( 10 key: "<INSERT_YOUR_PUSHER_KEY_HERE>" 11 ) 12 13 let channel = pusher.subscribe("photos") 14 15 let _ = channel.bind(eventName: "new_photo", callback: { (data: Any?) -> Void in 16 if let data = data as? [String : AnyObject] { 17 let url = data["url"] as! String 18 19 let photo = Photo(url: url) 20 21 self.photos.insert(photo, at: self.photos.startIndex) 22 23 let indexPath = IndexPath(row: 0, section: 0) 24 self.tableView.insertRows(at: [indexPath], 25 with: UITableViewRowAnimation.automatic) 26 self.tableView.scrollToRow(at: indexPath, 27 at: UITableViewScrollPosition.none, animated: true) 28 } 29 }) 30 31 pusher.connect() 32 } 33}
This way, when a new photo comes in, we can extract its URL, create a Photo instance and insert it in the array and in the tableView to display it.
Of course, for this to happen, we also need to implement the following methods so the tableView knows how many items it has to display and in which cell:
1class ViewController: UITableViewController { 2 3 ... 4 5 override func tableView(_ tableView: UITableView, 6 numberOfRowsInSection section: Int) -> Int { 7 return photos.count 8 } 9 10 override func tableView(_ tableView: UITableView, 11 cellForRowAt indexPath: IndexPath) -> UITableViewCell { 12 let cell = tableView.dequeueReusableCell( 13 withIdentifier: cellId, for: indexPath) as! PhotoCell 14 15 // At this point, the didSet block will set up the cell's views 16 cell.photo = photos[indexPath.item] 17 18 return cell; 19 } 20}
Finally, we need to give the cells a height (of 480) with the following method:
1class ViewController: UITableViewController { 2 3 ... 4 5 override func tableView(_ tableView: UITableView, 6 heightForRowAt indexPath: IndexPath) -> CGFloat { 7 return 480 8 } 9}
And we're done! Now you have an iOS photo feed that is connected to a Raspberry Pi camera and updates in realtime.
Testing the app
On the Raspberry Pi, with your virtual environment activated, execute the Python process with (don't forget to start ngrok and replace your HTTPS URL in the script):
python camera.py
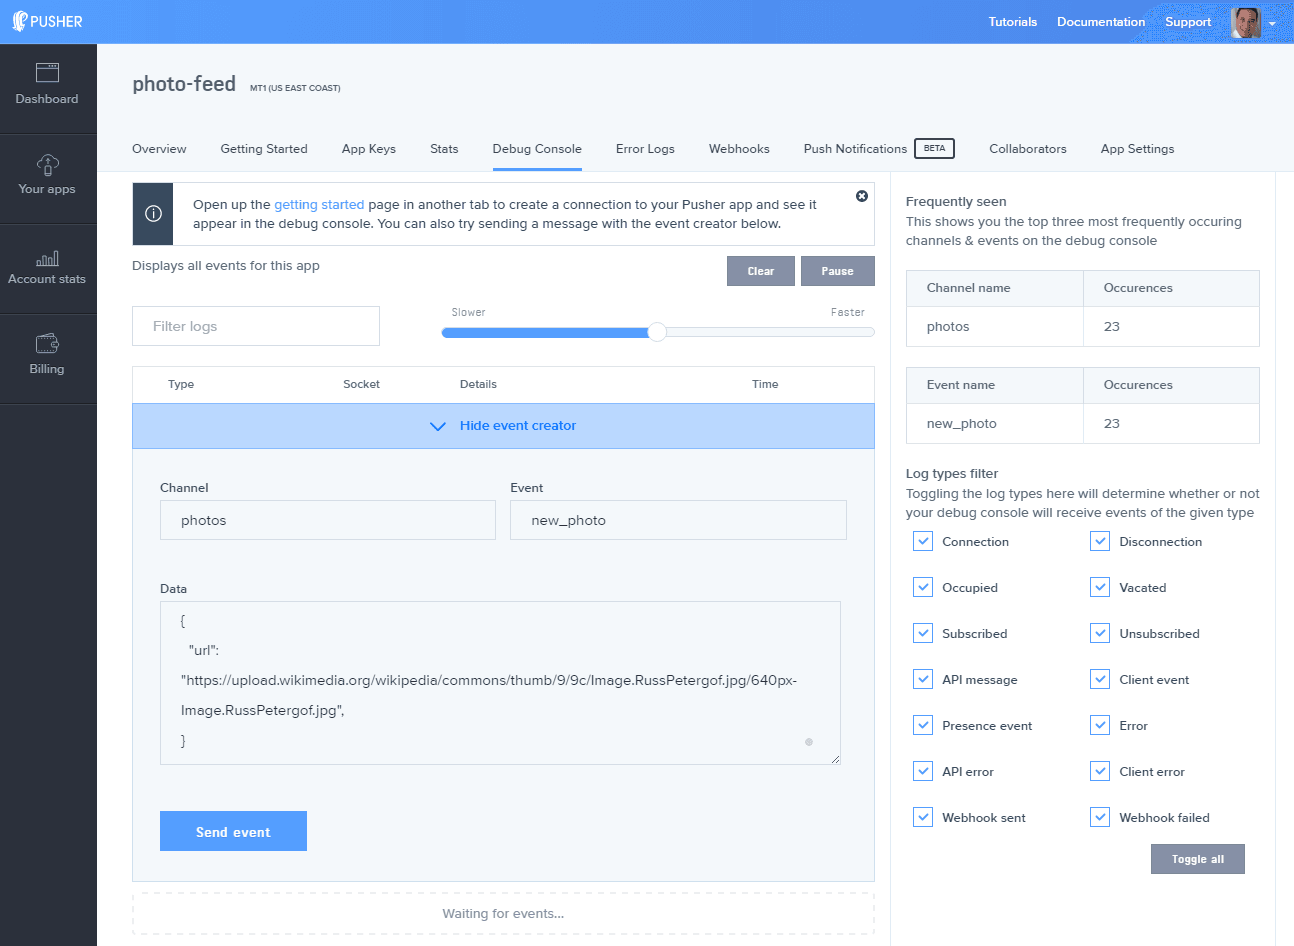
If you only want to test the app, you can use the Pusher Debug Console on your dashboard (just remember to use URLs with HTTPS, because iOS cannot load HTTP resources by default):
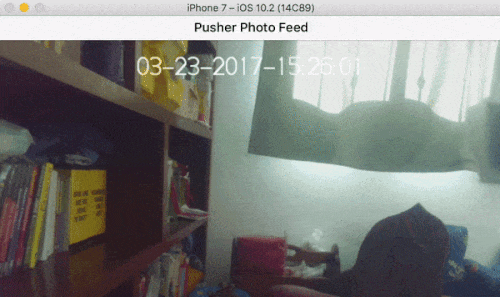
When a new_photo event is received in the Pusher channel, the new photo will come up in the iOS app:
In landscape, the photos look better:
Conclusion
You can find the final version of the backend here and the final version of the iOS app here.
Hopefully, this tutorial has shown you how to build a realtime iOS app with Pusher in an easy way. You can improve the app by changing the layout, showing more information or saving it to a database. Or, using OpenCV, take pictures only with motion is detected by the Raspberry Pi camera.
Remember that your forever free Pusher account includes 100 connections, unlimited channels, 200k daily messages, SSL protection, and there are more features than just Pub/Sub Messaging. Sign up here.
Further reading
- Pusher Swift client
- Installing Raspbian with NOOBS
- Apache vs Nginx: Practical Considerations
- Setting up a web server on a Raspberry Pi
- A non-magical introduction to Pip and Virtualenv for Python beginners
- Getting started with picamera
- Kingfisher Cheat Sheet
- Pain Free Constraints with Layout Anchors
- Property observers: didSet


© 2024 Pusher Ltd. All rights reserved.
Pusher Limited is a company registered in England and Wales (No. 07489873) whose registered office is at MessageBird UK Limited, 3 More London Riverside, 4th Floor, London, United Kingdom, SE1 2AQ.