- Products

- Developers
- User stories
- Blog
- Pricing

Making PostgreSQL database realtime with Pusher and Node
Introduction
Introduction
Sometimes, we want to watch over specific tables in our database and make new records or entries available to users as soon as they come in. While doing this, we do not want to take away the flexibility and advantages we get from using PostgreSQL databases. In this tutorial, we will learn about making PostgreSQL database realtime using Pusher. Just before then, for those of us who don’t have an idea what PostgreSQL is, let’s look at it.
PostgreSQL is a powerful, open source object-relational database system that uses and extends the SQL language combined with many features that safely store and scale the most complicated data workloads.
PostgreSQL comes with many features aimed to help developers build applications, administrators to protect data integrity and build fault-tolerant environments, and help you manage your data no matter how big or small the dataset. Besides being free and open source, PostgreSQL is highly extensible. For example, you can define your own data types, build out custom functions, even write code from different programming languages without recompiling your database!
In this tutorial, we will build a realtime table that shows a list of movies from our database.
Prerequisites
- A basic understanding of Node.js, SQL, and client-side JavaScript is required for this tutorial.
- You also need to have PostgreSQL, Node.js and npm installed.
- Some familiarity with PostgreSQL(as this tutorial isn’t helping with absolute basics like installation and setup).
- Pusher Channels. Create a free sandbox Pusher account or sign in.
Setting up a Pusher Channels account and app
Pusher is a hosted service that makes it super-easy to add realtime data and functionality to web and mobile applications.
Pusher Channels acts as a realtime layer between your servers and clients. Pusher maintains persistent connections to the clients over WebSocket if possible and falling back to HTTP-based connectivity so that as soon as your servers have new data they want to push to the clients they can do, via Pusher.
We will register a new app on the Pusher dashboard. The only compulsory options are the app name and cluster. A cluster represents the physical location of the Pusher server that will handle your app’s requests. Also, copy out your App ID, Key, and Secret from the App Keys section, as we will need them later on.
Setting up the project
Let’s create a new node project by running:
1#create directory 2 mkdir realtime_postgres 3 #move into the new directory 4 cd realtime_postgres 5 #initialize a node project 6 npm init -y
Next, let’s move ahead by installing the required libraries:
npm install express body-parser ejs pusher db-migrate db-migrate-pg dotenv pg --save
In the command above, we have installed the following:
- Express: fast, unopinionated, minimalistic web framework for Node.js.
- Body-parser: parse incoming request bodies in a middleware before your handlers, available under the
req.bodyproperty. - Ejs: templating engine for Node.js,
- Pusher: the official Node.js library for Pusher.
- Db-migrate: Database migration framework for node.js.
- Db-migrate-pg: A PostgreSQL driver for db-migrate, a database migration framework for node.js.
- Dotenv: Dotenv is a zero-dependency module that loads environment variables from a
.envfile - Pg: Non-blocking PostgreSQL client for node.js. Pure JavaScript and optional native libpq bindings.
Setting up the app
Setting up environment variables
First, we need to define a file called .env to hold our environment variables.
The POSTGRES_CONNECTION_URL is a combination of our PostgreSQL username, password, host, port and database. For example, if our username is user, password is securePassword, our host if installed on local is 127.0.0.1, the default port is 5432 and the name of our database is realtime_postgres, our POSTGRES_CONNECTION_URL would look like:
postgres://user:securePassword@127.0.0.1:5431/realtime_postgres
For this tutorial, we will need our POSTGRES_CONNECTION_URL and Pusher credentials which we had gotten earlier, so our file looks like:
1POSTGRES_CONNECTION_URL=postgres://user:securePassword@127.0.0.1:5431/realtime_postgres 2 PUSHER_APP_ID=XXX_APP_ID 3 PUSHER_APP_KEY=XXX_APP_KEY 4 PUSHER_APP_SECRET=XXX_APP_SECRET 5 PUSHER_APP_CLUSTER=XXX_APP_CLUSTER
Setting up db-migrate
Next, we need to create a file called database.json in the root of our app, which comprises a JSON structure, telling db-migrate which database connection we will be using.
In the snippet below, we set the connection URL to be retrieved from the POSTGRES_CONNECTION_URL variable which we had declared in our .env when our environment is dev.
1{ 2 "dev": { 3 "ENV": "POSTGRES_CONNECTION_URL" 4 } 5 }
Now we have our db-migrate config set up, we want to generate the SQL file to hold migrations for the table we will make realtime. To generate migrations, run :
node node_modules/db-migrate/bin/db-migrate create realtime_table --sql-file
The command above will create a folder called migrations. In the migrations folder, another folder called sqls will be created. In that folder, you would notice two files with the current timestamp as the prefix, followed by the name of the table you want to create, and a suffice of up and down.
In my case, the file was named 20180423192559-realtime-table-up.sql and 20180423192559-realtime-table-down.sql.
Open the 20180423192559-realtime-table-up.sql file and replace its content with:
1/* Replace with your SQL commands */ 2 CREATE TABLE realtime_table (id serial primary key, title varchar, year varchar, producer varchar); 3 CREATE FUNCTION notify_trigger() RETURNS trigger AS $$ 4 DECLARE 5 BEGIN 6 PERFORM pg_notify('watch_realtime_table', row_to_json(NEW)::text); 7 RETURN new; 8 END; 9 $$ LANGUAGE plpgsql; 10 11 CREATE TRIGGER watch_realtime_table_trigger AFTER INSERT ON realtime_table 12 FOR EACH ROW EXECUTE PROCEDURE notify_trigger();
What happens in the code above? We have some SQL statements which will be active once we migrate our database. In the first part of the statements, we create a table called realtime_table with an ID, title, year and producer columns respectively.
The next thing we do is to create a function which returns a trigger. Hold on first, what is a trigger? Triggers are stored programs, which are automatically executed or fired when some events occur. Triggers are, in fact, written to be executed in response to any of the following events:
- A
database manipulation(DML) statement (DELETE, INSERT, or UPDATE) - A
database definition(DDL) statement (CREATE, ALTER, or DROP). - A
database operation(SERVERERROR, LOGON, LOGOFF, STARTUP, or SHUTDOWN).
In the function which returns a trigger which we defined above, we perform a pg_notify function on our table, and we asked it to return the row as JSON, cast to text. Now, what exactly is this pg_notify function?
The pg_notify command sends a notification event together with an optional payload string to each client application that has previously executed LISTEN channel for the specified channel name in the current database. The arguments here are the channel name to send the notification to and the second part is the message. This means on the server side, we can listen to a channel called watch_realtime_table once we attach a trigger to it. Cool stuff.
The last part of our script is where we create our trigger called watch_realtime_table_trigger which we set to trigger after an INSERT action on our realtime_table. We tell the trigger to use the notify_trigger function for each new row added.
Let’s migrate our database by running:
node node_modules/db-migrate/bin/db-migrate up
Setting up the entry point
We have a channel which would be broadcast to on every new INSERT into our database, but we are yet to watch for the app and also send it to any client we want to send it to in realtime. Here is where Pusher comes in. In the notification of clients in realtime when a new row has been inserted.
Create a file called index.js in the root folder and paste in:
1const express = require('express'); 2 const bodyParser = require('body-parser'); 3 const Pusher = require('pusher'); 4 const pg = require ('pg'); 5 6 require('dotenv').config(); 7 8 const app = express(); 9 10 // declare variable to hold database connection 11 let pgClient; 12 13 // set the view engine to ejs 14 app.set('view engine', 'ejs'); 15 16 const pool = new pg.Pool({ 17 connectionString: process.env.POSTGRES_CONNECTION_URL, 18 }); 19 20 // Body parser middleware 21 app.use(bodyParser.json()); 22 app.use(bodyParser.urlencoded({ extended: true })); 23 // Session middleware 24 25 // Create an instance of Pusher 26 const pusher = new Pusher({ 27 appId: process.env.PUSHER_APP_ID, 28 key: process.env.PUSHER_APP_KEY, 29 secret: process.env.PUSHER_APP_SECRET, 30 cluster: process.env.PUSHER_APP_CLUSTER, 31 encrypted: true 32 }); 33 34 pool.connect((err, client) => { 35 if(err) { 36 console.log(err); 37 } 38 pgClient = client; 39 }); 40 41 //listen on the app 42 app.listen(3000, () => { 43 return console.log('Server is up on 3000') 44 });
Here, what we have is a basic Express setup, we have added the required libraries, used the body-parser middle-ware, and started an instance of Pusher, passing in the app id, key, secret, and cluster from our environment variables. We set ejs as our templating engine, which we will use later on in this tutorial. Also, we connect to our PostgreSQL connection, then assign the client to a global variable.
Listening to the PostgreSQL notification
Let’s update our PostgreSQL connection function to include our Listener and publishing the new data in realtime. Replace the pool.connect function with this:
1pool.connect((err, client) => { 2 if(err) { 3 console.log(err); 4 } 5 pgClient = client; 6 client.on('notification', function(msg) { 7 pusher.trigger('watch_realtime_table', 'new_record', JSON.parse(msg.payload)); 8 }); 9 const query = client.query('LISTEN watch_realtime_table'); 10 });
What has changed in this case? First, we added a notification handler for notifications in our database. In this response, we have two main attributes useful for us namely channel and payload. Here, since we are listening on only one channel, all notifications would come from our watch_realtime_table channel. If you watch for over one channel, be sure to use the channel attribute as a condition to be sure you are sending the right data to the right place. Once the data arrives, we make a Pusher trigger to send the record to our Pusher channel and event for realtime notification.
Next, we executed a query to listen for notifications on the channel by doing LISTEN watch_realtime_table.
Receiving data on the frontend
Now we are set up to receive data in realtime once a record is inserted into our table. Let us set up a new route to show how to receive this data on the front-end.
Let us add a new route to our index.js file as seen:
1app.get('/', async(req, res) => { 2 const data = await pgClient.query('SELECT * FROM realtime_table'); 3 return res.render('index', {table: data.rows}); 4 });
Here, we defined the route as the root of our application. First, we grab all current data in our database and pass it on to a view named index.
Note: we are using
ejsas our templating engine, andindexpassed to the render function refers toviews/index.ejs. The views folder defaults toviewsif we do not set it in our application.
Next, create the file views/index.ejs and add:
1<link href="//maxcdn.bootstrapcdn.com/bootstrap/3.3.0/css/bootstrap.min.css" rel="stylesheet" id="bootstrap-css"> 2 <script src="https://js.pusher.com/4.0/pusher.min.js"></script> 3 <div class="container"> 4 <div class="row"> 5 <div class="col-md-12"> 6 <h4>Realtime Movie Database</h4> 7 <div class="table-responsive"> 8 <table id="mytable" class="table table-bordred table-striped"> 9 <thead> 10 <th>Movie Title</th> 11 <th>Year Released</th> 12 <th>Producer</th> 13 </thead> 14 <tbody id="tableBody"> 15 <% table.forEach(function(row) { %> 16 <tr> 17 <td> 18 <%= row.title %> 19 </td> 20 <td> 21 <%= row.year %> 22 </td> 23 <td> 24 <%= row.producer %> 25 </td> 26 </tr> 27 <% }); %> 28 </tbody> 29 </table> 30 <div class="clearfix"></div> 31 </div> 32 </div> 33 </div> 34 </div> 35 36 <script> 37 var pusher = new Pusher('XXX_APP_KEY', { 38 cluster: 'XXX_APP_CLUSTER', 39 encrypted: true 40 }); 41 42 var channel = pusher.subscribe('watch_realtime_table'); 43 channel.bind('new_record', function(data) { 44 var table = document.getElementById('mytable'); 45 var row = table.insertRow(-1); 46 var title = row.insertCell(0); 47 var year = row.insertCell(1); 48 var producer = row.insertCell(2); 49 title.innerHTML = data.title; 50 year.innerHTML = data.year; 51 producer.innerHTML = data.producer; 52 }); 53 </script>
In the code above, we require the bootstrap library and the Pusher client library, we then declared a table with an ID of mytable, then looped the current table data to be displayed.
Next, we declared our script function, where we instantiated Pusher with our app key and cluster, respectively. We move on to subscribe to the watch_realtime_table channel which we push new data to. Immediately after subscribing, we bind to the event called new_record which is triggered every time a record is added.
We grab the current table, append a new row to the end of the table, create three new cells to hold the data, then we set the data to the innerHTML attributes of those cells.
After setting all of this up, we can use any PostgreSQL client such as pgAdmin or Adminer to add records to the table while we see the changes spin up on the frontend.
To view changes on the frontend, run node index.js and visit http://localhost:3000 in your browser to view the magic.
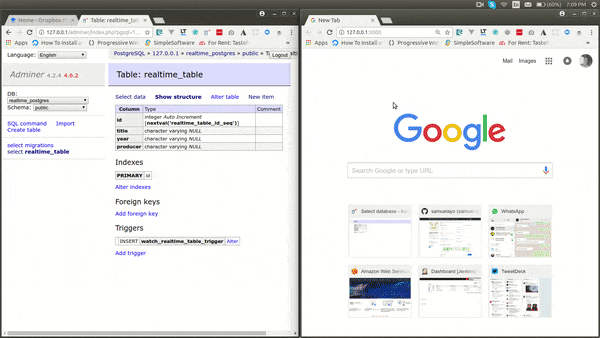
In my case, I have Adminer already on my system, so I used Adminer. Here is a demo of this functionality:
Conclusion
In this tutorial, you learned how to make PostgreSQL database realtime using Pusher. We covered creating stored procedures, triggers, watchers, and listeners. From here you can take things further and explore more complex functionalities by watching over more than one table at once, making triggers respond to update and delete operations, e.t.c!
The code base to this tutorial is hosted in a public GitHub repository. Experiment with the code.


© 2025 Pusher Ltd. All rights reserved.
Pusher Limited is a company registered in England and Wales (No. 07489873) whose registered office is at MessageBird UK Limited, 3 More London Riverside, 4th Floor, London, United Kingdom, SE1 2AQ.