- Products

- Developers
- User stories
- Blog
- Pricing

Building a realtime analytics dashboard for an Express application
Introduction
It’s important for website administrators and developers to have useful statistics regarding their web applications, to help them monitor, for instance, their app’s performance. This helps them to be proactive in bringing improvements and fixes to their sites. In this tutorial, we’ll build an Express application that uses a middleware to log all requests made to our application and pushes updated analytics on our requests in realtime to a dashboard. Here’s a preview of our app in action:
Prerequisites
- Node.js 8.10.0 or higher
- MongoDB 3.4 or higher.
- A Pusher account.
Setting up
We’ll start by using the express application generator:
1# if you don't already have it installed 2 npm install express-generator -g 3 4 # create a new express app with view engine set to Handlebars (hbs) 5 express --view=hbs express-realtime-analytics-dashboard 6 cd express-realtime-analytics-dashboard && npm install
Then we’ll add our dependencies:
npm install --save dotenv mongoose moment pusher
Here’s a breakdown of what each module is for:
- Dotenv is a small package for loading sensitive data (namely our Pusher app credentials) from a
.envfile. - Mongoose helps us map our models to MongoDB documents.
- Moment helps for easy manipulation of dates and times.
- Pusher provides the realtime APIs.
Logging all requests
We’ll create a middleware that logs every request to our database. Our middleware will be an "after” middleware, which means it will run after the request has been processed but just before sending the response. We’ll store the following details:
- The relative URL (for instance,
/users) - The HTTP method (for instance, “GET”)
- The time it took to respond to the request
- The day of the week
- The hour of day,
Let’s create our RequestLog model. Create the file models/request_log.js with the following content:
1let mongoose = require('mongoose'); 2 3 let RequestLog = mongoose.model('RequestLog', { 4 url: String, 5 method: String, 6 responseTime: Number, 7 day: String, 8 hour: Number 9 }); 10 11 module.exports = RequestLog;
Replace the code in your app.js with the following:
1const express = require('express'); 2 const path = require('path'); 3 const moment = require('moment'); 4 const RequestLog = require('./models/request_log'); 5 6 const app = express(); 7 require('mongoose').connect('mongodb://localhost/express-realtime-analytics'); 8 9 app.use((req, res, next) => { 10 let requestTime = Date.now(); 11 res.on('finish', () => { 12 if (req.path === '/analytics') { 13 return; 14 } 15 16 RequestLog.create({ 17 url: req.path, 18 method: req.method, 19 responseTime: (Date.now() - requestTime) / 1000, // convert to seconds 20 day: moment(requestTime).format("dddd"), 21 hour: moment(requestTime).hour() 22 }); 23 }); 24 next(); 25 }); 26 27 // view engine setup 28 app.set('views', path.join(__dirname, 'views')); 29 require('hbs').registerHelper('toJson', data => JSON.stringify(data)); 30 app.set('view engine', 'hbs'); 31 32 module.exports = app;
Here, we attach a middleware that attaches a listener to the finish event of the response. This event is triggered when the response has finished sending. This means we can use this to calculate the response time. In our listener, we create a new request log in MongoDB.
Displaying our analytics on a dashboard
First, we’ll create an analytics service object that computes the latest stats for us. Put the following code in the file analytics_service.js in the root of your project:
1const RequestLog = require('./models/request_log'); 2 3 module.exports = { 4 getAnalytics() { 5 let getTotalRequests = RequestLog.count(); 6 let getStatsPerRoute = RequestLog.aggregate([ 7 { 8 $group: { 9 _id: {url: '$url', method: '$method'}, 10 responseTime: {$avg: '$response_time'}, 11 numberOfRequests: {$sum: 1}, 12 } 13 } 14 ]); 15 16 let getRequestsPerDay = RequestLog.aggregate([ 17 { 18 $group: { 19 _id: '$day', 20 numberOfRequests: {$sum: 1} 21 } 22 }, 23 { $sort: {numberOfRequests: 1} } 24 ]); 25 26 let getRequestsPerHour = RequestLog.aggregate([ 27 { 28 $group: { 29 _id: '$hour', 30 numberOfRequests: {$sum: 1} 31 } 32 }, 33 {$sort: {numberOfRequests: 1}} 34 ]); 35 36 let getAverageResponseTime = RequestLog.aggregate([ 37 { 38 $group: { 39 _id: null, 40 averageResponseTime: {$avg: '$responseTime'} 41 } 42 } 43 ]); 44 45 return Promise.all([ 46 getAverageResponseTime, 47 getStatsPerRoute, 48 getRequestsPerDay, 49 getRequestsPerHour, 50 getTotalRequests 51 ]).then(results => { 52 return { 53 averageResponseTime: results[0][0].averageResponseTime, 54 statsPerRoute: results [1], 55 requestsPerDay: results[2], 56 requestsPerHour: results[3], 57 totalRequests: results[4], 58 }; 59 }) 60 } 61 };
Our service makes use of MongoDB aggregations to retrieve the following statistics:
averageResponseTimeis the average time taken by our routes to return a response.statsPerRoutecontains information specific to each route, such as the average response time and number of requests.requestsPerDayscontains a list of all the days, ordered by the number of requests per day.requestsPerHourcontains a list of all the hours, ordered by the number of requests per hour.totalRequestsis the total number of requests we’ve gotten.
Next, we define a route for the dashboard Add the following code just before the module.exports line in your app.js:
1app.get('/analytics', (req, res, next) => { 2 require('./analytics_service').getAnalytics() 3 .then(analytics => res.render('analytics', { analytics })); 4 });
Finally, we create the view. We’ll use Bootstrap for quick styling and Vue.js for easy data binding. Create the file views/analytics.hbs with the following content:
1<link rel="stylesheet" href="https://maxcdn.bootstrapcdn.com/bootstrap/3.3.7/css/bootstrap.min.css" 2 integrity="sha384-BVYiiSIFeK1dGmJRAkycuHAHRg32OmUcww7on3RYdg4Va+PmSTsz/K68vbdEjh4u" crossorigin="anonymous"> 3 <script src="https://cdn.jsdelivr.net/npm/vue/dist/vue.js"></script> 4 5 <div class="container" id="app"> 6 <div class="row"> 7 <div class="col-md-5"> 8 <div class="card"> 9 <div class="card-body"> 10 <h5 class="card-title">Total requests</h5> 11 <div class="card-text"> 12 <h3>\{{ totalRequests }}</h3> 13 </div> 14 </div> 15 </div> 16 </div> 17 <div class="col-md-5"> 18 <div class="card"> 19 <div class="card-body"> 20 <h5 class="card-title">Average response time</h5> 21 <div class="card-text"> 22 <h3>\{{ averageResponseTime }} seconds</h3> 23 </div> 24 </div> 25 </div> 26 </div> 27 </div> 28 29 <div class="row"> 30 <div class="col-md-5"> 31 <div class="card"> 32 <div class="card-body"> 33 <h5 class="card-title">Busiest days of the week</h5> 34 <div class="card-text" style="width: 18rem;" v-for="day in requestsPerDay"> 35 <ul class="list-group list-group-flush"> 36 <li class="list-group-item"> 37 \{{ day._id }} (\{{ day.numberOfRequests }} requests) 38 </li> 39 </ul> 40 </div> 41 </div> 42 </div> 43 </div> 44 <div class="col-md-5"> 45 <div class="card"> 46 <div class="card-body"> 47 <h5 class="card-title">Busiest hours of day</h5> 48 <div class="card-text" style="width: 18rem;" v-for="hour in requestsPerHour"> 49 <ul class="list-group list-group-flush"> 50 <li class="list-group-item"> 51 \{{ hour._id }} (\{{ hour.numberOfRequests }} requests) 52 </li> 53 </ul> 54 </div> 55 </div> 56 </div> 57 </div> 58 </div> 59 60 <div class="row"> 61 <div class="col-md-5"> 62 <div class="card"> 63 <div class="card-body"> 64 <h5 class="card-title">Most visited routes</h5> 65 <div class="card-text" style="width: 18rem;" v-for="route in statsPerRoute"> 66 <ul class="list-group list-group-flush"> 67 <li class="list-group-item"> 68 \{{ route._id.method }} \{{ route._id.url }} (\{{ route.numberOfRequests }} requests) 69 </li> 70 </ul> 71 </div> 72 </div> 73 </div> 74 </div> 75 <div class="col-md-5"> 76 <div class="card"> 77 <div class="card-body"> 78 <h5 class="card-title">Slowest routes</h5> 79 <div class="card-text" style="width: 18rem;" v-for="route in statsPerRoute"> 80 <ul class="list-group list-group-flush"> 81 \{{ route._id.method }} \{{ route._id.url }} (\{{ route.responseTime }} s) 82 </ul> 83 </div> 84 </div> 85 </div> 86 </div> 87 </div> 88 </div> 89 90 <script> 91 window.analytics = JSON.parse('{{{ toJson analytics }}}'); 92 93 const app = new Vue({ 94 el: '#app', 95 96 data: window.analytics 97 }); 98 </script>
Making the dashboard realtime
To make our dashboard realtime, we need to re-calculate the analytics as new requests come in. This means we’ll:
- Notify all clients of the updated analytics when there’s a new request
- Listen for the new analytics on our frontend and update the view accordingly
Pusher will power our app’s realtime functionality. Sign in to your Pusher dashboard and create a new app. Copy your app credentials from the App Keys section. Create a .env file and add your credentials in it:
1PUSHER_APP_ID=your-app-id 2 PUSHER_APP_KEY=your-app-key 3 PUSHER_APP_SECRET=your-app-secret 4 PUSHER_APP_CLUSTER=your-app-cluster
Now modify the code in your app.js so it looks like this:
1const express = require('express'); 2 const path = require('path'); 3 const moment = require('moment'); 4 const RequestLog = require('./models/request_log'); 5 6 const app = express(); 7 require('mongoose').connect('mongodb://localhost/poster'); 8 9 require('dotenv').config(); 10 const Pusher = require('pusher'); 11 const pusher = new Pusher({ 12 appId: process.env.PUSHER_APP_ID, 13 key: process.env.PUSHER_APP_KEY, 14 secret: process.env.PUSHER_APP_SECRET, 15 cluster: process.env.PUSHER_APP_CLUSTER 16 }); 17 18 app.use((req, res, next) => { 19 let requestTime = Date.now(); 20 res.on('finish', () => { 21 if (req.path === '/analytics') { 22 return; 23 } 24 25 RequestLog.create({ 26 url: req.path, 27 method: req.method, 28 responseTime: (Date.now() - requestTime) / 1000, // convert to seconds 29 day: moment(requestTime).format("dddd"), 30 hour: moment(requestTime).hour() 31 }); 32 33 // trigger a message with the updated analytics 34 require('./analytics_service').getAnalytics() 35 .then(analytics => pusher.trigger('analytics', 'updated', {analytics})); 36 }); 37 next(); 38 }); 39 40 // view engine setup 41 app.set('views', path.join(__dirname, 'views')); 42 require('hbs').registerHelper('toJson', data => JSON.stringify(data)); 43 app.set('view engine', 'hbs'); 44 45 app.get('/analytics', (req, res, next) => { 46 require('./analytics_service').getAnalytics() 47 .then(analytics => res.render('analytics', { analytics })); 48 }); 49 50 module.exports = app;
On the frontend, we’ll pull in Pusher and listen for the update message on the analytics channel. We’l then update the window.analytics values, and allow Vue to update the UI for us. Add the following code to the end of your views/analytics.hbs:
1<script src="https://js.pusher.com/4.2/pusher.min.js"></script> 2 <script> 3 const pusher = new Pusher('your-app-key', { cluster: 'your-app-cluster'}); 4 pusher.subscribe('analytics') 5 .bind('updated', (data) => { 6 Object.keys(data.analytics).forEach(stat => { 7 window.analytics[stat] = data.analytics[stat]; 8 }) 9 }) 10 </script>
Replace your-app-key and your-app-id with your Pusher app credentials.
Time for us to test our app. Let’s create some dummy routes—one, actually. This route will take different amounts of time to load, depending on the URL, so we can see the effect on our statistics. Visiting /wait/3 will wait for three seconds, /wait/1 for one second and so on. Add this to your app.js, just before the module.exports line:
1app.get('/wait/:seconds', async (req, res, next) => { 2 await ((seconds) => { 3 return new Promise(resolve => { 4 setTimeout( 5 () => resolve(res.send(`Waited for ${seconds} seconds`)), 6 seconds * 1000 7 ) 8 }); 9 })(req.params.seconds); 10 });
Now to see the app in action. Start your MongoDB server by running mongod. (On Linux/macOS, you might need to run it as sudo).
Then start your app by running:
npm start
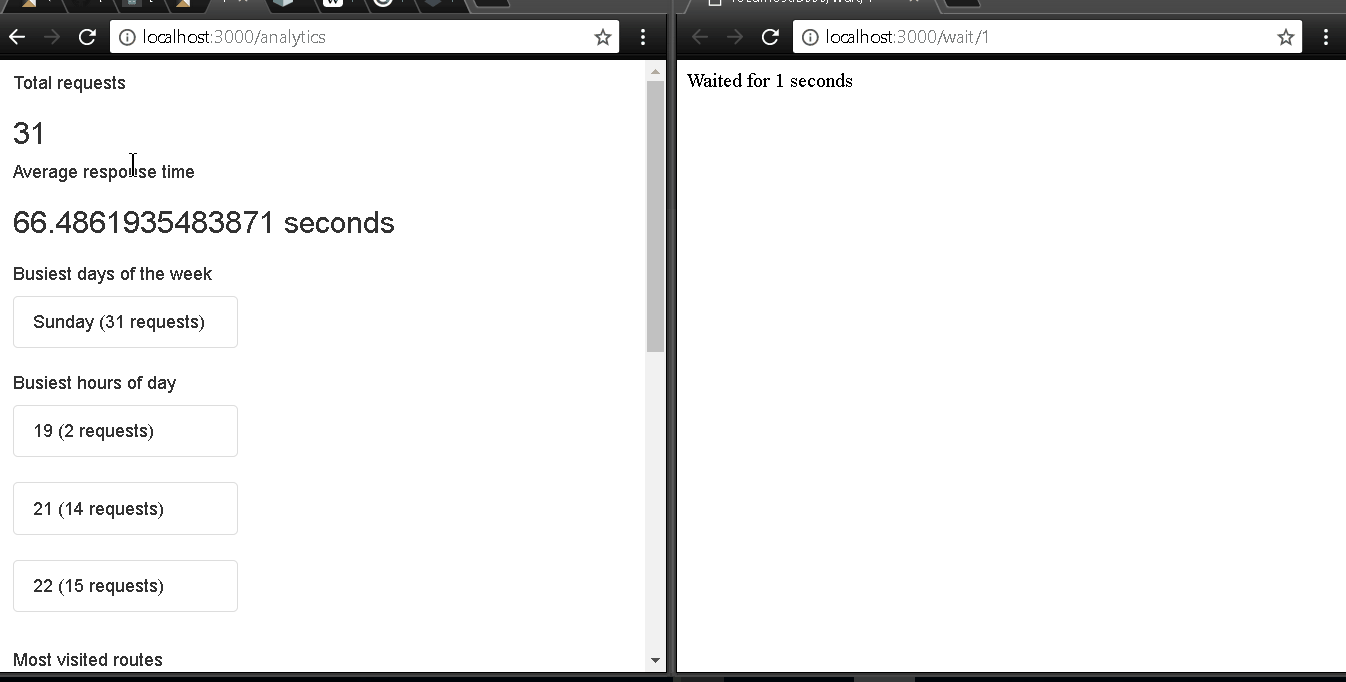
Visit your analytics dashboard at http://localhost:3000/analytics. Then play around with the app by visiting a few pages (the wait URL with different values for the number of seconds) and watch the stats displayed on the dashboard change in realtime.
Note: you might see that the number of requests increases by more than one when you visit a page. That’s because it’s also counting the requests for the CSS files (included with Express).
Conclusion
In this article, we’ve built a middleware that tracks every request, a service that computes analytics for us based on these tracks, and a dashboard that displays them. Thanks to Pusher, we’ve been able to make the dashboard update in realtime as requests come in. The full source code is available on GitHub.


© 2024 Pusher Ltd. All rights reserved.
Pusher Limited is a company registered in England and Wales (No. 07489873) whose registered office is at MessageBird UK Limited, 3 More London Riverside, 4th Floor, London, United Kingdom, SE1 2AQ.