- Products

- Developers
- User stories
- Blog
- Pricing

How to build a serverless backend with AWS Lambda
Introduction
Introduction
In this tutorial, we are going to build a REST API using Node.js and AWS Lambda. Each endpoint of the REST API is going to be a separate serverless function deployed on AWS Lambda.
Serverless is a modern day execution model to deploy server side code with the help of a cloud provider. Compared to traditionally deployed web applications, in a serverless architecture, the developing team does not have to maintain servers or infrastructure. They only have to pay a subscription to the cloud provider for the service being used. The cloud provider is responsible for handling the operation of running the back-end logic of a server along with maintaining, scaling as per the traffic, and security.
There are two common conventions of serverless architecture that can be implemented when deploying your server-side code. The first one is Backend as a Service or BaaS. A good example of this is Firebase, which you can often see in conjunction between a web or a mobile application to a database or providing user authentication.
In this tutorial, we are going to focus on a simplified and modular approach. The second concept of serverless is called Function as a Service or FaaS. With FaaS, server code is run inside containers that are usually triggered by events such as an HTTP requests from the client, database operations, file uploads, scheduled events and so on. The code on the cloud provider that is deployed and getting executed is in the form of a function.
In FaaS, functions are deployed in modular form. One function corresponds to each operation, thus eliminating the rest of the code and time spent on writing boilerplate code for setting up a server and data models. This means that by using the FaaS approach, in a serverless architecture, you have to pay for just the functionality that you use. Common use cases of FaaS that can be implemented are scheduled tasks (or cron jobs), automation, web applications, and chatbots. Some common FaaS providers are:
- AWS Lambda
- Google Cloud Functions
- Microsoft Azure Functions
- Apache OpenWhisk
Prerequisites
You are going to need three things to work with this tutorial:
- AWS Lambda
- MongoDB Atlas
- Node.js/npm installed on your local machine (>= v8.x.x)
Getting started with AWS lambda
In this tutorial, to learn and demonstrate at the same time about serverless, we are going to use AWS Lambda as the cloud provider and use Node.js to write the functions or CRUD operations. AWS Lambda supports different runtimes such as Node.js, Java, Python, .NET Core and Go for you to execute a function. The function runs inside a container with a 64-bit Amazon Linux AMI. You might be thinking, ‘why I am telling you all of this?’ Well, using serverless for the first time can be a bit overwhelming and if you know what you are getting in return, that’s always good!
A typical lambda function in a Node.js server will look like below.
1exports.handlerFunction = (event, context, callback) => { 2 // Logic for handling the function 3 callback(error, result); 4 };
In the above syntax, handlerFunction is the name of our Lambda function. The event object contains information about the event that triggers the lambda function on execution. The context object contains information about the runtime. The rest of the code is written inside the Lambda function and at last a callback is invoked with an error object and result object.
Let us proceed in this section, by setting up AWS Lambda. In order to move forward, we are going to need to register for an AWS account to get access to configuration keys. Use your personal credentials (such as email and password) to register or login with an account on console.amazon.com. Once you are logged in, you will be welcomed by the following screen.
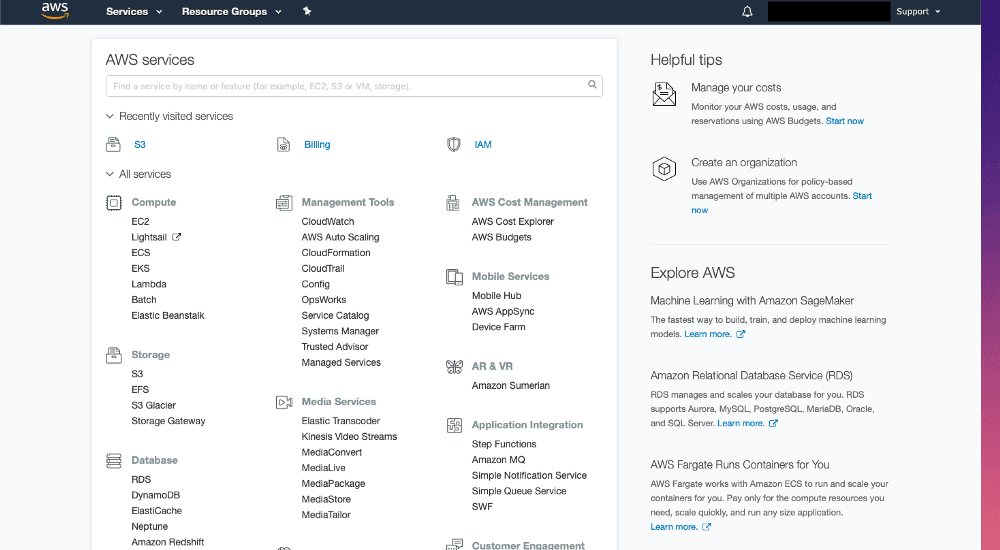
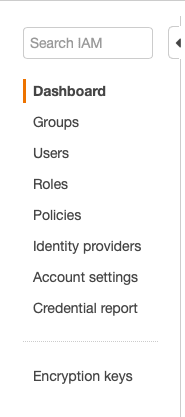
Now, we need to set up permissions and access to private keys in order to configure AWS Lambda with our serverless functions (which we will write soon). To start, click on the IAM (known as Identity and Access Management). Once you have a similar sidebar opened on the left-hand side in the current browser window, click on the Users tab.
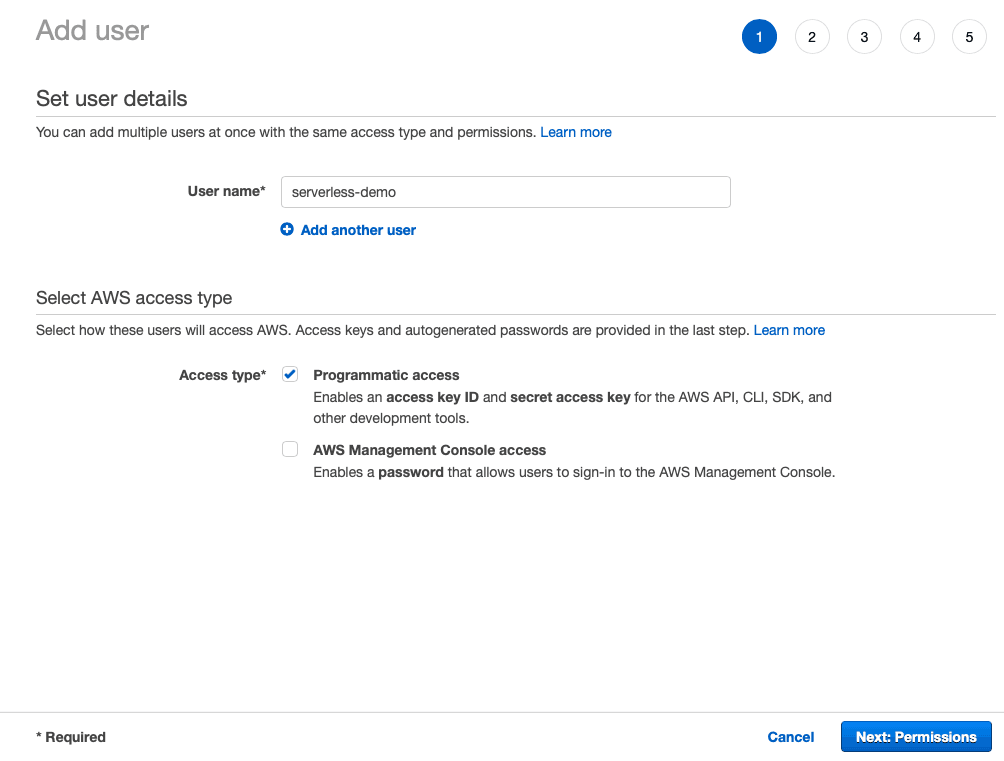
Click on the button Add User and fill in the details in a form (shown below). Then enable Access Type > Programmatic Access.
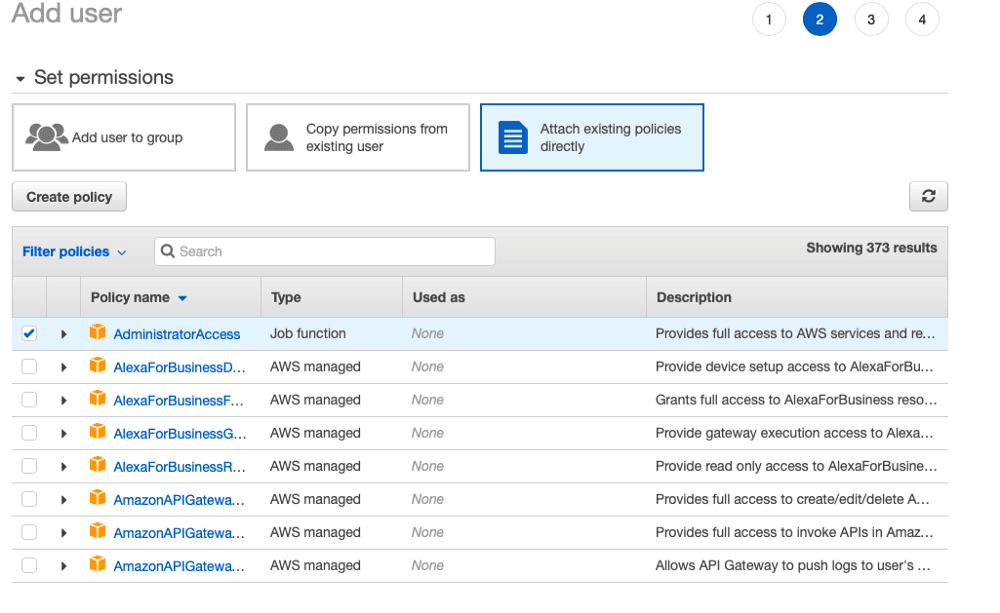
On the next page, Permissions, select Attach Existing Policies Directly and then select a policy name Administrator Access.
Proceed to the next page, Add Tags, which is optional, so we are going to leave it blank. Proceed, to Review, and then click Create User button when displayed. Proceeding to the next step you will see the user was created. Now, and only now, will you have access to the users Access Key ID and Secret Access Key. This information is unique for every user you create.
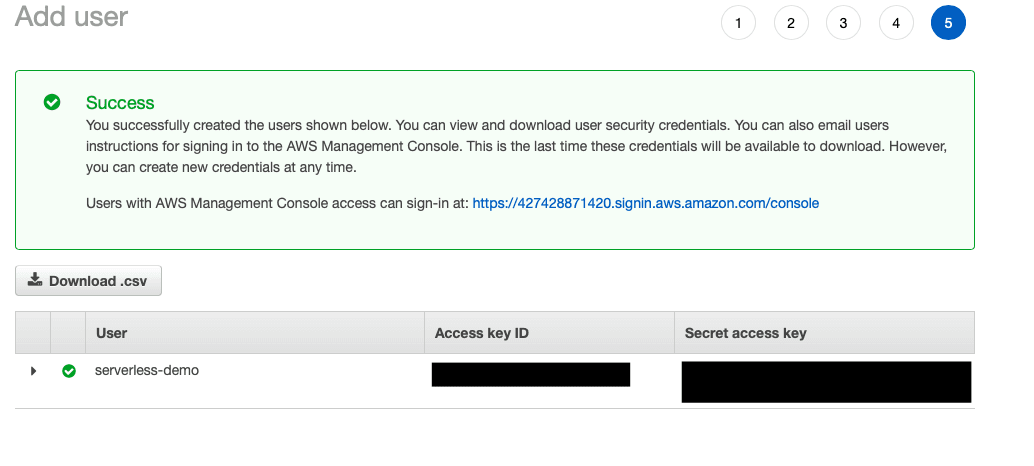
Also note that you can either save those Access Key Id and Secret Access Key manually or download the .csv file by clicking on the Download.csv button. This is important a won't be able to access these private keys again within the same serverless deployment. Also, this completes our AWS Lambda setup. This setup for the first time can be overwhelming but as you get more hands-on experience, you will get used to it.
Setting up MongoDB in the cloud
In this section, we are going to set up an instance of MongoDB database in order to hook it up later with our serverless application and store the data in real time. Log in to the site and create an account if you do not have it already. We just need a sandbox environment to get hands-on experience so we must opt for free tier. Once you have your account set up, open up your account page and add a new organization.

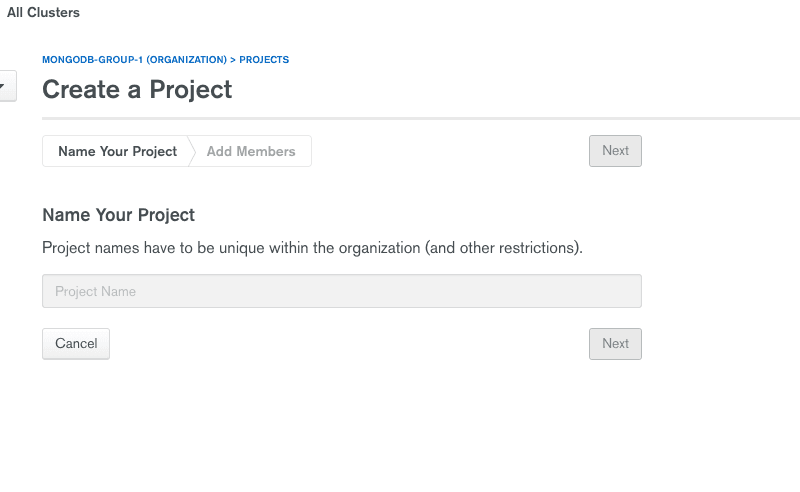
Once the organization step is complete, you can create a new project.
Next step is to set permissions or invite more users. We are going to leave everything here to default settings.
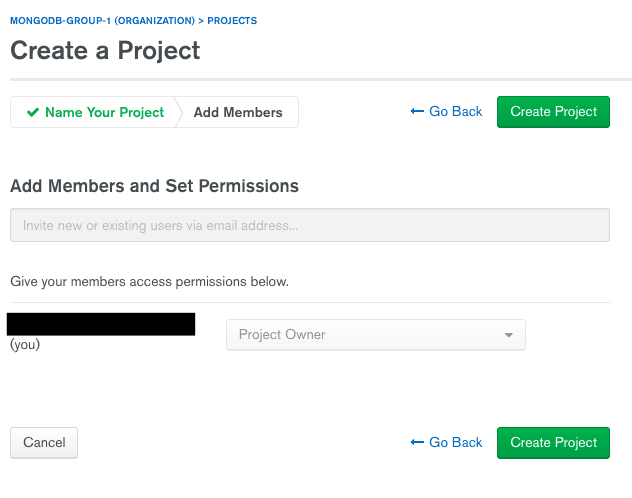
Lastly, click the button Create Project. In order to create a new database instance, we need to create a cluster Click on the button Build a Cluster, then choose a free-tier or better leave everything to default configuration and just click on the button Create Cluster below.
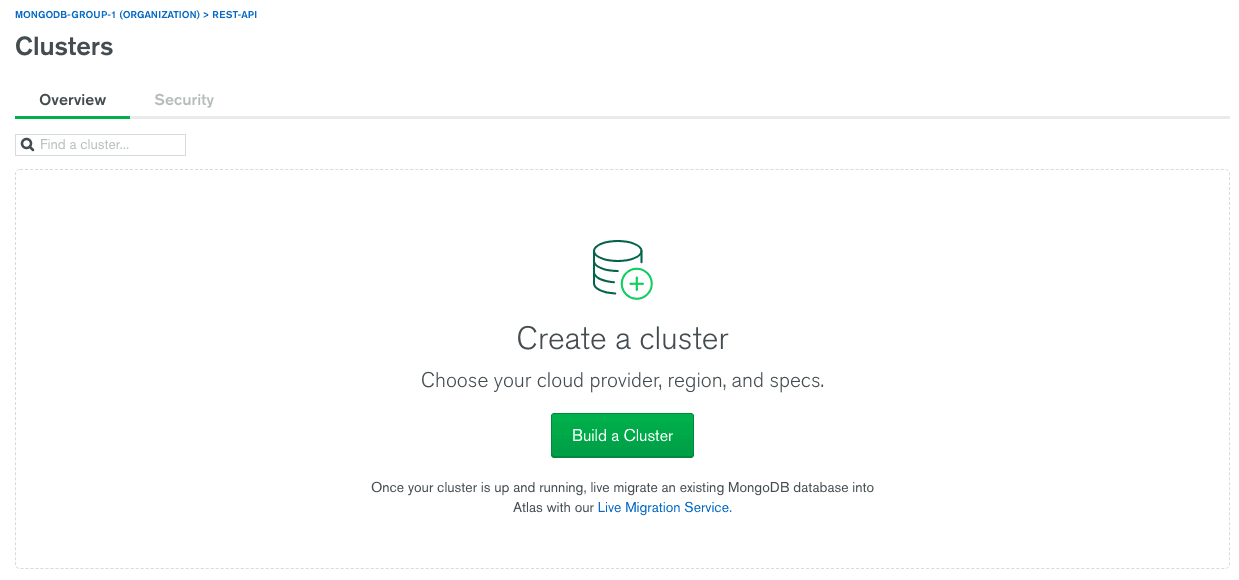
Your cluster will take a few minutes to deploy. While that is underway, let us finally start writing some code.
Your first serverless function
In order to create a REST API with the current set of technologies we are using, we have already established AWS Lambda (host) and MongoDB (database). Last piece of the puzzle is that we need to write serverless functions in Node.js. In this section let us begin creating the first serverless function. In order to proceed, you need to install the serverless dependency from npm.
npm install -g serverless
Once installed, we can run the serverless framework in the terminal by running the command serverless or use the shorthand sls. To start building a serverless function, we need to integrate configure AWS instance we previously created with our serverless module. Run the below command with the access key and the secret key I told you earlier to grab and save. Open your terminal and run the following command.
sls config credentials --provider aws --key ACCESS_KEY --secret SECRET_KEY
Once the above command runs successfully, you can proceed.
Note: If, for some reason you already had a AWS configured with the serverless package, you can always use overwrite
-oflag in order to force the update the keys.
The good thing about using the serverless npm package is that it comes with pre-defined templates that you can create in your project using a command and also creates a basic configuration for us that is required to deploy our Lambda function. To get started, we are going to use the aws-nodejs template inside a new directory.
sls create -t aws-nodejs -p serverless-lambda-demo && cd serverless-lambda-demo
The -p flag will create a new directory with the name serverless-lambda-demo. The -t flag uses the pre-defined boilerplate. The result of this will create three new files in your project directory.
.gitignorehandler.jswhere we will write our handle functionserverless.ymlcontains the configuration
Do take a look at the default handler.js file. You will find a function called module.exports.hello that further has two parameters: event, and context. module.exports. This is basic Nodes syntax as well as the rest of the code. You can clearly see it also supports ES6 JavaScript features like async and fat arrow => functions. An event is an object that contains all the necessary request data. The context object contains AWS-specific values. We have already discussed it before.
Let us modify this function to our needs and add a third parameter called the callback. Open the handler.js file and edit the hello function.
1// handler.js 2 'use strict'; 3 module.exports.hello = (event, context, callback) => { 4 console.log('Hello World'); 5 callback(null, 'Hello World'); 6 };
The callback function must be invoked with an error response as the first argument, in our case it is null right now or a valid response as the second argument, which is currently sending a simple Hello World message.
The callback function in the above code snippet is known as Error-First Callback and it is just a convention to represent an asynchronous function. The reason for passing null as the error right now is that if we are going to use this serverless function with a client framework or library, we are going to need a proper way of sending error messages. If the first argument error is sent, it will display the whole error call stack to the client, which is unnecessary.
Our first serverless function is ready to deploy and go live. To deploy, use the below command and run it in your terminal window.
sls deploy
It will take a few minutes to finish the process. Our serverless function gets packed into a .zip file. Take a look at the Service Information below. It contains all the information about what endpoints are available, what is our function, where it is deployed and so on.
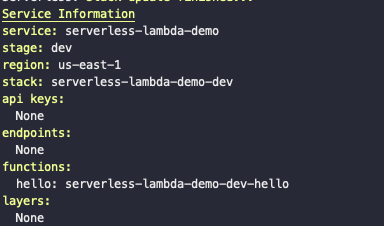
To see it in action, you can try the invoke attribute as follows to run the function and see the result. Run below command from your terminal.
sls invoke --function hello
The result will be as follows:

Congratulations! you have successfully, deployed your first serverless function on the cloud provider AWS Lamdba. Now let us make our serverless application behave as a REST API.
Connecting the database
In order to get started, the first step is to connect the database with our serverless API. Follow the below steps in the command line terminal.
1# Initialize it as an npm project 2 npm init -y 3 4 # Install dependencies 5 npm install --save mongoose dotenv
We need to create a connection between the database and our serverless functions (that we are going to define later) in order to consume the CRUD operations in real-time. Create a new file called db.js in the root and add the following.
1// db.js 2 3 const mongoose = require('mongoose'); 4 mongoose.Promise = global.Promise; 5 let isConnected; 6 module.exports = connectToDatabase = () => { 7 if (isConnected) { 8 console.log('=> using existing database connection'); 9 return Promise.resolve(); 10 } 11 console.log('=> using new database connection'); 12 return mongoose.connect(process.env.DB).then(db => { 13 isConnected = db.connections[0].readyState; 14 }); 15 };
This is a common Mongoose connection strategy that you might have seen in other Node.js apps if they use MongoDB as a database. The only difference here is that we are exporting connectToDatabase to import it inside handler.js for each CRUD operation that we are going to write.
The next step is to define the data model we need in order for things to work. Mongoose provides this functionality too. The serverless stack is un-opinionated about which ODM or ORM you use in your application. Create a new file called todo.model.js and add the following.
1// todo.model.js 2 const mongoose = require('mongoose'); 3 const TodoItemSchema = new mongoose.Schema({ 4 title: String, 5 description: String 6 }); 7 module.exports = mongoose.model('TodoItem', TodoItemSchema);
Now, import both of these files at the top inside handler.js.
1// handler.js 2 3 'use strict'; 4 5 const connectToDatabase = require('./db'); 6 const TodoItem = require('./todo.model.js');
Storing environment variables
Protecting our keys and other essentials is the first step to a secured backend application. Create a new file called variables.env. In this file, we will add the MongoDB cluster connection URL that we have already used in db.js as a process.env.DB. The good thing about environment variables is that they are global to the scope of the application.
To find out our MongoDB URL, we need to go back to the Mongodb Atlas cluster0, the previously created cluster. Click the button Connect and then you will be prompted a page where you can choose how to access the application. Next step is to add 0.0.0.0/0 CIDR block to your MongoDB Atlas cluster IP Whitelist because you would not know which IP address AWS Lambda is using to make calls to your Atlas database.
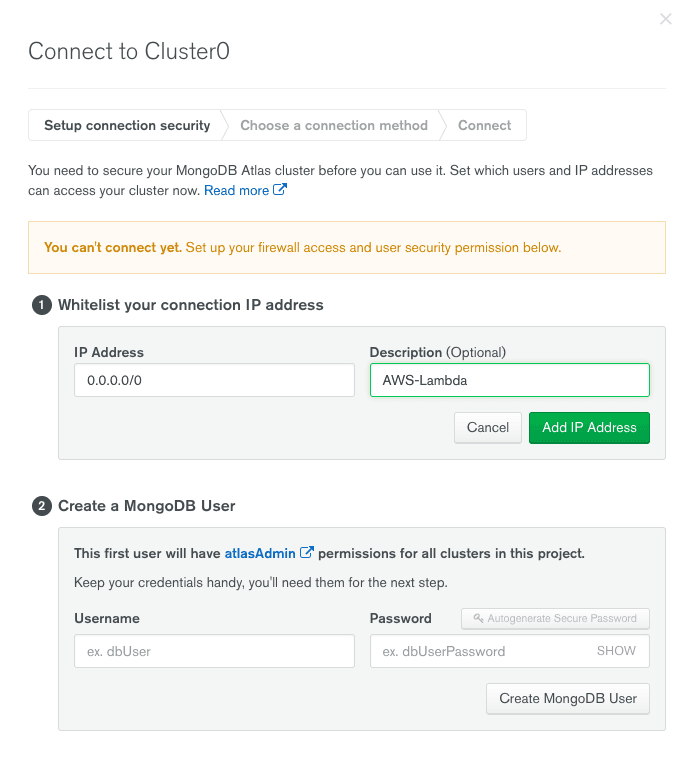
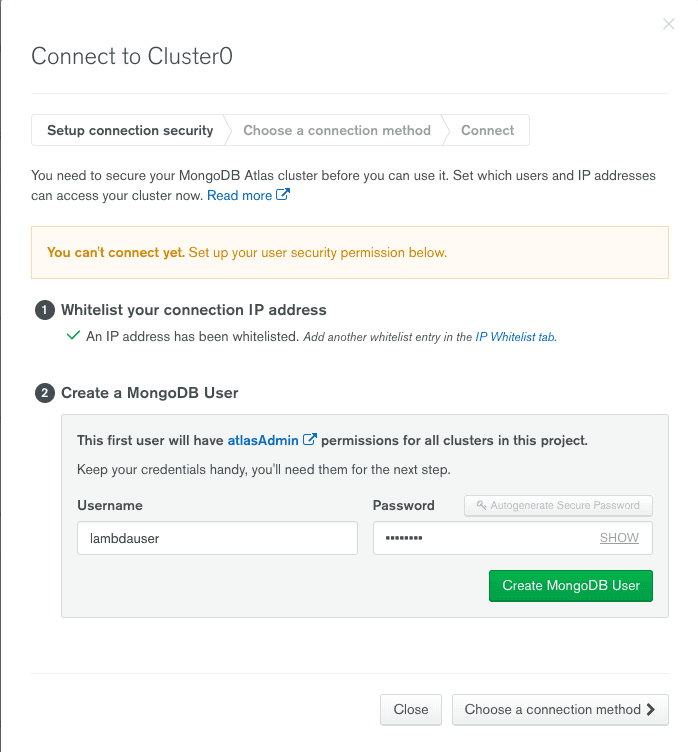
Now create the MongoDB User with credentials username and password of your own choice. Do remember them, as we are going to use them in MongoDB URI to make the connection as shown below.
The MongoDB URI string is going to look like this:
DB=mongodb://lambdauser:<PASSWORD>@cluster0-shard-00-00-enh0m.mongodb.net:27017,cluster0-shard-00-01-enh0m.mongodb.net:27017,cluster0-shard-00-02-enh0m.mongodb.net:27017/test?ssl=true&replicaSet=Cluster0-shard-0&authSource=admin&retryWrites=true
You have to replace the PASSWORD field with your own inside the file variables.env. Also, verify the username. In my case, I have set the username to lambdauser so if you have anything else, you need to replace it. Now to make it work, all we have to do is to add the following line in the handler.js at the top of the file.
1// handler.js 2 3 'use strict'; 4 require('dotenv').config({ path: './variables.env' }); 5 const connectToDatabase = require('./db'); 6 const TodoItem = require('./todo.model.js'); 7 module.exports.hello = (event, context, callback) => { 8 console.log('Hello World'); 9 callback(null, 'Hello World'); 10 };
Defining the first REST API route
In this section, we will first define a single REST API route to test everything works. To get started, open serverless.yml file and add the following. You will already see a handler function defined under the section functions and a lot of comments starting with #. Feel free to delete those comments for better readability.
1service: serverless-lambda-demo # NOTE: update this with your service name 2 provider: 3 name: aws 4 runtime: nodejs8.10 5 functions: 6 hello: 7 handler: handler.hello 8 create: 9 handler: handler.create # point to exported create function in handler.js 10 events: 11 - http: 12 path: todos # path will be domain.name.com/dev/notes 13 method: post 14 cors: true
This is how the file looks when adding our first endpoint or the first serverless function for the REST API known as create functin in above. It is a CRUD operation that will let us help create a new to-do item in the database. Each function contains the event information of the current event that will be invoked from the handler.js.
In the above configuration file, we are defining the create function along with an event. Also notice, when defining the events in the above file, we are associating an HTTP request with a path that is going to be the endpoint of the specific CRUD operation in the API, the HTTP method which is POST and lastly, enabling cors option.
Now, open the handler.js file and let us create write the logic behind the first API endpoint as shown below.
1// handler.js 2 3 'use strict'; 4 require('dotenv').config({ path: './variables.env' }); 5 const connectToDatabase = require('./db'); 6 const TodoItem = require('./todo.model.js'); 7 module.exports.hello = (event, context, callback) => { 8 console.log('Hello World'); 9 callback(null, 'Hello World'); 10 }; 11 module.exports.create = (event, context, callback) => { 12 context.callbackWaitsForEmptyEventLoop = false; 13 connectToDatabase().then(() => { 14 TodoItem.create(JSON.parse(event.body)) 15 .then(note => 16 callback(null, { 17 statusCode: 200, 18 body: JSON.stringify(todoitem) 19 }) 20 ) 21 .catch(err => 22 callback(null, { 23 statusCode: err.statusCode || 500, 24 headers: { 'Content-Type': 'text/plain' }, 25 body: 'Could not create the todoitem.' 26 }) 27 ); 28 }); 29 };
In the above snippet, create is the serverless function that will allow the API to add a new todo item and further add it to the database. The context argument to the serverless function contains all the information about the handler function. How long it has been running, how much memory it is consuming among other things.
context.callbackWaitsForEmptyEventLoop is set to false and starts with connectToDatabase function call. The context object property callbackWaitsForEmptyEventLoop value is by default set to true. This property is used to modify the behavior of a callback. By default, the callback will wait until the event loop is empty before freezing the process and returning the results to the invoked function. By setting this property’s value to false, it requests AWS Lambda to freeze the process after the callback is called, even if there are events in the event loop.
Let us deploy this function and see it in action. Run the command sls deploy from your terminal window. If successfully deployed, it will prompt you with the REST API endpoint to create a new todo item. The endpoint to communicate with the API is provided by AWS Lambda itself. Do note that, each handler function is deployed as a separate REST endpoint.

To test our API endpoint, let us use simple CURL command from the terminal window. Type the below and replace the POST endpoint URL with your own, like the one you got on deploying as shown in the previous image.
curl -X POST https://xj9yzmxs7g.execute-api.us-east-1.amazonaws.com/dev/todos --data '{"title": "Buy Cheese", "description": "Sandwiches for dinner!"}'
If the output of the above command is similar to below, that means you have successfully deployed your first serverless REST API endpoint!
{"_id":"5c0fffb0c8623fbc7e6676b2","title":"Buy Cheese","description":"Sandwiches for dinner!","__v":0}
Completing the API
Open serverless.yml again and define other functions required to complete the API.
1service: serverless-lambda-demo # NOTE: update this with your service name 2 provider: 3 name: aws 4 runtime: nodejs8.10 5 functions: 6 hello: 7 handler: handler.hello 8 create: 9 handler: handler.create # point to exported create function in handler.js 10 events: 11 - http: 12 path: todos # path will be domain.name.com/dev/notes 13 method: post 14 cors: true 15 getOne: 16 handler: handler.getOne 17 events: 18 - http: 19 path: todos/{id} # path will be domain.name.com/dev/notes/1 20 method: get 21 cors: true 22 getAll: 23 handler: handler.getAll # path will be domain.name.com/dev/notes 24 events: 25 - http: 26 path: todos 27 method: get 28 cors: true 29 update: 30 handler: handler.update # path will be domain.name.com/dev/notes/1 31 events: 32 - http: 33 path: todos/{id} 34 method: put 35 cors: true 36 delete: 37 handler: handler.delete 38 events: 39 - http: 40 path: todos/{id} # path will be domain.name.com/dev/notes/1 41 method: delete 42 cors: true
Next step is to write logic inside the handler.js file. Open it and add the code after module.exports.create function.
1// handler.js 2 3 'use strict'; 4 require('dotenv').config({ path: './variables.env' }); 5 const connectToDatabase = require('./db'); 6 const TodoItem = require('./todo.model.js'); 7 module.exports.hello = (event, context, callback) => { 8 console.log('Hello World'); 9 callback(null, 'Hello World'); 10 }; 11 module.exports.create = (event, context, callback) => { 12 context.callbackWaitsForEmptyEventLoop = false; 13 connectToDatabase().then(() => { 14 TodoItem.create(JSON.parse(event.body)) 15 .then(todoitem => 16 callback(null, { 17 statusCode: 200, 18 body: JSON.stringify(todoitem) 19 }) 20 ) 21 .catch(err => 22 callback(null, { 23 statusCode: err.statusCode || 500, 24 headers: { 'Content-Type': 'text/plain' }, 25 body: 'Could not create the item.' 26 }) 27 ); 28 }); 29 }; 30 module.exports.getOne = (event, context, callback) => { 31 context.callbackWaitsForEmptyEventLoop = false; 32 connectToDatabase().then(() => { 33 TodoItem.findById(event.pathParameters.id) 34 .then(todoitem => 35 callback(null, { 36 statusCode: 200, 37 body: JSON.stringify(todoitem) 38 }) 39 ) 40 .catch(err => 41 callback(null, { 42 statusCode: err.statusCode || 500, 43 headers: { 'Content-Type': 'text/plain' }, 44 body: 'Could not fetch the item.' 45 }) 46 ); 47 }); 48 }; 49 module.exports.getAll = (event, context, callback) => { 50 context.callbackWaitsForEmptyEventLoop = false; 51 connectToDatabase().then(() => { 52 TodoItem.find() 53 .then(todoitems => 54 callback(null, { 55 statusCode: 200, 56 body: JSON.stringify(todoitems) 57 }) 58 ) 59 .catch(err => 60 callback(null, { 61 statusCode: err.statusCode || 500, 62 headers: { 'Content-Type': 'text/plain' }, 63 body: 'Could not fetch the items.' 64 }) 65 ); 66 }); 67 }; 68 module.exports.update = (event, context, callback) => { 69 context.callbackWaitsForEmptyEventLoop = false; 70 connectToDatabase().then(() => { 71 TodoItem.findByIdAndUpdate( 72 event.pathParameters.id, 73 JSON.parse(event.body), 74 { 75 new: true 76 } 77 ) 78 .then(todoitem => 79 callback(null, { 80 statusCode: 200, 81 body: JSON.stringify(todoitem) 82 }) 83 ) 84 .catch(err => 85 callback(null, { 86 statusCode: err.statusCode || 500, 87 headers: { 'Content-Type': 'text/plain' }, 88 body: 'Could not update the items.' 89 }) 90 ); 91 }); 92 }; 93 module.exports.delete = (event, context, callback) => { 94 context.callbackWaitsForEmptyEventLoop = false; 95 connectToDatabase().then(() => { 96 TodoItem.findByIdAndRemove(event.pathParameters.id) 97 .then(todoitem => 98 callback(null, { 99 statusCode: 200, 100 body: JSON.stringify({ 101 message: 'Removed note with id: ' + todoitem._id, 102 todoitem: todoitem 103 }) 104 }) 105 ) 106 .catch(err => 107 callback(null, { 108 statusCode: err.statusCode || 500, 109 headers: { 'Content-Type': 'text/plain' }, 110 body: 'Could not delete the item.' 111 }) 112 ); 113 }); 114 };
This completes the business logic behind REST API. Run the sls deploy command again to deploy these serverless functions as endpoints. On success, you will see that each serverless function is now has its own endpoint. Since we already have one item in the database, let us test getAll endpoint. Run the below command from your terminal.
curl -X GET https://xj9yzmxs7g.execute-api.us-east-1.amazonaws.com/dev/todos
Similarly, you can perform all the CRUD operations.
Conclusion
Congratulations! You have successfully built and deployed a completely functioning serverless REST API with Node.js, MongoDB and AWS Lambda. I have tried my best to transfer the experience and to show you the preferred way of creating an API with this serverless stack. If you want to dig deep, possibilities are endless for the serverless architecture.
You can find the complete code for this tutorial in this GitHub repository.
Some References


© 2024 Pusher Ltd. All rights reserved.
Pusher Limited is a company registered in England and Wales (No. 07489873) whose registered office is at MessageBird UK Limited, 3 More London Riverside, 4th Floor, London, United Kingdom, SE1 2AQ.