- Products

- Developers
- User stories
- Blog
- Pricing

Build a simple social network with Kotlin
Introduction
Social networks require live updates to your status stack. Take for instance, Facebook. If you are on your main profile page and you post a new status, it is reflected immediately on the page without need to refresh it.
It is engaging and saves users the extra muscle of having to click the refresh button. Taking this to a mobile context, if this feature is not present, we would have to restart the ativity or have to wait till the user closes the app and opens it again before he can see anything new. This is obviously a bad user experience.
What we will build
In this article, we will build a simple android app that shows our status as soon as it is posted.
Prerequisites
You need the following;
- Knowledge of the Kotlin programming language
- A Pusher application
- Node JS - This is to enable us to setup a server.
- Android Studio - Android studio 3.0.1 is recommended as it is the latest stable version at the time of this publication and it integrates Kotlin support with ease.
Pusher app setup
Head to the Pusher dashboard, create an account if you have none, login to your dashboard, and create a new Pusher app.
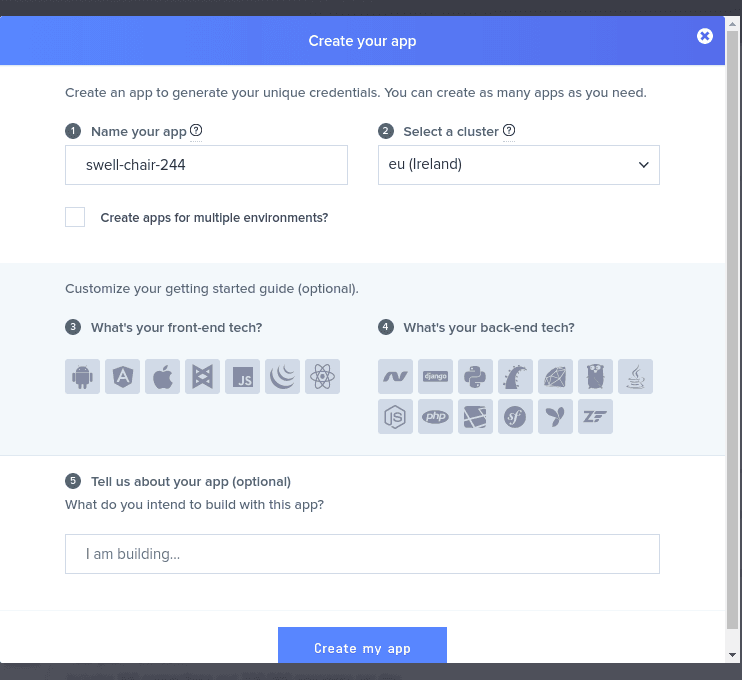
Be careful to take not of the cluster used, eu in our case. Open your app details and note the keys in the App Keys tab. You will need these later in the article.
Server setup
We will build a Node.js server and run it locally. We first create a new folder and name it accordingly, say user-status-backend. cd to the folder, create a package.json file and paste this:
1{ 2 "name": "realtime-status-update", 3 "version": "1.0.0", 4 "description": "", 5 "main": "index.js", 6 "scripts": { 7 "test": "echo \"Error: no test specified\" && exit 1" 8 }, 9 "keywords": [], 10 "author": "", 11 "license": "ISC", 12 "dependencies": { 13 "body-parser": "^1.18.2", 14 "express": "^4.16.2", 15 "pusher": "^1.5.1" 16 } 17 }
We also create an index.js file within the folder and paste this:
1// Load dependencies 2 const express = require('express') 3 const bodyParser = require('body-parser') 4 const app = express() 5 6 // App middlewares 7 app.use(bodyParser.json()); 8 app.use(bodyParser.urlencoded({ extended: false })); 9 10 // Initialize Pusher 11 var Pusher = require('pusher'); 12 var pusher = new Pusher({ 13 appId: 'PUSHER_APP_ID', 14 key: 'PUSHER_APP_KEY', 15 secret: 'PUSHER_APP_SECRET', 16 cluster: 'PUSHER_APP_CLUSTER', 17 encrypted: true 18 }); 19 20 // app's routes 21 app.post('/update-status', (req, res) => { 22 23 pusher.trigger('my-channel', 'my-event', { 24 "message": req.query.status 25 }); 26 27 res.json(req.query.status) 28 29 }) 30 31 app.get('/', (req, res, next) => { 32 res.json("Yeaaaa!!!!") 33 }) 34 35 app.listen(3000, () => console.log('Running application...'))
Our server has one major endpoint, update-status which accepts an HTTP POST method with the message to be posted sent as one of the parameters.
Use your app keys in this file.
We then install the Node and Pusher modules in our folder directory using the following commands:
npm install
Finally, we run the server:
node index.js
With this, our server is up and running on port 3000, you can check it out on your browser first before forging ahead.
Building our realtime Kotlin application
Setting up the project
Open android studio and create a new project. Details to be provided include: the application name and the domain name. Click the “include kotlin support” checkbox to enable Kotlin in the project.
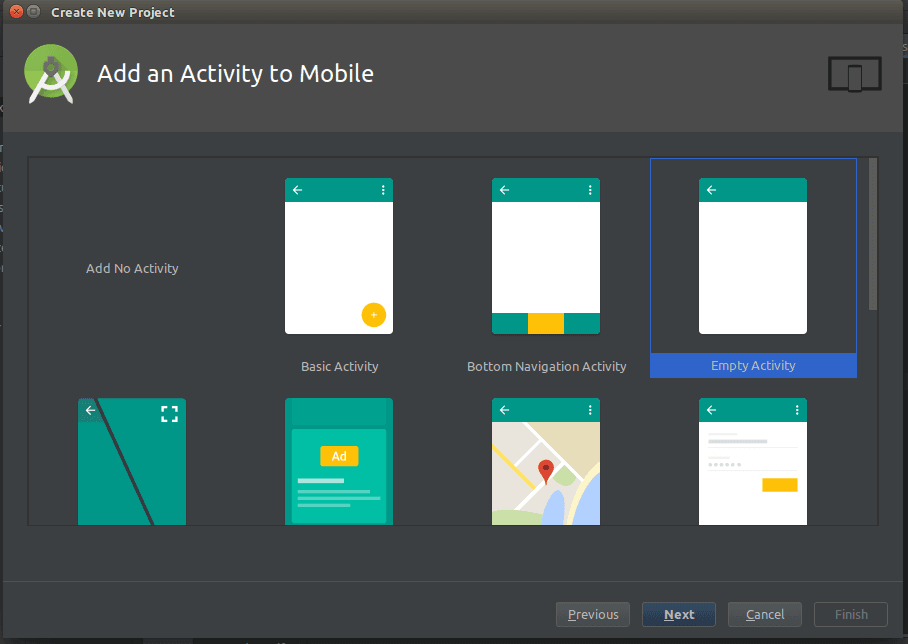
Next up, you select the minimum SDK which is the least Android version our app will support. Choose Empty Activity when asked to add an activity.
The next screen gives you a chance to customize the name of the activity. We will leave ours as the default MainActivity and click finish.
Adding dependencies
We need the support library dependencies, Pusher client dependency and Retrofit dependency. The first will give us extra features to access while using the Android SDK, Pusher will provide us with the much needed real-time feature and Retrofit will enable us make network requests to our server. These dependencies will be added in our app-module build.gradle:
1// pusher dependency 2 compile 'com.pusher:pusher-java-client:1.5.0' 3 4 // part of the support libraries 5 implementation 'com.android.support:design:26.1.0' 6 7 // retrofit dependency 8 implementation 'com.squareup.retrofit2:retrofit:2.3.0' 9 implementation 'com.squareup.retrofit2:converter-scalars:2.3.0'
After adding the dependencies, we sync it so that it can be downloaded and made available for use in our app.
Setting up Retrofit
Retrofit is a type-safe HTTP client for Android and Java built by Square, Inc. It is used for making network requests. For us to use Retrofit, we need an interface to define our endpoints. Create a new Kotlin file named ApiInterface.kt and paste this:
1import retrofit2.Call 2 import retrofit2.http.POST 3 import retrofit2.http.Query 4 5 interface ApiInterface { 6 @POST("/update-status") 7 fun updateStatus(@Query("status") status:String): Call<String> 8 }
Thereafter, we need to provide a Retrofit object. We will do this by creating a class named RetrofitClient.kt and pasting this:
1import okhttp3.OkHttpClient 2 import retrofit2.Retrofit 3 import retrofit2.converter.scalars.ScalarsConverterFactory 4 5 class RetrofitClient { 6 fun getClient(): ApiInterface { 7 val httpClient = OkHttpClient.Builder() 8 val builder = Retrofit.Builder() 9 .baseUrl("http://10.0.2.2:3000/") 10 .addConverterFactory(ScalarsConverterFactory.create()) 11 12 val retrofit = builder 13 .client(httpClient.build()) 14 .build() 15 return retrofit.create(ApiInterface::class.java) 16 } 17 }
The getClient function gives us an instance of Retrofit. While declaring the Retrofit object, the base url for our network requests and the converter to be used are defined.
We are using
10.0.2.2because this is how the Android emulator recognizes localhost as against the usual127.0.0.1
We also add the internet permission in the AndroidManifest.xml file. This should be done under the <manifest> tag:
1<manifest xmlns:android="http://schemas.android.com/apk/res/android" 2 package="YOUR_APP_PACKAGE_NAME"> 3 4 <uses-permission android:name="android.permission.INTERNET" /> 5 6 </manifest>
Designing our layout
In this app, we will have just one screen. It will contain an EditText for our input, a Button to send the message inputted and trigger a request to the server, and finally a RecyclerView to display our status messages. This will be housed in the activity_main.xml layout file:
1<?xml version="1.0" encoding="utf-8"?> 2 <ScrollView xmlns:android="http://schemas.android.com/apk/res/android" 3 xmlns:tools="http://schemas.android.com/tools" 4 android:layout_width="match_parent" 5 android:layout_margin="16dp" 6 android:layout_height="match_parent" 7 tools:showIn="@layout/activity_main"> 8 9 <LinearLayout 10 android:layout_width="match_parent" 11 android:orientation="vertical" 12 android:layout_height="wrap_content"> 13 14 <EditText 15 android:paddingLeft="10dp" 16 android:hint="Whats on your mind?" 17 android:background="@drawable/background" 18 android:layout_width="match_parent" 19 android:layout_height="wrap_content" 20 android:minHeight="100dp" 21 android:id="@+id/newStatus" /> 22 23 <Button 24 android:layout_gravity="end" 25 android:id="@+id/buttonPost" 26 android:layout_width="wrap_content" 27 android:layout_height="wrap_content" 28 android:text="post" /> 29 30 <android.support.v7.widget.RecyclerView 31 android:id="@+id/recyclerView" 32 android:layout_width="match_parent" 33 android:layout_height="wrap_content"/> 34 35 </LinearLayout> 36 37 </ScrollView>
We added a seprate drawable as background for the EditText tag. This gives it a box like look. Create a new drawable resource named background.xml and paste this:
1<shape xmlns:android="http://schemas.android.com/apk/res/android" 2 android:thickness="0dp" 3 android:shape="rectangle"> 4 <solid android:color="#FFFFFF" /> 5 <stroke android:width="2dp" 6 android:color="@color/colorAccent"/> 7 8 </shape>
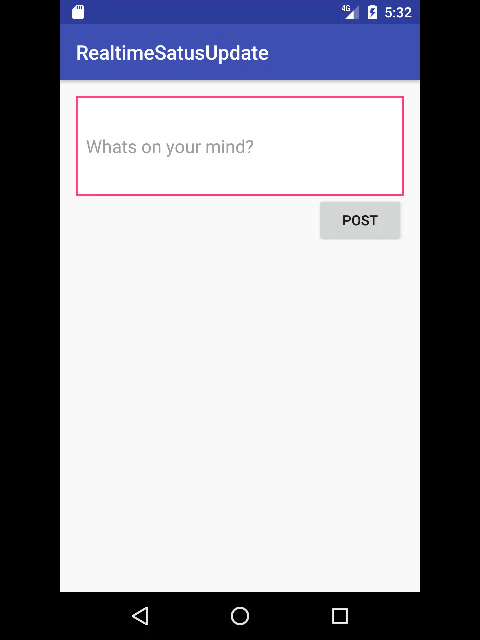
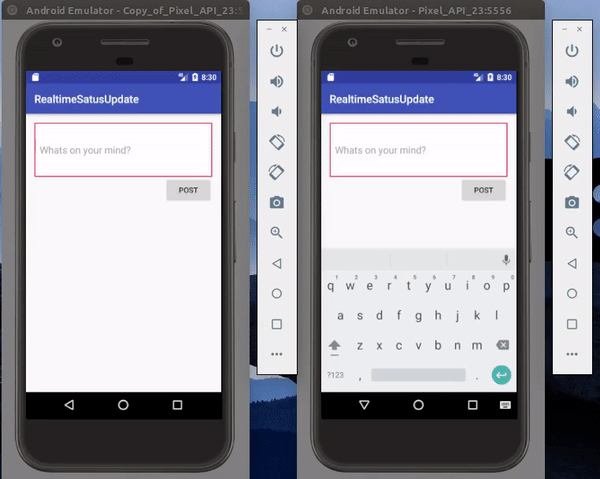
If you build the project right now our layout will look like this:
This takes the shape of a generic social media platform where status updates are made. Next up, we create an adapter to handle the display of status messages on a list. Create a new class StatusAdapter.kt and paste this:
1import android.support.v7.widget.RecyclerView 2 import android.view.LayoutInflater 3 import android.view.View 4 import android.view.ViewGroup 5 import android.widget.TextView 6 import java.util.* 7 8 class StatusAdapter : RecyclerView.Adapter<StatusAdapter.ViewHolder>() { 9 10 private var statusList = ArrayList<String>() 11 private var reversedList = ArrayList<String>() 12 13 fun addMessage(newMessage: String){ 14 statusList.add(newMessage) 15 reversedList = statusList 16 Collections.reverse(reversedList) 17 notifyDataSetChanged() 18 } 19 20 override fun getItemCount(): Int { 21 return statusList.size 22 } 23 24 override fun onCreateViewHolder(parent: ViewGroup?, viewType: Int): ViewHolder { 25 val view = LayoutInflater.from(parent!!.context).inflate(android.R.layout.simple_list_item_1,parent,false) 26 return ViewHolder(view) 27 } 28 29 override fun onBindViewHolder(holder: ViewHolder?, position: Int) { 30 holder!!.statusText.text = reversedList[position] 31 } 32 33 inner class ViewHolder(itemView: View?): RecyclerView.ViewHolder(itemView) { 34 var statusText: TextView = itemView!!.findViewById(android.R.id.text1) 35 } 36 37 }
The onCreateViewHolder function returns an instance of our ViewHolder coupled with the view that gives us the layout design for each list item. The addMessage function adds a new message to the list. Still in this function, we also assign list to reversedList and reverse reversedList so that we can have the most recent updates on top of the list. The reversedList is used based on position to display each item in the onBindViewHolder function.
In the MainActivity class, paste this:
1import android.app.Activity 2 import android.os.Bundle 3 import android.support.v7.app.AppCompatActivity 4 import android.support.v7.widget.LinearLayoutManager 5 import android.view.View 6 import android.view.inputmethod.InputMethodManager 7 import android.widget.Toast 8 import com.pusher.client.Pusher 9 import com.pusher.client.PusherOptions 10 import kotlinx.android.synthetic.main.activity_main.* 11 import org.json.JSONObject 12 import retrofit2.Call 13 import retrofit2.Callback 14 import retrofit2.Response 15 16 class MainActivity : AppCompatActivity() { 17 18 lateinit var pusher:Pusher 19 20 override fun onCreate(savedInstanceState: Bundle?) { 21 super.onCreate(savedInstanceState) 22 setContentView(R.layout.activity_main) 23 24 // setup recycler view and adapter 25 val adapter = StatusAdapter() 26 recyclerView.layoutManager = LinearLayoutManager(this) 27 recyclerView.adapter = adapter 28 29 // setup pusher to receive status update 30 val options = PusherOptions() 31 options.setCluster(PUSHER_CLUSTER) 32 pusher = Pusher(PUSHER_API_KEY, options) 33 val channel = pusher.subscribe("my-channel") 34 channel.bind("my-event") { channelName, eventName, data -> 35 val jsonObject = JSONObject(data) 36 runOnUiThread { adapter.addMessage(jsonObject.getString("message")) } 37 } 38 39 // post status to server 40 buttonPost.setOnClickListener { 41 42 if (newStatus.text.isNotEmpty()) 43 RetrofitClient().getClient().updateStatus(newStatus.text.toString()).enqueue(object : Callback<String> { 44 override fun onResponse(call: Call<String>?, response: Response<String>?) { 45 newStatus.text.clear() 46 hideKeyboard() 47 } 48 49 override fun onFailure(call: Call<String>?, t: Throwable?) { 50 Toast.makeText(this@MainActivity,"Error occurred",Toast.LENGTH_SHORT).show() 51 } 52 }) 53 } 54 55 } 56 57 private fun hideKeyboard() { 58 val imm = this.getSystemService(Activity.INPUT_METHOD_SERVICE) as InputMethodManager 59 var view = this.currentFocus 60 if (view == null) 61 view = View(this) 62 imm.hideSoftInputFromWindow(view.windowToken, 0) 63 } 64 65 override fun onResume() { 66 super.onResume() 67 pusher.connect() 68 } 69 70 override fun onPause() { 71 super.onPause() 72 pusher.disconnect() 73 } 74 75 }
In this snippet, we initialized the recycler view together with its adapter, we initialized Pusher using our keys from our dashboard and subscribed to a channel so as to get realtime updates, then we created a listener for our button that posts a message to the server when clicked.
Finally, we connected and disconnected Pusher in the onResume and onPause functions.
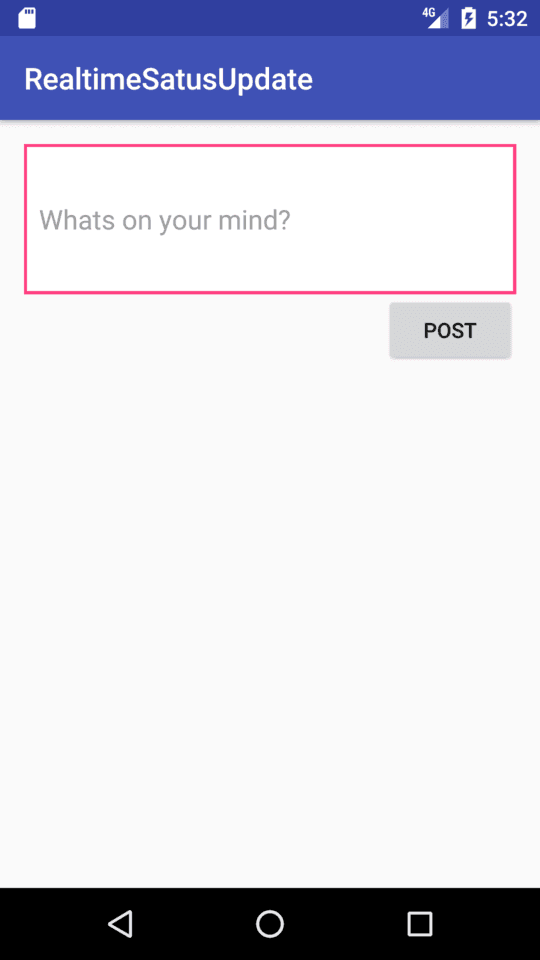
With this, the application is ready! When we run it, we see results like this example:
Conclusion
In this article, we have used Pusher to quickly and easily add realtime updates to the social network app.


© 2024 Pusher Ltd. All rights reserved.
Pusher Limited is a company registered in England and Wales (No. 07489873) whose registered office is at MessageBird UK Limited, 3 More London Riverside, 4th Floor, London, United Kingdom, SE1 2AQ.