- Products

- Developers
- User stories
- Blog
- Pricing

Building a Spotify-like currently playing feature: Part 2 - Building the iOS player
Introduction
Introduction
In the previous part, we started by creating the API that will power the client applications. In this part, we will be adding realtime functionality to a prebuilt iOS client application. This will be a simple music player that will play songs and broadcast the current song, device, and the track position.
This will make it easy to switch listening between clients just like Spotify does with its music clients. Let’s get started.
Prerequisites
To follow along in this part, you must have the following requirements:
- Completed the first part of the series
- Have Xcode 10.x installed on your machine
- Have CocoaPods installed on your machine
- Knowledge of the Xcode IDE
If you have the requirements then let’s get started.
Setting up your project
Clone the project from GitHub. The iOS application is in the iOS-* directory in the repository. One is the completed project and the other is the music player without realtime features (iOS_Base). You can use the one without realtime to follow along and the other for reference.
Now that you have the project, open the .xcworkspace file in Xcode. Here’s a quick explanation of the project.
There is a Podfile in the root of the project. This file is used to define the dependencies of the application. To update or install the dependencies, close Xcode and run the following commands:
$ pod install
Note that sometimes you may need to clear your cache to get the latest version of your dependencies. If this happens, just run the following commands below:
1$ pod cache clean --all 2 $ pod repo update 3 $ pod install
When your installation is complete, reopen the project using the Spot.xcworkspace file in the root of your project.
In the project, there is a Main.storyboard file that defines the scenes of the application, here is what it looks like:
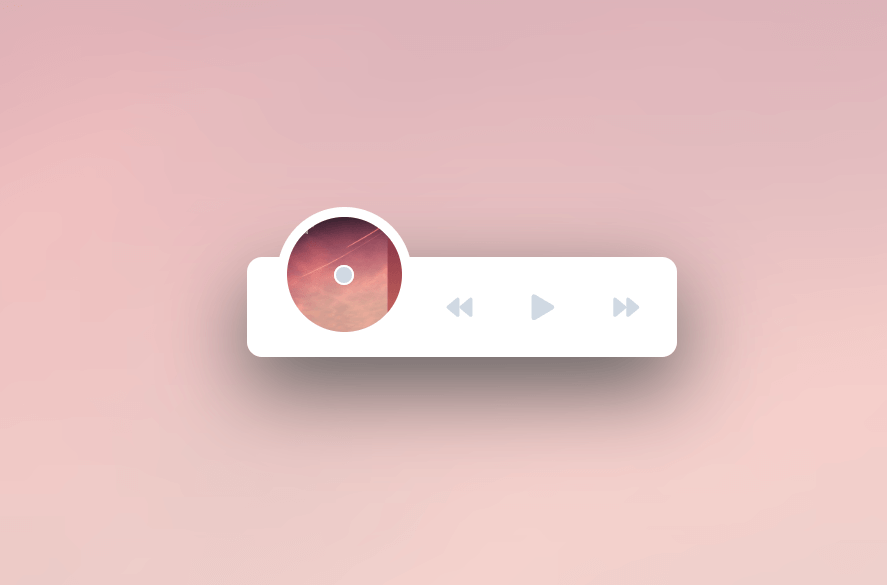
The first is the home screen with a button to enter the application. The second scene is a navigation controller that has the third scene defined as the root controller. The root controller in the third scene just displays the tracks available. The final scene displays the currently playing track.
In the project, we have a Song struct which is just a struct that we will use to store the song details when we fetch them from the API we built in the first part of the article. The struct looks like this:
1import Foundation 2 3 struct Song: Codable { 4 let id: Int 5 let title: String 6 let cover: String 7 let duration: Int 8 let artist: String 9 var isPlaying: Bool? = false 10 }
Next, we have the PlaylistTableViewController. This class is responsible for fetching the tracks list, playing the selected track, keeping a song seconds elapsed timer. In the same file, we also defined a small Duration class that we will use for the elapsed timer.
The TrackViewController is responsible for the view displaying the currently playing track. It displays the time elapsed and also has a few controls but only the Play/Pause button works to keep the tutorial focused.
In the assets, we have the stock mp3 file, which we got from bensounds.com. We also have a placeholder cover image. If you build and run the application in a simulator, you should have the music player but without any realtime features and it also plays the mp3 file.
Adding some extra features to the application
Now that we have the application running, let’s connect it to our backend API and add some extra features to the application.
To get started, make sure your Node.js application is still running in the background. To start the Node.js server, cd to the root of the Node.js application and run the following command:
$ node index.js
When the server is running, we can begin.
The first thing we want to do is load the tracks list from the server. We will just use this so we can have multiple listed on the main page instead of the one. Note though that the sound we will play will always be the same.
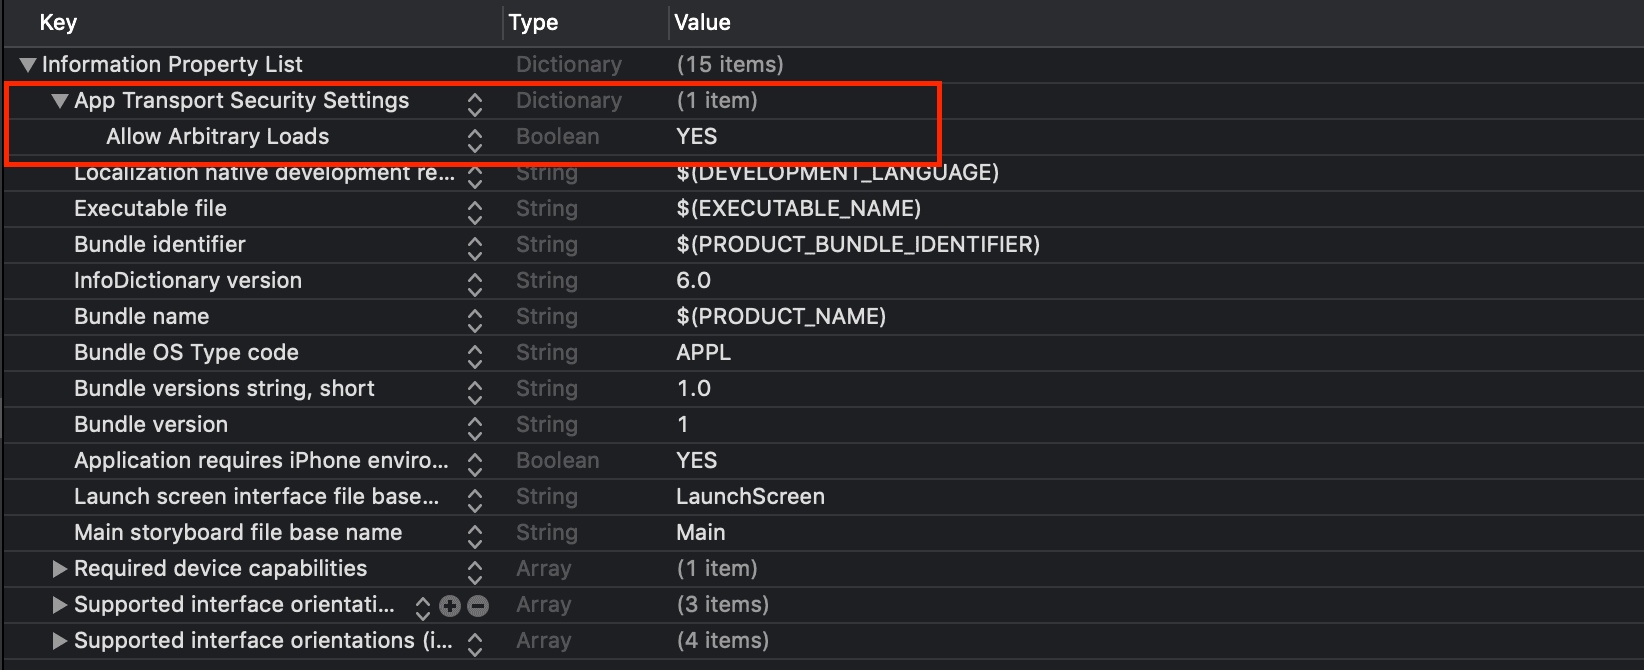
Before we do anything, open your project’s info.plist and make sure the setting to Allow Arbitrary Loads is set to YES.
Next, open the PlaylistTableViewController class and at the top, import the Alamofire library:
1// File: PlaylistTableViewController.swift 2 // [...] 3 4 import Alamofire
Then, replace the contents of the populateTracks method with the following code:
1// File: PlaylistTableViewController.swift
2 // [...]
3
4 fileprivate func populateTracks() {
5 Alamofire.request("http://localhost:3000/tracks").validate().responseData { res in
6 guard res.result.isSuccess, let responseData = res.data else {
7 return print("Failed to fetch data from the server")
8 }
9
10 let decoder = JSONDecoder()
11 self.tracks = try! decoder.decode([Song].self, from: responseData)
12 self.tableView.reloadData()
13 }
14 }
Also, go to the tickTimer method and replace the contents with the following code:
1// File: PlaylistTableViewController.swift
2 // [...]
3
4 @objc fileprivate func tickTimer() {
5 if Duration.instance.freeze {
6 return
7 }
8
9 Duration.instance.count += 1
10
11 if Duration.instance.count > 1000 {
12 killTimer()
13 }
14
15 else if (playingDevice == deviceName) {
16 let params: Parameters = [
17 "device": deviceName,
18 "id": currentlyPlaying?.id ?? 0,
19 "position": Duration.instance.count,
20 ]
21
22 Alamofire.request("http://localhost:3000/tick", method: .post, parameters: params)
23 .validate()
24 .responseData { _ in }
25 }
26 }
The code above makes sure that the tracks are loaded from the Node.js server instead of the hardcoded implementation we had previously.
Next, let’s add a simple indication to each track name to know which is currently playing from the list view. In the same PlaylistTableViewController class, find and replace the following code as seen below:
1// Replace:
2 cell.textLabel?.text = "🎶 \(track.title) - \(track.artist)"
3
4 // With:
5 let isPlaying = track.isPlaying ?? false
6 cell.textLabel?.text = "\(isPlaying ? "🎶" : "") \(track.title) - \(track.artist)"
Then in the tableView(``*_* tableView:, didSelectRowAt indexPath:) method, find and replace the method with the following:
1// File: PlaylistTableViewController.swift
2 // [...]
3
4 override func tableView(_ tableView: UITableView, didSelectRowAt indexPath: IndexPath) {
5 startTimer()
6
7 if lastPlayed == nil {
8 lastPlayed = tracks[indexPath.row]
9 }
10
11 if sound.playing == false || currentlyPlaying == nil || currentlyPlaying?.id != lastPlayed?.id {
12 if let index = tracks.firstIndex(where: { $0.id == currentlyPlaying?.id }) {
13 tracks[index].isPlaying = false
14 }
15
16 tracks[indexPath.row].isPlaying = true
17 self.tableView.reloadData()
18
19 lastPlayed = currentlyPlaying
20 currentlyPlaying = tracks[indexPath.row]
21
22 if playingDevice == nil || playingDevice == deviceName {
23 playingDevice = deviceName
24 playSound()
25 resetTimer()
26 }
27
28 if timerStarted == false {
29 timer?.fire()
30 timerStarted = true
31 }
32 }
33 }
That should do the trick. Now let’s start adding realtime features.
Adding realtime features to the application
The first thing we want to do is connect the application to Pusher Channels. To do this, open the PlaylistTableViewController file and in the viewDidLoad method, add the following code:
1// File: PlaylistTableViewController.swift 2 // [...] 3 4 func viewDidLoad() { 5 // [...] 6 7 pusherConnect() 8 }
Then add the following property and methods to the class as shown below:
1// File: PlaylistTableViewController.swift
2 // [...]
3
4 var pusher: Pusher!
5
6 fileprivate func pusherConnect() {
7 pusher = Pusher(key: "PUSHER_KEY", options: PusherClientOptions(
8 host: .cluster("PUSHER_CLUSTER")
9 ))
10 pusher.connect()
11
12 let channel = pusher.subscribe("spotmusic")
13
14 let _ = channel.bind(eventName: "tick") { [unowned self] data in
15 if let data = data as? [String: Any] {
16 self.handleTickEvent(data: data)
17 }
18 }
19 }
20
21 fileprivate func handleTickEvent(data: [String: Any]) {
22 guard let device = data["device"] as? String, device != deviceName else {
23 playingDevice = deviceName
24 return
25 }
26
27 guard let position = data["position"] as? Int else { return }
28
29 if playingDevice == deviceName {
30 killTimer()
31 }
32
33 playingDevice = device
34
35 setTimer(count: position)
36 startTimer()
37 pauseSound()
38 }
Replace the
PUSHER_*placeholders with the values in your Pusher dashboard.
We are using a device name so we can know where the event is fired from. We don’t want an event fired from the same device to be handled by the same device.
At the top of the class, import the PusherSwift library:
1// File: PlaylistTableViewController.swift 2 // [...] 3 4 import PusherSwift
One last thing we need to make sure we do is ping the main server to update the tick event. We will use this to broadcast the position of the currently playing track at all times the track is playing.
Track Controller
There is another controller called the TrackViewController, which displays the song details when a song is tapped. We do not need to make any changes to this file but it could come in handy if you need to make some improvements to the application.
Great. Now let’s test our application.
Testing your application
Make sure the Node server is running in the background. You can run the server by running the command below in the root of the API project:
$ node index.js
Now, build your music application and run it . You should notice no major difference from how it was but if you log into your Pusher dashboard and look at the Debug Console for your application, you will notice there will be an event fired for every second the song plays.
Now that we have the ticker, let’s build another application that listens for these changes and displays it in realtime.
Conclusion
In this part of the tutorial, we have learned how we can use realtime features to enhance our music player. In the next part, we will consume this information from another player.
The source code is available on GitHub.


© 2024 Pusher Ltd. All rights reserved.
Pusher Limited is a company registered in England and Wales (No. 07489873) whose registered office is at MessageBird UK Limited, 3 More London Riverside, 4th Floor, London, United Kingdom, SE1 2AQ.